cafe coffee maker manual

A cafe coffee maker manual provides essential guidance for operating‚ maintaining‚ and troubleshooting your machine. It ensures optimal performance and longevity‚ helping you brew perfect coffee every time while adhering to safety standards and customization options for enhanced user experience.

1.1 Understanding the Importance of Manuals for Cafe Coffee Makers

A cafe coffee maker manual is crucial for ensuring safe‚ efficient‚ and optimal use of your machine. It provides detailed instructions for setup‚ daily operation‚ and maintenance‚ helping users avoid common mistakes. Manuals include safety tips‚ such as avoiding abrasive cleaners and not immersing the brewer in water. They also guide users on descaling and troubleshooting‚ which are essential for maintaining performance and longevity. By following the manual‚ users can achieve better coffee quality and extend the machine’s lifespan. Referencing the manual ensures compliance with manufacturer recommendations‚ enhancing both functionality and user satisfaction.

Pre-Installation and Setup Guide

Begin by carefully unboxing and inspecting your cafe coffee maker. Place it on a flat‚ stable surface‚ ensuring proper ventilation. Plug it into a grounded outlet and follow the manual’s initial setup instructions for a seamless start.

2.1 Unboxing and Initial Setup of Your Cafe Coffee Maker

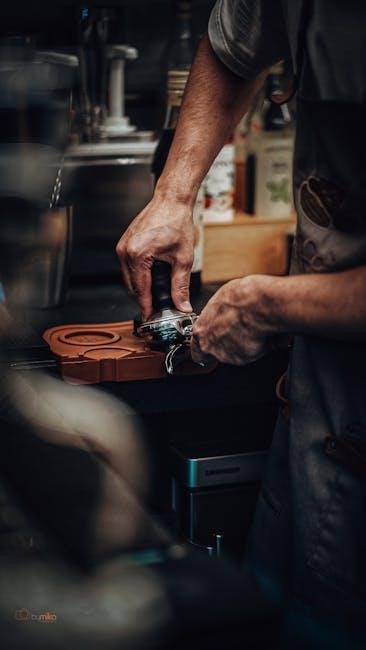
Start by carefully unboxing your cafe coffee maker and inspecting for any damage. Place it on a stable‚ heat-resistant surface‚ ensuring good ventilation. Plug the power cord into a grounded outlet and familiarize yourself with the controls. Remove all packaging materials and wash any removable parts‚ such as the water reservoir or drip tray‚ with warm soapy water. Rinse thoroughly and dry before reassembling. Refer to the manual for specific model instructions‚ such as priming the machine or setting the clock. Once everything is in place‚ your coffee maker is ready for its first use.

Daily Usage and Brewing Guide

Your cafe coffee maker manual details step-by-step brewing instructions‚ emphasizing the use of quality coffee beans and precise measurements for optimal flavor. Adjust brew settings as needed.

3.1 Step-by-Step Instructions for Brewing the Perfect Cup

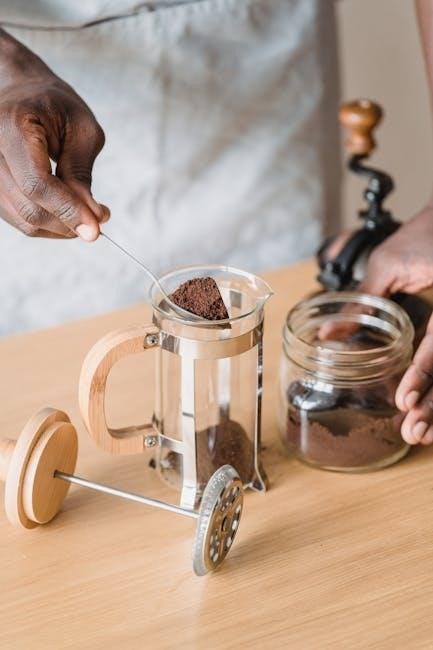
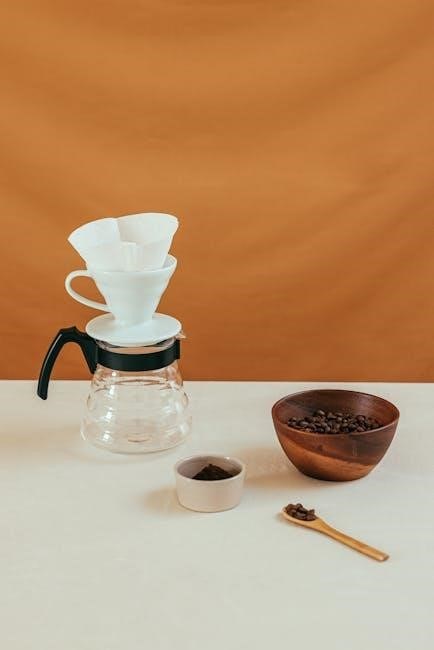
To brew the perfect cup‚ start by adding the recommended amount of medium-ground coffee beans to the filter. Ensure the water reservoir is filled to the desired level. Turn on the machine and allow it to heat up. Once ready‚ pour the water evenly over the grounds. Let the coffee drip completely‚ ensuring no residue is left. For optimal flavor‚ use good-quality beans and adjust settings as needed. Allow a pre-infusion phase if available. Monitor brewing time‚ typically 4-6 minutes‚ and serve immediately. Clean the machine regularly to prevent residue buildup and maintain flavor consistency.

Maintenance and Cleaning Instructions

Regular daily cleaning with a damp sponge and descaling maintain your cafe coffee maker’s performance. Avoid using abrasive cleaners and dishwasher for longevity.

4.1 Cleaning the Coffee Maker and Descaling Tips

Regular cleaning and descaling are crucial for maintaining your cafe coffee maker’s performance. Use a damp sponge to wipe the exterior and avoid abrasive cleaners. Descaling every 3-6 months prevents mineral buildup—use commercial descalers specifically designed for coffee machines. Never use vinegar or dishwasher detergent‚ as they may damage components. Rinse thoroughly after descaling to remove any residue. Clean the water reservoir and brew basket daily to prevent mold and bacterial growth. Refer to your manual for specific descaling instructions tailored to your model. Proper maintenance ensures fresh-tasting coffee and extends the lifespan of your machine.

Troubleshooting Common Issues

Address issues like the coffee maker not turning on or water not flowing by checking power supply‚ descaling‚ and cleaning. Consult the manual for specific solutions.

5.1 Diagnosing and Solving Common Problems

Identify issues by observing machine behavior‚ such as error lights or unusual noises. Common problems include clogged water filters‚ scaling buildup‚ or faulty heating elements. For no power‚ check the electrical connection. If water flow is slow‚ descale the machine. Clean brew heads and drip trays regularly to prevent blockages. Refer to the manual for specific troubleshooting steps‚ such as resetting settings or replacing worn parts. Always unplug the machine before attempting repairs. Regular maintenance‚ like descaling and cleaning‚ can prevent many issues and ensure optimal performance.

Safety Precautions and Best Practices

Always unplug the coffee maker before cleaning. Avoid using abrasive cleaners or immersing electrical parts in water. Keep children away and ensure the area is dry.

6.1 Essential Safety Information for Users

Always unplug the coffee maker before cleaning or maintenance to prevent electrical accidents. Never submerge electrical components in water or use abrasive cleaners‚ as this can damage the machine. Keep the appliance out of children’s reach and ensure the surrounding area is dry to avoid slipping hazards. Descale regularly to prevent mineral buildup and maintain performance. Use only commercially available decalcifiers; avoid vinegar or other unsuitable agents. Follow all instructions carefully to ensure safe and effective operation of your cafe coffee maker. This will help prolong its lifespan and ensure consistent brewing quality. Always refer to the manual for specific safety guidelines.

Advanced Features and Customization

Explore advanced features like WiFi connectivity for remote control via smartphone apps‚ customizable brew temperatures‚ and preset options for tailored coffee experiences. Use these settings to enhance your brewing process and enjoy personalized coffee every time.

7.1 Exploring Special Settings and Customization Options

Discover how to tailor your coffee experience with advanced customization options. Adjust brew temperatures between 185°F and 205°F for optimal extraction. Utilize WiFi connectivity to control your coffee maker remotely via smartphone apps. Explore preset settings for different brewing strengths and schedules. Some models offer programmable options for grind size and flavor profiles. Customize the machine’s interface and lighting to match your kitchen decor. Advanced features like automatic grinders and milk frothing systems enhance versatility. Regularly update your machine’s software for new features and improvements. Experiment with these settings to create a brewing experience that suits your preferences perfectly. Refer to your manual for detailed guidance on unlocking these features.

8.1 Maximizing Your Cafe Coffee Maker Experience

To maximize your cafe coffee maker experience‚ regular maintenance and experimentation are key. Descale regularly to prevent mineral buildup and ensure optimal flavor. Use high-quality coffee beans for the best taste. Explore customization options‚ such as adjustable brew strength and temperature control‚ to tailor your coffee to your preferences. Clean the machine frequently to prevent old coffee oils from affecting the taste. Experiment with different roast levels and grinding techniques to enhance your brewing results. Refer to your manual for specific tips and settings. Consistency and care will help you perfect your brewing process over time.

Additional Resources and Support

Downloadable manuals‚ troubleshooting guides‚ and FAQs are available online. Visit the manufacturer’s website for detailed support‚ or contact customer service for personalized assistance and repair options.

9.1 Where to Find More Information and Assistance

For additional support‚ visit the manufacturer’s official website to download PDF manuals‚ troubleshooting guides‚ and FAQs. Contact customer service for personalized assistance or repair inquiries. Online forums and community discussions also offer valuable insights and tips from experienced users. Many models‚ like the Café Specialty Drip Coffee Maker‚ have dedicated support pages with detailed instructions and videos. Ensure to refer to authorized sources for accurate and reliable information to maintain your coffee maker’s performance and address any operational queries effectively.

the sword coast adventurer’s guide pdf

The Sword Coast Adventurer’s Guide PDF offers a comprehensive setting, story, and character options for D&D 5e, set in Faerûn’s iconic Sword Coast region, published in 2020.

1.1 Overview of the Guide

The Sword Coast Adventurer’s Guide is a comprehensive resource for D&D 5e, detailing the Sword Coast region of Faerûn. It provides rich lore, character options, and adventures, making it a versatile tool for both players and Dungeon Masters. The guide includes new races, classes, backgrounds, and mechanics tailored to the Sword Coast setting. Designed to complement core rulebooks, it offers a deep dive into one of D&D’s most iconic regions, perfect for creating immersive campaigns or expanding existing ones with unique content.

1.2 Importance of the Sword Coast in Dungeons & Dragons Lore

The Sword Coast holds a pivotal role in D&D lore as a vibrant and historically rich region within Faerûn. It is the setting for numerous iconic campaigns and adventures, including the legendary cities of Waterdeep and Baldur’s Gate. The area is renowned for its diverse cultures, political intrigue, and epic quests, making it a cornerstone of Forgotten Realms lore. The Sword Coast Adventurer’s Guide enhances this legacy by providing detailed setting information, ensuring the region remains central to D&D storytelling and world-building for both new and veteran players.

Setting and Lore

The Sword Coast Adventurer’s Guide PDF details the vibrant region of Faerûn, focusing on the Sword Coast, including key cities like Waterdeep and Baldur’s Gate, and its rich lore.

2.1 The Sword Coast Region in Faerûn

The Sword Coast region in Faerûn is a land of diverse geography, from the bustling cities of Waterdeep and Baldur’s Gate to the dense forests and snow-capped mountains. This area serves as a hub for trade, adventure, and political intrigue, making it a cornerstone of the Forgotten Realms. The guide provides detailed descriptions of key locations, cultural influences, and historical events that shape the Sword Coast, offering players and DMs a rich tapestry to explore. Its dynamic environment and vibrant lore make it a compelling setting for any D&D campaign.

2.2 Key Locations and Cities

The Sword Coast is home to iconic cities like Waterdeep, Baldur’s Gate, and Luskan, each offering unique cultures and opportunities for adventure. Waterdeep, the City of Splendors, is a bustling metropolis and hub of trade and intrigue. Baldur’s Gate, with its rich history and troubled past, serves as a gateway to the region’s wilder areas. Smaller towns like Daggerford and Neverwinter provide quieter settings, while locations like the Cloakwood and the Sword Coast’s numerous ports add depth to the region’s diverse landscape and storytelling potential.

2.3 The History and Timeline of the Sword Coast

The Sword Coast Adventurer’s Guide PDF delves into the rich history of Faerûn’s Sword Coast, detailing pivotal events that shaped the region. From the rise of ancient kingdoms to modern conflicts, the timeline highlights key moments that influenced the area’s cultural and political landscape. The guide explores the founding of cities like Waterdeep and Baldur’s Gate, their growth, and the challenges they faced. This historical context enriches the setting, providing depth for players and DMs to craft compelling stories and adventures within this iconic D&D realm.

Character Creation and Options

The Sword Coast Adventurer’s Guide PDF introduces new races, classes, and backgrounds, enriching character customization and offering fresh options for players to explore unique identities and abilities.

3.1 New Races and Subraces Introduced

The Sword Coast Adventurer’s Guide PDF introduces new racial options, including the Aasimar, Firbolg, Goliath, and Tiefling, each with unique traits and subraces. These additions expand character diversity, allowing players to explore distinct cultural and magical backgrounds. The Guide also details how these races integrate into the Sword Coast’s lore, offering rich storytelling opportunities. Players can customize their characters further with subracial bonuses and abilities, enhancing customization and immersion in the Forgotten Realms setting. These options provide fresh choices for creating memorable and unique characters in D&D 5e campaigns.

3.2 New Classes and Subclasses

The Sword Coast Adventurer’s Guide PDF introduces exciting new subclasses, such as the College of Glamour for Bards and the Oath of the Crown for Paladins, each with unique abilities. These options enrich character creation by offering distinct playstyles and lore integration. Players can explore fresh archetypes while maintaining game balance, enhancing both storytelling and mechanical depth in their D&D 5e campaigns. This adds variety and creativity for adventurers in the Forgotten Realms.

3.3 Backgrounds and Subclasses Specific to the Sword Coast

The Sword Coast Adventurer’s Guide PDF provides unique backgrounds tailored to the region, such as Entertainer, Folk Hero, and Noble, each with distinct traits and starting equipment. These backgrounds immerse players in the lore of Faerûn, offering roleplaying opportunities tied to the Sword Coast’s vibrant culture and history. Additionally, subclasses like the College of Glamour for Bards or the Oath of the Crown for Paladins add regional flavor, enabling characters to embody the ideals and identities of the Forgotten Realms, enhancing both gameplay and storytelling.

Mechanics and Rules

The Sword Coast Adventurer’s Guide PDF introduces new magic items, unique spells, and revised combat rules, enhancing gameplay and storytelling within the Forgotten Realms setting.

4.1 Magic Items and Equipment

The Sword Coast Adventurer’s Guide PDF introduces a variety of unique magic items and equipment tailored to the Forgotten Realms setting. These include enchanted weapons, potions, and artifacts that reflect the region’s rich history and lore. Players can discover items like wands imbued with elemental forces or armor forged in ancient dwarven clans. The guide also provides balanced rules for crafting and attuning these items, ensuring they integrate seamlessly into existing D&D 5e campaigns. These magical additions enhance both gameplay and storytelling, offering new ways for characters to shine in Faerûn.

4.2 Spells and Abilities Unique to the Guide

The Sword Coast Adventurer’s Guide PDF introduces a range of unique spells and abilities that enrich the Forgotten Realms experience. These include region-specific incantations tied to Faerûn’s history, such as magic influenced by the ancient elven and dwarven cultures. Players can access spells that interact with the Sword Coast’s distinct environments, like those related to the sea or forests. Additionally, the guide offers abilities that enhance character customization, ensuring a deeper connection to the setting. These unique options provide fresh gameplay opportunities while staying true to D&D 5e’s balanced mechanics.

4.3 Combat and Exploration Rules

The Sword Coast Adventurer’s Guide PDF enhances gameplay with tailored combat and exploration rules, perfect for the Sword Coast setting. It introduces mechanics for navigating Faerûn’s diverse environments, such as coastal voyages and forest treks. Combat encounters are enriched with region-specific tactics and challenges, blending seamlessly with the lore. These rules expand the 5e system while maintaining balance, offering players and DMs new ways to engage with the world. The guide ensures immersive adventures, making the Sword Coast a vibrant playground for exploration and battle.

Adventures and Quests

The Sword Coast Adventurer’s Guide PDF offers a variety of integrated adventures and questlines, each deeply tied to the Sword Coast’s rich lore, with notable NPCs and factions enhancing the storytelling experience.

5.1 Integrated Adventures and Questlines

The Sword Coast Adventurer’s Guide PDF seamlessly integrates adventures and questlines, offering players a rich narrative experience. The guide features quests tied to iconic locations like Luskan and Neverwinter, with encounters designed to immerse players in Faerûn’s history. These adventures are complemented by interactions with key NPCs and factions, such as the Harpers and Zhentarim, providing depth and replayability. The PDF format ensures easy access to these questlines, with digital bookmarks and hyperlinked references for seamless navigation. This makes it a valuable resource for both players and DMs seeking to explore the Sword Coast’s vibrant world.

5.2 NPCs and Factions in the Sword Coast

The Sword Coast Adventurer’s Guide PDF provides detailed profiles of key NPCs and factions, enriching the region’s lore. Factions like the Harpers, Zhentarim, and Lords of Waterdeep are explored, offering players opportunities to interact with influential groups. NPCs are fleshed out with motivations and backstories, adding depth to the setting. These elements enhance storytelling and character development, allowing DMs to craft immersive campaigns. The guide’s focus on these aspects ensures a vibrant and dynamic Sword Coast experience for both players and Dungeon Masters alike, with ample hooks for adventure and intrigue.

Digital and PDF Versions

The Sword Coast Adventurer’s Guide is available as a PDF, offering convenience and accessibility. It can be purchased on platforms like D&D Beyond and DriveThruRPG.

6.1 Availability and Platforms

The Sword Coast Adventurer’s Guide PDF is widely available on platforms like D&D Beyond and DriveThruRPG. It can be purchased directly from these official sources, ensuring authenticity. The PDF is optimized for digital devices, making it easy to access and navigate. Players and Dungeon Masters can download it for use in virtual campaigns or as a handy reference. Availability on these platforms ensures that fans can easily integrate the guide into their D&D 5e games, whether they prefer digital or physical copies.

6.2 Features of the PDF Edition

The PDF edition of the Sword Coast Adventurer’s Guide is fully optimized for digital use, featuring bookmarks and cross-references for easy navigation. It includes all content from the physical book, such as character options, lore, and adventures, in a portable format. The PDF is compatible with popular platforms like D&D Beyond and DriveThruRPRG, allowing seamless integration into virtual campaigns. Enhanced search functionality and zoom capabilities make it ideal for both players and DMs seeking quick access to specific rules or lore.

Community and Reception

The Sword Coast Adventurer’s Guide has been well-received by the D&D community, praised for its rich lore and character options, though some find it lacking in depth compared to larger campaign books.

7.1 Player and DM Feedback

Players and DMs praise the Sword Coast Adventurer’s Guide for its rich lore and character options, enhancing campaigns with unique races and subclasses. Many appreciate the detailed setting, which immerses players in Faerûn’s iconic region. DMs find the NPCs and factions particularly useful for crafting engaging stories. However, some users feel the guide could offer more depth and variety in its content. Overall, the community sees it as a valuable resource for expanding D&D 5e experiences, especially for those focused on the Sword Coast’s vibrant world.

7.2 Impact on the D&D Community

The Sword Coast Adventurer’s Guide has significantly enriched the D&D community by expanding Faerûn’s lore and offering new character options. It inspired fan-made content and fostered creativity among players and DMs. The guide’s detailed setting and unique mechanics have become integral to many homebrew campaigns, particularly those set in the Sword Coast region. Its influence is evident in community discussions, custom adventures, and character builds, solidifying its role as a valuable resource for enhancing D&D 5e experiences and deepening players’ connection to the Forgotten Realms.

Resources and Supplements

The Sword Coast Adventurer’s Guide PDF is supported by official supplements and fan-made content, offering expanded lore, adventures, and character options for enhanced gameplay experiences.

8.1 Official Supplements and Expansions

The Sword Coast Adventurer’s Guide PDF is complemented by official D&D supplements, expanding its lore and gameplay. It integrates seamlessly with core books like the Player’s Handbook and Monster Manual, while adventures such as Curse of Strahd and Princes of the Apocalypse enhance its setting. The PDF edition includes bookmarks and cross-references, making it easy to navigate. Official expansions ensure the guide remains a vital resource for players and DMs, offering fresh content to enrich Sword Coast campaigns.

8.2 Fan-Made Content and Resources

The Sword Coast Adventurer’s Guide has inspired a vibrant community of creators, producing fan-made content like custom setting guides, character builds, and adventures. Platforms such as Reddit and D&D Beyond host forums where fans share homebrew races, subclasses, and quests tailored to the Sword Coast. These resources often expand on the official material, offering unique twists and deepening the lore. Fan-created maps, NPCs, and story hooks further enrich the setting, providing DMs and players with endless possibilities to enhance their campaigns.

rapid set concrete leveler instructions

Rapid Set Concrete Leveler is a quick-setting‚ self-leveling underlayment designed for indoor and outdoor use‚ offering a durable‚ flat surface ready for foot traffic in 2-4 hours.

Overview of Rapid Set Concrete Leveler

Rapid Set Concrete Leveler is an advanced‚ hydraulic cement-based‚ polymer-modified self-leveling underlayment designed for both indoor and outdoor applications. It creates a smooth‚ flat surface with high bond strength‚ making it ideal for various flooring projects. The product is quick-setting‚ ready for foot traffic in 2 to 4 hours‚ and can be covered with finish flooring in 4 to 16 hours. With a flow life of 15 minutes and workability for 20 minutes‚ it ensures efficient application. Suitable for new or existing concrete‚ wood‚ and other surfaces‚ it can be applied from 1/8 inch to 2 inches thick‚ and up to 5 inches when extended with aggregate‚ offering versatility for different projects.

Benefits and Applications

Rapid Set Concrete Leveler offers numerous benefits‚ including quick-setting properties‚ high durability‚ and versatility across various environments. It is ideal for commercial applications such as offices‚ schools‚ and hospitals‚ as well as residential projects. The self-leveling feature eliminates the need for manual leveling‚ saving time and effort. The product is suitable for both wet and dry environments‚ making it a reliable choice for bathrooms‚ kitchens‚ and outdoor areas. Its high early-strength development ensures quick installation‚ reducing downtime. Additionally‚ it can be used to replace cement backerboard under tile installations or to provide adequate rigidity for floor coverings. With its ability to be applied over new or existing concrete‚ wood‚ and other surfaces‚ Rapid Set Concrete Leveler is a flexible solution for achieving a smooth‚ stable substrate for various flooring needs.

Preparation for Applying Rapid Set Concrete Leveler

Ensure the substrate is clean‚ free of old adhesives‚ and loose material. Address cracks and uneven areas to create a stable surface for the leveler to adhere properly.

Substrate Cleaning and Readiness

Proper substrate preparation is critical for the success of Rapid Set Concrete Leveler. The surface must be clean‚ dry‚ and free of old adhesives‚ oils‚ or contaminants. Use mechanical methods like grinding or shot blasting to remove any existing coatings or debris. A clean surface ensures proper adhesion and prevents bonding issues. Vacuum thoroughly to remove dust and particles. If the substrate is damp or has high moisture content‚ allow it to dry completely before proceeding. Any cracks or uneven areas should be addressed beforehand to ensure a stable base. The substrate must also be structurally sound and level within acceptable tolerances. Proper preparation prevents uneven curing and ensures the leveler adheres correctly‚ leading to a smooth‚ durable finish. Always follow manufacturer guidelines for specific substrate requirements.

Priming the Surface

Priming is essential for optimal adhesion and performance of Rapid Set Concrete Leveler. Apply a Rapid Set Concrete Leveler Primer to all substrate surfaces before applying the leveler. This primer is a ready-to-use‚ solvent-free acrylic solution designed to enhance bonding and reduce pinholes. Follow the instructions on the primer label for application methods and drying times. Ensure the primer is evenly spread and fully dry before proceeding. This step is crucial for ensuring a strong bond between the substrate and the leveler‚ particularly on porous or uneven surfaces. Proper priming also helps prevent delamination and ensures a uniform finish. Always use the recommended primer to maintain warranty and performance standards. The primer should be applied in accordance with the manufacturer’s specifications to achieve the best results.

Addressing Substrate Imperfections

Before applying Rapid Set Concrete Leveler‚ all substrate imperfections must be addressed to ensure proper adhesion and a smooth finish. Cracks‚ uneven areas‚ and low spots should be filled with a suitable patching compound. Any loose or defective material must be removed and replaced. For plywood substrates‚ ensure all loose panels are securely fastened to prevent deflection. Clean the surface thoroughly to remove dirt‚ oils‚ or other contaminants that could interfere with adhesion. If necessary‚ apply a primer to enhance bonding‚ as recommended by the manufacturer. Properly addressing substrate imperfections ensures a stable and even base for the leveler‚ preventing future issues such as cracks or delamination. Always follow the manufacturer’s guidelines for substrate preparation to achieve optimal results. A well-prepared surface is critical for the success of the leveling process.

Mixing Rapid Set Concrete Leveler

Mix one bag of Rapid Set Concrete Leveler with 4.0 to 4.5 quarts of clean water for 3-5 minutes until smooth and lump-free‚ avoiding excessive air entrapment.

Materials and Equipment Needed

To mix Rapid Set Concrete Leveler‚ you’ll need a bag of the product‚ 4.0 to 4.5 quarts of clean‚ potable water‚ a mixing bucket‚ and a drill with a paddle mixer. A trowel or squeegee is essential for spreading‚ while a level ensures even application. Safety gear like gloves and goggles is recommended. For larger applications‚ a notched trowel or specialized spreading tools may be necessary. Optional materials include aggregate for thicker applications and a primer to enhance adhesion. Ensure all tools are clean and free of contaminants to achieve optimal results. Proper ventilation and a stable workspace are also crucial for efficient mixing and application. Always follow the manufacturer’s guidelines for equipment and material ratios to ensure the best outcome.

Step-by-Step Mixing Instructions

Begin by adding 4.0 to 4.5 quarts of clean‚ potable water to a mixing bucket. Gradually pour in one bag of Rapid Set Concrete Leveler while mixing with a drill equipped with a mixing paddle. Continue mixing for 3 to 5 minutes until the mixture is smooth and free of lumps. Avoid over-mixing to prevent air entrapment. Pour the mixed material immediately onto the prepared surface and spread evenly using a trowel or squeegee. Work quickly‚ as the flow life is 15 minutes; Ensure the substrate is clean‚ dry‚ and primed with a recommended primer like Rapid Set TXP epoxy primer for optimal adhesion. Follow all safety precautions and manufacturer guidelines for best results.

Application of Rapid Set Concrete Leveler

Rapid Set Concrete Leveler is applied from 1/8″ to 2″ thick‚ ideal for indoor and outdoor surfaces‚ creating a smooth‚ durable base ready for foot traffic in 2-4 hours.

Pouring and Spreading Techniques

Rapid Set Concrete Leveler should be poured and spread immediately after mixing. Use a notched trowel or specialized squeegee to evenly distribute the material across the surface.

Work in small sections‚ ensuring full coverage and avoiding air entrapment. Use a leveling tool to achieve the desired finish; For larger areas‚ a self-leveling blade or laser-guided screed can enhance efficiency and accuracy.

Always pour in a consistent flow‚ maintaining a steady pace to prevent unevenness. Avoid over-working the material‚ as this can introduce air bubbles and disrupt the surface.

Ensure the surface is clean and primed before applying‚ and follow the manufacturer’s instructions for optimal results. Proper technique ensures a smooth‚ professional finish.

Application Thickness Guidelines

Rapid Set Concrete Leveler is typically applied between 1/8 inch and 2 inches thick‚ depending on the substrate’s condition and the desired finish; For thicker applications‚ up to 5 inches‚ aggregate can be added to extend the material while maintaining its self-leveling properties.

The minimum recommended thickness is 1/8 inch to ensure proper flow and leveling. Exceeding the maximum thickness without proper extension may lead to cracking or uneven drying. Always follow the manufacturer’s guidelines to achieve optimal results and avoid potential issues.

Ensure the surface is properly prepared and primed before applying the leveler‚ as this affects the material’s performance and bond strength. Adhering to the specified thickness range ensures a durable‚ even surface for flooring installations.

Curing and Drying

Rapid Set Concrete Leveler requires no curing under normal conditions (70°F). For exterior use‚ apply a fine water mist after setting. Ready for foot traffic in 2-4 hours and flooring in 4-16 hours.

Curing Process and Requirements

Rapid Set Concrete Leveler typically requires minimal curing under moderate conditions. At 70°F (21°C)‚ no additional curing measures are necessary. However‚ for exterior applications‚ a fine water mist should be applied to the newly hardened surface as soon as possible without marring it. This step ensures proper hydration and prevents premature drying‚ which could weaken the surface. The curing process is quick‚ with the underlayment developing high early-strength to support rapid installation timelines. It is crucial to follow these guidelines to achieve optimal performance and durability‚ especially in environments exposed to varying temperatures or humidity levels. Proper curing practices ensure the underlayment adheres well and maintains its structural integrity over time.

Drying Time Before Foot Traffic and Flooring

Rapid Set Concrete Leveler is designed for fast-track projects‚ with minimal downtime. It is ready for foot traffic within 2 to 4 hours after application‚ depending on ambient conditions. For flooring installation‚ the surface can typically be covered within 4 to 16 hours‚ allowing for quick turnaround times. The drying time may vary based on temperature‚ humidity‚ and thickness of the application. Cooler temperatures or higher humidity can extend the drying period‚ while warmer conditions may accelerate it. Proper ventilation and environmental control are essential to ensure optimal drying performance. Once cured‚ the surface is strong and durable‚ ready to support various flooring systems without compromising integrity. This rapid drying capability makes Rapid Set Concrete Leveler ideal for both residential and commercial applications where time efficiency is critical.

flag football drills pdf

Flag football drills are essential for improving skill development, strategy, and teamwork. They cover passing, flag pulling, and offensive/defensive techniques, enhancing overall performance on the field.

1.1 Importance of Drills in Flag Football

Drills are crucial for skill mastery, strategy development, and teamwork in flag football. They enhance passing accuracy, catching consistency, and flag-pulling efficiency. Additionally, drills improve speed, agility, and decision-making under pressure. By focusing on specific techniques, players build confidence and adaptability, which are vital for competitive play. Regular practice ensures a well-rounded team capable of executing complex strategies effectively during games. Drills are the foundation of success.

1.2 Overview of Key Skill Areas

Flag football drills focus on essential skills like passing, catching, and flag pulling. Players also develop footwork, agility, and strategic awareness. Offensive skills include ball carrying and route running, while defensive skills emphasize reaction time and positioning. These drills ensure a balanced approach to improving both individual and team performance, preparing players for competitive play. Each skill area is tailored to enhance overall game effectiveness.

Warm-Up and Fundamental Drills

Warm-up drills include dynamic stretching and mobility exercises to prepare players physically and mentally. Fundamental drills focus on essential techniques like form running, footwork, and basic ball handling, ensuring a solid foundation for advanced skills and strategies. These exercises are crucial for improving coordination, agility, and teamwork, setting the stage for effective practice sessions.

2.1 Dynamic Stretching and Mobility Exercises

Dynamic stretching and mobility exercises are crucial for flag football warm-ups. They involve active movements like leg swings, arm circles, and high knees to prepare muscles for activity. These exercises improve flexibility, range of motion, and blood flow, reducing injury risk and enhancing performance. Incorporating dynamic stretches ensures players are physically and mentally ready for drills and gameplay.

2.2 Form Running and Footwork Drills

Form running and footwork drills focus on improving agility, acceleration, and proper running techniques. Exercises like ladder drills, cone weaves, and shuttle runs enhance quick changes of direction and speed. These drills also emphasize staying low, cutting sharply, and maintaining balance, which are critical for evading opponents and executing plays effectively in flag football.

Passing and Receiving Drills

Passing and receiving drills focus on developing fundamental skills like throwing accuracy, catching techniques, and route execution. These exercises improve quarterback-receiver chemistry and overall offensive efficiency.

3.1 Basic Passing Techniques for Quarterbacks

Quarterbacks must master grip, stance, and footwork. A proper grip involves placing the laces with the index finger. A balanced stance allows for quick movements. Step into the throw, transfer weight, and release the ball with a strong arm. Practice short and long passes to build accuracy and consistency, ensuring optimal delivery to receivers. This foundational skill is crucial for effective offense.

3.2 Route Running and Catching Drills

Route running involves precise footwork, cuts, and timing. Drills like slant and fade routes help receivers master separation. Catching drills focus on hand positioning, body control, and securing the ball. Pairing quarterbacks and receivers for timing exercises enhances chemistry. Incorporate game-like scenarios to simulate pressure, ensuring players can perform under competition conditions effectively. These drills refine offensive execution and reliability.

Flag Pulling and Defensive Drills

Flag pulling and defensive drills focus on proper techniques, avoiding common mistakes like grabbing the wrong spot or overrunning. Defensive agility and reaction drills enhance quick decision-making and effective flag removal.

4.1 Proper Flag Pulling Techniques

Proper flag pulling techniques are vital for success in flag football. Players must align their body correctly, approach at an angle, and grip the flag firmly without overreaching. Avoid grabbing the wrong spot or overrunning the ball-carrier. Drills like “The Gauntlet” simulate real-game scenarios, teaching defenders to make split-second decisions and instinctively pull flags. These techniques ensure effective flag removal and minimize mistakes during gameplay.

4.2 Defensive Agility and Reaction Drills

Defensive agility and reaction drills are crucial for developing quick reflexes and sharp instincts; Drills like “The Gauntlet” involve defenders lining up in a 10-yard alley, challenging them to pull flags while reacting to ball-carriers. These exercises improve reaction time, agility, and decision-making under pressure. Cone drills and rapid-change-of-direction exercises further enhance defensive players’ ability to stay alert and responsive during gameplay.

Offensive Play and Strategy Drills

Offensive play and strategy drills focus on ball control, effective play execution, and teamwork development. Drills like “Run & Shoot” enhance passing accuracy, route running, and evasive maneuvers, improving overall offensive performance in competitive flag football games.

5.1 Ball Carrying and Evasion Drills

Ball carrying and evasion drills focus on developing agility and elusiveness. Drills like “The Gauntlet” and “Circle of Love” teach players to navigate through defenders while maintaining ball control. These exercises improve reaction time, balance, and the ability to quickly change direction, essential for outsmarting opponents on the field. Proper footwork and flag management are emphasized to maximize evasive maneuvers.

5.2 Play Execution and Timing Exercises

Play execution and timing exercises refine teamwork and strategy. Drills like “Run & Shoot” emphasize synchronization between quarterbacks and receivers, ensuring precise route execution. These exercises focus on understanding play designs, improving reaction time, and enhancing decision-making under pressure. Players learn to anticipate defensive moves and adapt their strategies, fostering a cohesive offensive unit capable of executing plays effectively during games.

Defensive Play and Strategy Drills

Defensive drills focus on improving reaction time, flag-pulling techniques, and strategic positioning. Players learn to anticipate plays, cover receivers, and execute effective defensive formations.

6.1 Positional Assignments and Responsibilities

Understanding positional roles is crucial in flag football. Each player has specific duties, such as defensive backs covering receivers, linebackers supporting the rush, and linemen pressuring the quarterback. Drills focus on teaching players their assignments, ensuring cohesive teamwork, and improving overall defensive strategy. Proper alignment and communication are emphasized to maximize effectiveness during games. Coaches often use drills to reinforce these responsibilities.

6.2 Defensive Formation and Coverage Drills

Defensive formations and coverages are vital for disrupting opponents’ plays. Drills focus on teaching players how to align properly, read offenses, and react quickly. Zones and man-to-man coverages are practiced to ensure versatility. These drills enhance communication, anticipation, and reaction skills, helping defenders make effective flag pulls and secure stops. Coaches use these exercises to build a strong, coordinated defensive unit.

Speed and Agility Drills

Speed and agility drills, such as high-intensity sprints and cone exercises, enhance quick changes of direction and overall athleticism in flag football players effectively.

7.1 Sprints and High Knees for Speed

Sprints and high knees are fundamental drills to boost speed and explosiveness. Players sprint short distances, focusing on acceleration and proper form. High knees exercises improve agility and quick turnover, essential for flag football. These drills enhance cardiovascular fitness and muscular endurance, preparing athletes for the demands of fast-paced games. Regular practice ensures improved performance on the field.

7.2 Cone Drills for Agility and Quick Changes of Direction

Cone drills are versatile exercises designed to enhance agility and sharp directional changes. Players weave through cones in various patterns, focusing on quick footwork and balance. These drills mimic game scenarios, improving reaction time and coordination. Incorporating cones into practice helps flag football athletes develop the nimbleness needed to outmaneuver opponents effectively during plays. Regular repetition sharpens their ability to change direction swiftly and maintain control.

Youth-Specific Flag Football Drills

Youth-specific drills focus on age-appropriate skill development through engaging, fun activities. These exercises build foundational football skills while fostering teamwork and a love for the game.

8.1 Age-Appropriate Drills for Skill Development

Drills for youth flag football focus on developing foundational skills like throwing, catching, and flag pulling. Activities are designed to be engaging and challenging, ensuring players build confidence and teamwork. Age-specific exercises include simple passing routes, fun obstacle courses, and controlled scrimmages. These drills promote physical fitness, coordination, and sportsmanship, making the game enjoyable for young athletes of all skill levels.

8;2 Fun and Engaging Games for Young Players

Engaging games like “Jingle Jangle” and “The Gauntlet” make flag football practice exciting for youth. These activities focus on teamwork, agility, and strategy while keeping players entertained. Games incorporate skill-building exercises, such as flag pulling and route running, in a competitive yet fun environment. They foster camaraderie and ensure young athletes stay motivated and eager to improve their abilities on the field.

Practice Planning and Organization

Effective practice planning involves structuring sessions to maximize skill development and engagement. A 50-minute schedule can include warm-ups, drills, and strategy discussions, ensuring a balanced approach to improvement and fun.

9.1 Structuring a 50-Minute Practice Session

A well-organized 50-minute practice session begins with a 10-minute warm-up, followed by 20 minutes of fundamental drills. Allocate 15 minutes to strategy and play execution, and conclude with a 5-minute cool-down. This structure ensures balanced skill development and keeps players engaged throughout the session.

9.2 Incorporating Drills into a Coherent Practice Schedule

A well-planned practice schedule integrates drills seamlessly, starting with warm-ups and fundamental exercises. Offensive and defensive drills follow, focusing on specific skills like flag pulling and route running. Team strategy sessions and cool-downs conclude the practice, ensuring a balanced and productive session that aligns with player development goals.

Conditioning and Cool-Down Drills

Conditioning and cool-down drills are vital for improving endurance and flexibility. They include static stretching and low-intensity exercises to reduce muscle soreness and enhance recovery after practice.

10.1 Endurance and Stamina Building Exercises

These exercises focus on enhancing cardiovascular fitness through activities like sprints, high knees, and shuttle runs. They improve players’ ability to sustain energy levels during games, ensuring optimal performance. Dynamic drills, such as cone weaves and agility ladder exercises, also boost speed and coordination, making them essential for flag football training programs and practice sessions.

10.2 Static Stretching and Cool-Down Routines

Static stretches target major muscle groups like hamstrings, quadriceps, and hip flexors, promoting flexibility and relaxation. Cool-down routines include deep breathing exercises to lower heart rates and prevent muscle soreness. These practices ensure players recover effectively, preparing their bodies for the next session while maintaining overall physical well-being and readiness for future drills and games.

cadence ic design tools tutorial

Cadence Design Systems provides a comprehensive suite of tools for integrated circuit (IC) design, enabling the creation of analog, digital, and mixed-signal circuits. These tools streamline the entire design flow, from schematic capture and simulation to layout and verification, making it essential for modern semiconductor development.

1.1 Overview of Cadence and Its Importance in IC Design

Cadence Design Systems is a leading provider of integrated circuit (IC) design tools, offering a comprehensive suite for analog, digital, and mixed-signal designs. Its tools enable efficient schematic capture, simulation, layout, and verification, streamlining the entire design flow. Cadence is widely adopted in the semiconductor industry due to its robust capabilities, scalability, and support for complex IC designs, making it a cornerstone for modern chip development.

1.2 Key Tools in the Cadence Suite

The Cadence Suite includes Virtuoso for schematic capture and circuit simulation, Spectre for advanced circuit analysis, and Encounter for digital place and route. Additionally, Innovus handles sign-off and physical design, while Allegro supports PCB and package design. These tools collectively ensure a seamless design flow, from concept to fabrication, catering to both analog and digital IC development needs.

Installation and Setup of Cadence Tools

Installing Cadence tools requires meeting specific system requirements and following step-by-step guides for Windows or Linux. Setup involves configuring environment variables and licensing for optimal functionality.

2.1 System Requirements for Cadence Installation

Ensuring your system meets Cadence installation requirements is crucial. This includes a multi-core processor, ample RAM (typically 16GB or more), and sufficient disk space. Operating systems must be Windows or Linux, with specific versions supported. Graphics capabilities and compatible software libraries are also necessary for optimal tool performance and functionality. Meeting these specifications ensures smooth installation and operation of Cadence tools.

2.2 Step-by-Step Installation Guide for Windows and Linux

Install Cadence tools by downloading the software from the official repository. Run the installer, selecting the desired tools and destination folder. Follow on-screen instructions for both Windows and Linux. Post-installation, configure environment variables and obtain a license file for activation. Ensure system requirements are met for smooth operation. This guide ensures a seamless setup process for both operating systems.

IC Design Flow Overview

The IC design flow outlines the structured process from concept to fabrication, ensuring a systematic approach to creating integrated circuits through schematic capture, simulation, layout, and verification.

3.1 From Schematic Capture to Layout

The design process begins with schematic capture using Cadence Virtuoso, where circuit diagrams are created. This step transitions to layout design, where the schematic is translated into a physical representation of the IC. Tools like Virtuoso ensure accurate conversion, maintaining design integrity. The layout is then verified for design rule compliance and layout vs. schematic consistency, ensuring fabrication readiness.

3.2 Verification and Simulation in the Design Flow

Verification ensures design accuracy, while simulation validates circuit behavior; Tools like Spectre simulate circuit performance, checking timing, power, and noise. Design Rule Checks (DRC) verify layout compliance with foundry rules. Layout vs. Schematic (LVS) ensures layout accuracy matches the schematic. Electrical Rule Checks (ERC) detect electrical issues like shorts or opens. These steps ensure a manufacturable and functional design.

Schematic Capture and Circuit Simulation

Cadence tools like Virtuoso enable schematic capture for designing analog and digital circuits. Spectre simulates circuit behavior, ensuring functionality and performance meet design specifications before layout and fabrication.

4.1 Creating Schematics with Virtuoso

Virtuoso is Cadence’s tool for schematic capture, enabling designers to create detailed circuit diagrams. Users can launch Virtuoso, create a new design, and add components from libraries. Wires connect components, forming the circuit. The tool’s intuitive interface allows for precise placement and connectivity. Once complete, the schematic is saved for simulation and further analysis, ensuring accuracy in the design flow.

4.2 Running Simulations Using Spectre

Spectre is Cadence’s advanced circuit simulator for verifying analog and mixed-signal designs. After creating a schematic in Virtuoso, designers can use Spectre to run simulations, such as DC, AC, and transient analyses. The tool provides precise results, ensuring the circuit meets specifications. Simulation setups are configured within the Virtuoso environment, and results are analyzed to validate design performance and identify potential improvements.

Layout Design and Extraction

The layout design phase involves creating the physical representation of the IC using Cadence tools like Virtuoso. This step ensures accurate placement and routing of components, followed by parasitic extraction using Quantus. These processes are crucial for ensuring design integrity and preparing for verification steps.

5.1 Designing Layouts with Cadence Tools

Using Cadence tools like Virtuoso, designers create detailed layouts for analog and digital circuits. The tool supports hierarchical and full-custom designs, ensuring precise placement and routing. Virtuoso’s user-friendly interface and advanced features simplify complex layouts, while its integration with other tools ensures seamless design transitions. Tutorials often use the AMI06 process and CG45NM kit to illustrate layout design, making it easier to adapt to real-world applications.

5.2 Parasitic Extraction Techniques

Parasitic extraction identifies unwanted resistances, capacitances, and inductances in IC layouts. Cadence tools like Spectre and Virtuoso enable accurate extraction of these parasitics, crucial for post-layout simulation. Advanced algorithms ensure precise modeling of interconnects and devices, while integration with simulation tools allows designers to verify and optimize designs effectively, ensuring high performance and reliability in the final IC design.

Verification: DRC, LVS, and ERC

Cadence tools enable Design Rule Checks (DRC), Layout vs. Schematic (LVS), and Electrical Rule Checks (ERC) to ensure compliance with fabrication rules, schematic accuracy, and electrical correctness, guaranteeing design integrity and functionality.

6.1 Understanding Design Rule Checks (DRC)

Design Rule Checks (DRC) verify that a circuit layout adheres to a foundry’s fabrication rules, ensuring manufacturability and functionality. Cadence tools automate this process, checking for violations like minimum spacing, width, and overlap errors. DRC is a critical step in the IC design flow, ensuring compliance with process guidelines before tape-out. It prevents costly redesigns by identifying issues early in the development cycle.

6.2 Layout vs. Schematic (LVS) Verification

Layout vs. Schematic (LVS) verification ensures the physical layout matches the original schematic, confirming connectivity and device consistency. Cadence tools automate this process by comparing the layout-extracted netlist with the schematic netlist. This step is critical for detecting layout errors that could lead to functional failures, ensuring the design meets specifications and functions as intended after fabrication. LVS is a cornerstone of sign-off checks.

6.3 Electrical Rule Checks (ERC)

Electrical Rule Checks (ERC) verify the electrical integrity of a design by identifying issues like floating nets, short circuits, and incorrect biases. Cadence tools automate ERC, ensuring compliance with design standards and preventing functional failures. This step is crucial for validating connectivity and electrical consistency before fabrication, enhancing overall design reliability and performance. ERC complements DRC and LVS, forming a robust verification framework.

Custom and Analog Design Considerations

Cadence tools enable precise design of custom and analog circuits, ensuring optimal performance and reliability. They support detailed analog design, from schematic capture to simulation, and manage large-scale circuits effectively.

7.1 Specialized Techniques for Analog Circuits

Cadence tools offer advanced techniques for analog circuit design, including device characterization, DC operating point annotation, and AC analysis. Virtuoso and Spectre enable precise simulation of analog behavior, ensuring high accuracy. These tools support complex analog circuits, allowing designers to optimize performance, noise reduction, and reliability, while adhering to design rules and process constraints for superior IC outcomes.

7.2 Optimizing Custom Cell Designs

Cadence tools like Virtuoso enable precise optimization of custom cell designs through advanced layout and simulation techniques. Designers can perform detailed parasitic extraction and mitigate issues early in the design process. The tools also support manual adjustments for performance and reliability, ensuring compliance with design rules and process constraints for optimal IC outcomes in analog and mixed-signal applications.

Digital IC Design Flow

The digital IC design flow involves a systematic approach from front-end design to back-end implementation. Cadence tools facilitate synthesis, place-and-route, and sign-off, ensuring efficient and accurate digital circuit creation.

8.1 Synthesis and Place and Route Tools

Cadence offers advanced tools for digital IC design, such as Genus Synthesis and Innovus Place-and-Route, which streamline the flow from RTL to GDSII. These tools optimize area, power, and performance while ensuring design constraints are met. They integrate seamlessly with other Cadence tools, enabling a comprehensive digital design flow from synthesis to sign-off, ensuring high-quality results for complex SoCs.

8.2 Integrating Digital and Analog Components

Cadence tools enable seamless integration of digital and analog components in mixed-signal designs. Virtuoso and Spectre handle analog circuits, while Genus and Innovus manage digital logic. The platform provides a unified cockpit for co-design, ensuring synchronization between domains. This integration allows for accurate timing and power analysis across both domains, ensuring design consistency and reducing errors in complex mixed-signal ICs.

Post-Layout Verification

Post-layout verification ensures the design’s final layout meets performance specs through simulation and extraction, confirming the integrity of the integrated circuit’s physical implementation.

9.1 Ensuring Design Integrity Post-Layout

Post-layout verification ensures the design’s final layout meets performance specs through simulation and extraction, confirming the integrity of the integrated circuit’s physical implementation. This step validates that the design adheres to all specified constraints, ensuring reliability and functionality in the manufactured chip.

9.2 Advanced Verification Techniques

Advanced verification techniques in Cadence tools include signal integrity analysis, power integrity checks, and advanced DRC/LVS/ERC. These tools enable precise validation of designs, ensuring compliance with foundry requirements. Automated validation accelerates large-scale design verification, enhancing accuracy and reducing errors, thus ensuring robust and reliable final designs.

3D-IC Design with Cadence

Cadence’s 3D-IC design tools, including the Integrity platform, enable advanced 3D packaging and integration, accelerating the development of high-performance, power-efficient chips with cutting-edge technology.

3D integration enables the stacking of multiple layers in an IC, enhancing performance and reducing power consumption. Cadence tools support advanced 3D packaging, facilitating the design of high-density, multi-layered chips for modern semiconductor applications.

10.2 Cadence Tools for 3D-IC Design

Cadence offers advanced tools like the Integrity 3D-IC platform, enabling efficient design of 3D-integrated circuits. These tools support waiver management, thermal analysis, and electrical modeling, facilitating the creation of high-performance, power-efficient chips. Allegro X packaging tools are integral to this suite, aiding in complex system-on-chip (SoC) integration and 3D packaging designs.

Tips and Best Practices

Start with simple designs, utilize existing libraries, and perform regular verification to ensure accuracy. Optimize simulations and leverage Cadence’s built-in automation for efficient workflow management.

11.1 Expert Tips for Efficient Design

Plan your design thoroughly before starting. Use hierarchical design to manage complexity. Leverage Cadence libraries for reusable components. Run regular DRC and LVS checks to catch errors early. Utilize automated routing and optimization tools. Collaborate with experienced designers for feedback. Refer to Cadence documentation for advanced features. Keep your design simple and well-documented for future reference.

11;2 Common Pitfalls to Avoid

Ignoring design rule checks (DRC) and layout vs. schematic (LVS) verifications can lead to fabrication failures. Overcomplicating designs increases errors and reduces performance. Failing to document designs properly hinders collaboration and future modifications. Inadequate simulation setups can result in inaccurate results. Neglecting parasitic extraction leads to unreliable post-layout analysis. Always follow design guidelines and best practices to minimize these risks and ensure successful outcomes.

Cadence IC design tools offer a comprehensive platform for creating and verifying integrated circuits. By mastering these tools, designers can efficiently navigate the entire design flow, from schematic capture to post-layout verification, ensuring high-quality outcomes.

12.1 Summary of Key Concepts

Cadence IC design tools provide a comprehensive suite for creating and verifying integrated circuits. The workflow spans schematic capture, simulation, layout, and verification, ensuring design integrity. Key concepts include Design Rule Checks (DRC), Layout vs. Schematic (LVS), and Electrical Rule Checks (ERC). Understanding these ensures compliance with fabrication standards. The tools support both analog and digital designs, enabling efficient and accurate circuit development.

12.2 Future Learning Resources

For further learning, explore Cadence’s official tutorials and online courses on their website. Additionally, resources like Virtuoso ADE and Spectre documentation provide in-depth insights. Advanced topics, such as 3D-IC design and RF design, are covered in specialized workshops. Engaging with Cadence user forums and attending webinars can also enhance your proficiency in using these tools for complex integrated circuit designs effectively.

vtm players guide v5 pdf free

The VtM V5 Player’s Guide is a comprehensive companion to the core rulebook, offering expanded character options, new mechanics, and insights into seven additional clans. Available as a free PDF, it enhances gameplay while emphasizing the importance of official copies for legal support and game integrity.

Overview of the VtM V5 Player’s Guide

The VtM V5 Player’s Guide is a dedicated resource for players and storytellers, offering a wealth of new content. It consolidates seven clans not in the core rulebook, such as Banu Haqim and Lasombra, providing fresh character-building options. The guide introduces new systems, advantages, and disciplines, enhancing gameplay depth. Designed to complement the corebook, it streamlines rules and expands storytelling possibilities. Available as a free PDF, it’s an essential tool for both newcomers and veterans, enriching the Vampire: The Masquerade experience with diverse mechanics and narrative insights.

Importance of the Guide for Players and Storytellers

The VtM V5 Player’s Guide is invaluable for both players and storytellers, offering enriched character creation and gameplay mechanics. Players gain access to new clans, disciplines, and predator types, deepening roleplay opportunities. Storytellers benefit from expanded lore and systems, enhancing narrative depth. Its availability as a free PDF ensures accessibility, while official purchases support legal compliance and game development. This guide bridges core rulebook gaps, fostering a more immersive and dynamic Vampire: The Masquerade experience for all participants.

Key Features of the VtM V5 Player’s Guide

The guide consolidates seven clans, introduces new systems, and offers character-building options. Available as a free PDF, it enhances gameplay while emphasizing the importance of official copies for legal support and game integrity.

Consolidation of 7 Clans Not Included in the Core Rulebook

The VtM V5 Player’s Guide includes seven clans not covered in the core book: Banu Haqim, Hecata, Lasombra, The Ministry, Ravnos, Salubri, and Toreador. These clans add depth to the game, offering unique traits, abilities, and playstyles. Each clan’s history, culture, and disciplines are detailed, enriching character creation and storytelling. This expansion provides players and storytellers with fresh narrative possibilities, enhancing the Vampire: The Masquerade experience.

New Systems, Advantages, and Character-Building Options

The VtM V5 Player’s Guide introduces new systems and character-building options, including predator types, disciplines, and advantages. These additions enhance gameplay by offering players more flexibility in shaping their characters. The guide also provides innovative ways to use existing rules, allowing for deeper customization and storytelling. New mechanics and advantages expand the narrative possibilities, making the game more dynamic and immersive for both players and storytellers alike.

Character Creation and Development

The guide expands character creation with detailed predator types and clans like Banu Haqim and Hecata, offering new rules and depth to shape unique vampire characters.

Predator Types and Their Impact on Character Play

Predator types in the VtM V5 Player’s Guide shape a character’s identity, influencing interactions with their Beast and mortal prey. These classifications, such as “Hunter” or “Raven,” define how a vampire hunts, interacts with others, and navigates their immortal existence. They add depth to role-playing by connecting a character’s past life with their vampiric nature, offering rich storytelling opportunities. The guide provides detailed frameworks for integrating predator types into character creation, enhancing both individual and group dynamics in the game.

Disciplines and Powers Introduced in the Guide

The VtM V5 Player’s Guide introduces new Disciplines and powers, expanding character customization and gameplay depth. These abilities, tied to specific clans and bloodlines, offer fresh ways to interact with the game world. Players can explore unique vampiric powers that enhance storytelling and strategic play. The guide also clarifies and expands on existing Discipline mechanics, ensuring consistency and innovation. These additions enrich the vampire experience, providing players with more tools to craft compelling and diverse characters.

New Mechanics and Systems

The VtM V5 Player’s Guide introduces innovative mechanics, including systems for group play and virtual sessions, enhancing collaborative storytelling and strategic gameplay with fresh rule applications.

Guidelines for Playing Together and Virtually

The VtM V5 Player’s Guide provides detailed advice for both in-person and virtual gameplay, ensuring immersive storytelling. It includes tips for managing group dynamics, fostering collaboration, and adapting rules for online platforms. The guide emphasizes maintaining the game’s atmosphere and engagement, whether players are gathered around a table or connected via screens. These guidelines are particularly useful for Storytellers looking to create seamless experiences across different play formats, enhancing accessibility and inclusivity for all participants. The free PDF version makes these resources widely available, promoting consistent and enjoyable play.

Innovative Ways to Use Existing Rules

The VtM V5 Player’s Guide introduces creative approaches to leveraging the game’s core mechanics. It offers fresh perspectives on combining disciplines, exploiting weaknesses, and crafting unique character interactions. Players can explore innovative ways to interact with the Beast, manipulate mortals, and navigate the supernatural world. The guide also provides tips for integrating new systems with existing rules, ensuring a seamless and dynamic gameplay experience. These ideas empower Storytellers and players alike to push the boundaries of storytelling while staying true to the game’s essence, fostering creativity and depth in every session. The free PDF version makes these insights accessible to all, enhancing play without unnecessary complexity.

Companion Supplements and Expansions

The VtM V5 Player’s Guide serves as a vital expansion to the core rulebook, offering new clans, disciplines, and mechanics. Available as a free PDF, it complements existing material seamlessly, enriching the game with fresh content while maintaining compatibility with other supplements.

The Role of the VtM V5 Players Guide in the Corebook Ecosystem

The VtM V5 Player’s Guide acts as a bridge between the core rulebook and expanded content, providing essential character options and clans not included in the original. Available as a free PDF, it complements the corebook seamlessly, offering new systems, predator types, and disciplines. This guide enhances gameplay while maintaining compatibility with other supplements, making it a cornerstone for both players and storytellers seeking to deepen their VtM V5 experience.

Integration with Other VtM V5 Supplements

The VtM V5 Player’s Guide seamlessly integrates with other Vampire: The Masquerade 5th Edition supplements, enhancing gameplay with new clans, disciplines, and mechanics. Available as a free PDF, it complements existing materials without overlapping, ensuring a cohesive experience. Players and storytellers can effortlessly combine it with other expansions, creating a rich, dynamic story; Its compatibility ensures a unified system, making it a vital resource for expanding the VtM V5 universe while maintaining balance and consistency across all supplements.

Digital Availability and Access

The VtM V5 Player’s Guide is widely available as a free PDF download, accessible through official distribution channels and online platforms, ensuring easy access for players globally.

Free PDF Downloads and Official Distribution Channels

The VtM V5 Player’s Guide is available as a free PDF download through official distribution channels, ensuring easy access for players worldwide. Official platforms offer high-quality digital versions, often bundled with pre-orders of the physical copy. Fans can also find the guide on trusted websites and forums, though purchasing official copies supports the game’s development. Digital availability enhances convenience, allowing players to access rules, clans, and character options instantly. Always verify sources to ensure authenticity and quality of the download.

Platforms for Accessing the Guide

The VtM V5 Player’s Guide is accessible through various platforms, including official distribution channels like DriveThruRPG and Paradox Interactive’s website. Fans can also find it on community-driven platforms such as AnyFlip, where users share and download the guide. Additionally, some enthusiasts use software tools to download the PDF from these platforms. The guide is often available as a free download, making it widely accessible for players and storytellers. Official platforms ensure high-quality and authentic versions of the guide.

Community Reception and Reviews

The VtM V5 Player’s Guide has received enthusiastic feedback, with players praising its enhanced character creation options and clarity. The free PDF availability has been widely appreciated.

Player and Storyteller Feedback on the Guide

Players and storytellers have praised the VtM V5 Player’s Guide for its enriched character creation options, streamlined rules, and clarity. The free PDF has been widely appreciated for its accessibility, making it easier for newcomers and veterans alike to explore the game. Many highlight the guide’s ability to deepen immersion and expand storytelling potential, while others commend the inclusion of new clans and mechanics that enhance gameplay diversity and complexity.

Impact on the VtM V5 Community

The VtM V5 Player’s Guide has revitalized the community, offering fresh content that enhances gameplay and storytelling. Its release, especially as a free PDF, has made it accessible to a broader audience, fostering creativity and engagement. The inclusion of new clans and mechanics has inspired players and storytellers, leading to more diverse and immersive experiences. This guide has become a cornerstone for both new and veteran players, enriching the VtM V5 ecosystem and ensuring its continued growth and vibrancy within the role-playing community.

Legal and Ethical Considerations

Purchasing official copies supports creators and ensures quality. Free PDFs, while tempting, may infringe copyright. Respect intellectual property to maintain the game’s integrity and future development.

Importance of Purchasing Official Copies

Purchasing official copies of the VtM V5 Player’s Guide supports the creators and ensures access to high-quality, error-corrected content. Official copies fund future development and maintain the game’s ecosystem. While free PDFs are available, they may lack the polished presentation and legal backing of official releases. Buying the guide also provides a hardcover version, enhancing the gaming experience. Supporting official channels ensures the longevity of the game and its community.

Copyright and Fair Use of the Guide

The VtM V5 Player’s Guide is protected under copyright law, ensuring creators’ rights are upheld. Using or distributing the guide without permission is illegal. Copyright infringement can lead to legal consequences. Fair use allows limited, non-commercial use for education or commentary, but does not permit redistribution or profit. Respecting copyright ensures continued quality content creation and supports the game’s ecosystem.

The VtM V5 Player’s Guide is a vital resource for enhancing your Vampire: The Masquerade experience. With free PDF availability, it offers expanded character options and mechanics, ensuring endless storytelling possibilities while supporting official releases for quality and legality. Dive in and explore the depths of the World of Darkness with this indispensable guide.

Final Thoughts on the VtM V5 Player’s Guide

The VtM V5 Player’s Guide is a must-have for Vampire: The Masquerade fans, offering new clans, mechanics, and character-building options. Its free PDF availability makes it accessible for all players, enhancing storytelling and gameplay depth. Whether you’re a veteran or new to the World of Darkness, this guide provides fresh insights and tools to enrich your experience, ensuring unforgettable nights of immersive roleplay and horror.

Encouragement to Explore the Guide

The VtM V5 Player’s Guide is an essential companion for enhancing your Vampire: The Masquerade experience. With its free PDF availability, it’s an accessible starting point for exploring new clans, disciplines, and mechanics. Whether you’re a new player or a seasoned storyteller, this guide offers fresh insights to deepen your storytelling and gameplay. Dive into its pages to unlock new possibilities and transform your gaming experience with innovative character-building options and immersive roleplay opportunities.

change valve guides

Valve guides are crucial for engine performance‚ ensuring proper sealing and heat management. Worn guides can lead to oil leaks and reduced efficiency. Replacing them involves removing old guides and installing new ones‚ which can be done with tools like liquid CO2 or through machine shop procedures. Professional help is often recommended for accuracy‚ and costs vary based on vehicle specifics and labor fees.

Overview of Valve Guides and Their Importance

Valve guides play a critical role in engine functionality by ensuring proper valve operation and alignment. They are cylindrical components located in the cylinder head‚ guiding the valve stems to maintain precise movement. Their primary function is to prevent sideways motion‚ which could damage the valve or engine. Additionally‚ valve guides help manage heat transfer from the valve to the cylinder head‚ preventing overheating. Over time‚ wear and tear can cause guides to become loose or damaged‚ leading to inefficiencies. Properly functioning valve guides are essential for maintaining engine performance‚ fuel efficiency‚ and overall durability‚ making them a vital engine component.

Symptoms Indicating the Need for Valve Guide Replacement

Increased oil consumption‚ blue smoke from the exhaust‚ and rough engine performance are key indicators of worn valve guides. These issues signal the need for replacement.

Common Issues Caused by Worn Valve Guides

Worn valve guides can lead to increased oil consumption‚ as oil seeps into the combustion chamber and burns‚ producing blue smoke from the exhaust. This issue can also cause reduced engine performance‚ rough idling‚ and potential misfires. Over time‚ worn guides may result in valve stem wear‚ further complicating engine operation. Additionally‚ improper heat management due to guide wear can lead to engine overheating. Addressing these issues early is crucial to prevent more severe damage and costly repairs down the line. Regular maintenance and timely replacement of worn valve guides are essential for maintaining optimal engine functionality and longevity.

Tools and Materials Required for the Job

Essential tools include a slide hammer or air hammer with a valve guide driver‚ liquid CO2 for freezing‚ and a press tool for installing new guides. Safety gear like gloves and safety glasses is crucial. Additional materials may involve new valve guides‚ gaskets‚ and seals specific to your engine model. Measuring tools and potential machining tools or a machine shop visit might be necessary. Consulting a repair manual or seeking advice from an experienced individual can also be beneficial for a successful valve guide replacement.

Essential Tools for Removing and Installing Valve Guides

Key tools for valve guide replacement include an air hammer or slide hammer with a valve guide driver‚ liquid CO2 for freezing‚ and a press tool for installation. Additional tools may involve a valve grinder for resurfacing valve faces‚ measuring tools like calipers‚ and a ball bearing or driver to knock out old guides. Safety gear such as gloves and safety glasses is crucial. Specialized tools like the Lisle 59000 can aid in guide installation without machining. Ensure all tools are compatible with your engine model for precise fitment. Proper tool selection ensures efficiency and minimizes the risk of damage during the process.

The Valve Guide Replacement Process

Valve guide replacement involves removing old guides using tools like air hammers or liquid CO2‚ then pressing in new ones. Machining may be required for proper fitment and alignment.

Step-by-Step Guide to Removing Old Valve Guides

Begin by preparing the cylinder head and ensuring the engine is cool. Use liquid CO2 to freeze the guides‚ making them easier to remove. Next‚ employ an air hammer with a guide driver to carefully drive out the old guides. For stubborn guides‚ a slide hammer or specialized tools may be necessary. Once removed‚ inspect the area and clean any debris. If machining is required‚ bore and ream the guide holes to proper specifications. Always follow safety precautions and use appropriate tools to avoid damaging the cylinder head or surrounding components during the removal process.

Installing New Valve Guides: Best Practices

Begin by pressing the new valve guides into place using a guide driver and a small sledgehammer or air hammer. Ensure the guides are properly aligned and seated. Once installed‚ use a milling tool to achieve the correct height and surface finish. It’s crucial to maintain precision to avoid future issues. After installation‚ inspect the guides for proper fit and alignment. Finally‚ lap the valves to ensure a tight seal with the new guides. This step ensures optimal engine performance and prevents leaks or excessive wear. Always follow manufacturer specifications for the best results.

Costs Involved in Valve Guide Replacement

Valve guide replacement costs vary widely‚ typically ranging from $100 to $500 or more‚ depending on the vehicle‚ guide type‚ and labor fees. Factors like engine complexity and shop rates also influence the total cost. Always consult a professional for an accurate estimate tailored to your specific needs.

Factors Affecting the Total Cost of the Procedure

The total cost of valve guide replacement is influenced by several factors‚ including the vehicle’s make and model‚ the type and location of the valve guides‚ and labor rates. Machine shop procedures‚ such as boring and reaming‚ can increase expenses. Additionally‚ the need for specialized tools or additional repairs‚ like valve grinding‚ may add to the cost. On average‚ costs range from $100 to $500 or more‚ depending on these variables. Consulting a professional mechanic or machine shop is recommended for an accurate estimate tailored to your specific situation.

DIY vs; Professional Installation: Pros and Cons

DIY valve guide replacement can save money but requires specialized tools and skills. Professional installation ensures accuracy and handles complex procedures‚ though at a higher cost.

When to Opt for Professional Help

Opt for professional help when dealing with complex engine setups or if specialized tools like machine shop equipment are required. Professionals ensure precise guide alignment and milling‚ critical for proper engine function. If you lack experience with valve guide replacement‚ hiring an expert prevents costly mistakes. Additionally‚ if the guides are deeply worn or the cylinder head requires reaming‚ professional intervention is essential for achieving the correct specifications. Their expertise guarantees a durable and efficient repair‚ minimizing future issues and ensuring optimal engine performance.

Common Mistakes to Avoid During the Process

Avoid improper guide alignment‚ insufficient cooling‚ or using incorrect tools. Neglecting proper valve seating or reaming can lead to engine damage. Ensure precise measurements and follow proper techniques.

Tips for a Successful Valve Guide Replacement

For a smooth process‚ ensure proper alignment of new guides with the cylinder head. Use liquid CO2 to chill guides before installation to prevent damage. Always measure guide height accurately and verify proper seating. Clean the area thoroughly before installing new guides to avoid contamination. Use the correct tools‚ such as guide drivers or air hammers‚ to prevent cylinder head damage. Refer to your vehicle’s manual for specific instructions. After installation‚ lap valves to ensure proper sealing. Double-check all steps to avoid costly rework. Proper preparation and attention to detail are key to a successful valve guide replacement.

Replacing valve guides is a critical task for maintaining engine health. Proper installation ensures optimal performance and longevity. If unsure‚ consulting a professional is highly recommended.

Key Takeaways and Recommendations

Changing valve guides requires precision and proper tools to ensure engine performance. Use liquid CO2 or machine shop procedures for removal and installation. Costs vary by vehicle and labor. Professional help is recommended for complex jobs. Always use the correct tools‚ like air hammers or guide drivers‚ to avoid damage. Proper installation prevents oil leaks and maintains efficiency. If unsure‚ consult a professional to avoid further engine issues. Regular maintenance and inspections can prevent worn guides from causing severe damage. Invest in quality materials and tools for a successful replacement. Seeking expert advice ensures a reliable and long-lasting fix for your engine.

post construction cleaning checklist pdf

A post-construction cleaning checklist is a detailed document outlining tasks to ensure a newly built or renovated space is clean, safe, and ready for occupancy. It streamlines the cleaning process, covering debris removal, surface sanitizing, and final inspections, ensuring all areas are spotless and hazard-free. This essential tool helps contractors, cleaners, and homeowners achieve a thorough cleanup efficiently.

1.1 Importance of a Post-Construction Cleaning Checklist

A post-construction cleaning checklist ensures all areas are thoroughly cleaned and safe, preventing overlooked spots and potential hazards. It organizes tasks, assigns responsibilities, and verifies completion, streamlining the process. Without it, cleaning may be disorganized, leading to incomplete results. The checklist guarantees a space is spotless, meets health standards, and is ready for occupancy, making it indispensable for contractors and homeowners alike.

1.2 Benefits of Using a Comprehensive Cleaning Plan

A comprehensive cleaning plan enhances efficiency, accountability, and safety in post-construction cleaning. It ensures all tasks are completed systematically, reducing oversight and ensuring compliance with health standards. By detailing specific responsibilities and timelines, it promotes organization and accountability among cleaning teams. This structured approach also improves client satisfaction, as it guarantees a clean, hazard-free environment, ready for occupancy or handover, aligning with project goals and expectations.

Key Elements of a Post-Construction Cleaning Checklist

A post-construction cleaning checklist includes tasks like debris removal, surface dusting, and sanitizing, ensuring a thorough and organized cleaning process. It also outlines safety protocols and compliance standards.

2.1 Completion Checklist for Ensuring Thorough Cleaning

A completion checklist ensures no task is overlooked, providing a systematic approach to post-construction cleaning. It includes removing debris, dusting surfaces, sanitizing high-touch areas, and polishing floors. This structured list helps teams track progress, verify each task, and confirm the space is clean and safe for occupancy, ensuring a professional and efficient cleanup process from start to finish.

2.2 Safety Protocols and Hazard Identification

Ensuring safety is critical during post-construction cleaning. Identify potential hazards like sharp debris, unstable structures, or hazardous materials. Use proper PPE, including gloves and masks, to protect against dust and chemicals. Clearly mark restricted areas with signage to prevent accidents. Ensure proper ventilation to avoid inhaling dust or fumes. Regularly inspect equipment and tools for damage. Train staff to handle emergencies and maintain a first-aid kit on-site. Keep emergency exits clear and accessible at all times.

The Three-Phase Post-Construction Cleaning Process

The post-construction cleaning process involves three phases: rough cleaning, detailed cleaning, and finishing touches. Each phase ensures thorough removal of debris, dust, and residue, preparing the space for occupancy.

3.1 Rough Cleaning: Removing Debris and Large Particles

Rough cleaning is the initial phase, focusing on removing large debris, dust, and particles from the construction site. This step involves clearing away materials like leftover lumber, drywall scraps, and packaging. Tools such as shovels, brooms, and wheelbarrows are essential for efficiently collecting and disposing of waste. Ensuring the area is free from bulky obstacles and debris creates a safe and organized environment for the next cleaning phases.

3.2 Detailed Cleaning: Dusting, Wiping, and Sanitizing Surfaces

Detailed cleaning involves thoroughly dusting and wiping all surfaces, including floors, walls, and countertops, using microfiber cloths and mild detergents. Windows, window sills, and tracks are cleaned to remove streaks and residue. High-touch areas like doorknobs and light switches are sanitized to ensure hygiene. This phase ensures every surface is clean, streak-free, and ready for final inspection, creating a pristine environment for occupancy or use.

3.3 Finishing Touches: Polishing and Final Inspections

The final phase involves polishing surfaces like mirrors, stainless steel, and hardwood floors to restore their shine. A thorough inspection ensures all areas are spotless, with no dust, debris, or residue remaining. Light fixtures, vents, and windows are double-checked for clarity and cleanliness. This step guarantees the space meets high standards, ready for handover, ensuring client satisfaction and a professional finish to the construction project.

Tools and Equipment Needed for Post-Construction Cleaning

Essential tools include brooms, mops, vacuums, scrubbers, squeegees, buckets, and microfiber cloths. Specialized equipment like ladders, pressure washers, and HEPA-filter vacuums ensure proper cleaning.

4.1 Essential Cleaning Supplies and Materials

Essential supplies include all-purpose cleaners, disinfectants, glass cleaners, and degreasers. Sponges, scrub brushes, and microfiber cloths are must-haves for effective cleaning. Dusters, mops, and buckets are also critical for removing dust and debris. Additionally, trash bags, gloves, and safety goggles protect cleaning crews and maintain hygiene. These materials ensure thorough and efficient post-construction cleaning.

4.2 Specialized Equipment for Efficient Cleaning

Specialized equipment like pressure washers, industrial vacuum cleaners, and floor scrubbers are crucial for large-scale post-construction cleaning. Ladders or aerial lifts enable access to high areas, while steam cleaners tackle stubborn stains and grout. This advanced gear ensures efficient removal of debris, dust, and residue, making it indispensable for handling extensive construction sites effectively and ensuring a pristine finish.

Safety Considerations During Post-Construction Cleaning

Ensuring safety involves wearing PPE, identifying hazards like sharp debris or chemicals, and following safe practices to prevent accidents and ensure a secure cleaning environment.

5.1 Personal Protective Equipment (PPE) Requirements

Personal Protective Equipment (PPE) is crucial for ensuring safety during post-construction cleaning. Essential items include gloves, safety glasses, masks, and sturdy footwear to protect against sharp debris, chemicals, and airborne particles. PPE helps prevent injuries and exposure to hazardous materials, ensuring cleaners can work safely and efficiently. Adhering to PPE requirements is a cornerstone of maintaining a secure and healthy cleaning environment.

5.2 Identifying and Managing Hazardous Materials

Identifying and managing hazardous materials is critical during post-construction cleaning. Cleaners must recognize substances like asbestos, lead, and chemicals, using specialized gear and safe disposal methods. Proper labeling and segregation prevent accidental exposure, while training ensures handlers understand risks and protocols. Ensuring compliance with safety standards minimizes health risks and environmental impact, fostering a safer cleanup process for both workers and the environment.

Cleaning Exterior and High-Reach Areas

Cleaning exterior and high-reach areas involves removing dust from windows, sills, and HVAC vents, ensuring safety with ladders and harnesses, and using specialized equipment for efficiency.

6.1 Removing Dust and Debris from Windows and Sills

Windows and sills often accumulate dust and debris during construction. Use a squeegee or brush to remove loose particles, then wipe surfaces with a damp cloth. Ensure streak-free results by drying thoroughly. For exterior windows, use ladders or specialized tools safely. Regular inspection guarantees clarity and a polished finish, enhancing the overall appearance of the space.

6.2 Cleaning HVAC Vents and Ducts for Improved Air Quality

Cleaning HVAC vents and ducts is crucial for eliminating construction dust and debris, ensuring optimal air flow and quality. Use specialized brushes and vacuums to remove contaminants. Replace filters with high-efficiency options. This process prevents airborne particles from circulating, promoting a healthier indoor environment and maintaining system efficiency. Regular cleaning also reduces dust accumulation in living spaces, enhancing comfort and safety.

Creating a Printable Post-Construction Cleaning Checklist PDF

A printable post-construction cleaning checklist PDF ensures tasks are organized and easily accessible. Customize it to include essential tasks, from debris removal to final inspections. This format allows for efficient tracking and completion of cleaning duties, ensuring no detail is overlooked. It’s a practical tool for maintaining organization and accountability during the cleanup process.

7.1 Customizing the Checklist for Specific Projects

Customizing a post-construction cleaning checklist PDF ensures it aligns with the unique needs of each project. Tailor tasks to the scope of work, such as focusing on kitchens, bathrooms, or outdoor areas. Include specific details like surface materials, equipment requirements, and safety protocols. This adaptability makes the checklist more relevant and effective for the cleaning team, ensuring no detail is overlooked. It also allows for easy updates as project requirements evolve.

7.2 Ensuring the Checklist is User-Friendly and Comprehensive

A well-structured post-construction cleaning checklist PDF ensures clarity and ease of use. Organize tasks by room or category, using clear headings and checkmarks for progress tracking. Include detailed instructions for complex tasks, such as cleaning HVAC vents or high-reach areas. Ensure the document is visually appealing with bullet points and concise language. This approach makes the checklist both practical and accessible, enhancing team efficiency and ensuring a thorough cleaning process.

Top Tips for Effective Post-Construction Cleaning

Start with dry cleaning to remove loose debris, then transition to wet methods for a deeper clean. Use specialized tools and ensure all surfaces are residue-free for a spotless finish.

8.1 Starting with Dry Cleaning Before Moving to Wet Methods

Begin with dry cleaning to remove loose debris, dust, and particles using tools like brooms, brushes, or vacuum cleaners. This prevents mud formation when water is introduced later. Dry methods ensure surfaces are prepared for wet cleaning, making the overall process more efficient and effective. Always prioritize dry cleaning to achieve a smoother transition to wet cleaning techniques.

8.2 Ensuring All Surfaces Are Clean and Free of Residue

Thoroughly clean and inspect all surfaces, including countertops, floors, and windows, to ensure they are free of dust, dirt, and construction residue. Use appropriate cleaning solutions and tools to remove stubborn stains or adhesive marks. After cleaning, wipe down surfaces with a damp cloth and dry them to prevent streaks. This step ensures a polished finish and a safe, residue-free environment for occupancy.

Room-Specific Cleaning Checklists

Room-specific cleaning checklists ensure tailored cleaning for kitchens, bathrooms, bedrooms, and living areas, addressing unique needs like countertops, fixtures, and flooring to guarantee a spotless finish.

9.1 Kitchen and Bathroom Cleaning Priorities

Kitchens and bathrooms require focused attention due to their high-touch surfaces and moisture-prone areas. Ensure countertops, sinks, and faucets are sanitized, and bathrooms’ showers, toilets, and mirrors are thoroughly cleaned. Appliances and cabinets should be wiped down, and floors mopped to remove dust and debris, ensuring a hygienic environment for immediate use.

9.2 Bedroom and Living Area Cleaning Requirements

Bedrooms and living areas need meticulous cleaning to create a comfortable environment. Dust and vacuum furniture, floors, and upholstery, ensuring surfaces are free of debris. Wipe door handles, baseboards, and light fixtures, and remove any construction residue. Clean mirrors and windows, and ensure all areas are spotless before final inspection, making the space ready for occupancy.

Best Practices for Final Walk-Throughs

Conduct a thorough inspection to ensure all areas are spotless, free of debris, and safe. Verify that all cleaning tasks are completed and documented for client approval.

10.1 Ensuring All Areas Are Spotless and Ready for Handover

A meticulous final walk-through ensures every room, surface, and detail meets high standards. Check for dust, debris, and cleanliness in kitchens, bathrooms, floors, and windows. Verify that all fixtures are clean and functioning. Ensure no construction materials or waste remain. This step guarantees the space is safe, hygienic, and perfectly prepared for occupancy or handover, meeting client expectations fully.

10.2 Documenting Completion and Client Approval

Documenting completion involves creating a detailed report of all cleaned areas, ensuring every task on the checklist is verified. Capture photo evidence of cleaned spaces and obtain client signatures for approval. This formal process confirms the project’s completion and client satisfaction, providing a legal and professional record of the work done. A PDF copy of the checklist and report is typically issued for transparency.

The Role of Professional Cleaning Services

Professional cleaning services provide expertise, specialized tools, and efficiency, ensuring thorough post-construction cleanup. They handle complex tasks, adhere to safety standards, and deliver a pristine environment for handover.

11.1 Hiring Experts for Efficient and Reliable Cleaning

Hiring professional cleaning services ensures efficient and reliable post-construction cleanup. Experts utilize specialized tools and follow detailed checklists to tackle complex tasks, from debris removal to sanitizing surfaces. Their training and experience guarantee a thorough job, adhering to safety protocols and health standards. This allows for a swift handover, ensuring the space is clean, safe, and ready for occupancy or use.

11.2 Ensuring Compliance with Health and Safety Standards

Professional cleaning services ensure compliance with health and safety standards by using proper PPE, adhering to safety protocols, and managing hazardous materials. They follow detailed checklists to identify and mitigate risks, ensuring a safe environment. This compliance guarantees the space meets regulatory requirements, providing peace of mind for clients and ensuring a clean, hazard-free area for occupancy or use.

A well-structured post-construction cleaning checklist ensures a clean, safe, and ready-to-use environment. It streamlines the process, guarantees compliance with standards, and provides a smooth transition to occupancy.

12.1 The Importance of a Well-Structured Cleaning Plan

A well-structured cleaning plan is essential for ensuring efficiency, safety, and accountability in post-construction cleaning. It serves as a roadmap, guiding cleaners through all necessary tasks, from debris removal to final inspections. A clear plan minimizes overlooked areas, reduces hazards, and ensures compliance with health and safety standards. Ultimately, it guarantees a clean, safe, and ready-to-use environment, making the handover process seamless and stress-free.

12.2 Ensuring a Clean and Safe Environment Post-Construction

Ensuring a clean and safe environment post-construction is crucial for occupancy readiness. A thorough cleaning process removes debris, dust, and hazardous materials, while adhering to safety protocols prevents accidents. Final inspections verify all areas are spotless, functional, and free from risks. This comprehensive approach guarantees a safe, healthy, and visually appealing space, ready for immediate use and handover to clients or occupants.

the very hungry caterpillar food printables pdf

Discover a collection of engaging food-themed printables inspired by Eric Carle’s beloved story. These PDF resources offer diverse activities‚ from food cards and matching games to counting exercises‚ perfect for young learners. Designed to enhance educational fun‚ these printables align with the story’s themes of growth‚ hunger‚ and transformation‚ making learning an enjoyable experience for children of all ages.

Overview of The Very Hungry Caterpillar Book

Written and illustrated by Eric Carle‚ The Very Hungry Caterpillar is a beloved children’s book first published in 1969. The story follows the life cycle of a caterpillar‚ from its emergence as an egg to its transformation into a beautiful butterfly. The book is known for its simple‚ repetitive text and vibrant collage-style illustrations‚ making it accessible to young readers. It introduces basic concepts such as counting‚ days of the week‚ and the stages of metamorphosis‚ while also exploring themes of hunger‚ growth‚ and transformation. The caterpillar’s journey‚ as it eats through various foods‚ captivates children and sparks their curiosity about nature. The book has become a classic in early childhood education‚ widely used in classrooms and homes to teach foundational skills and inspire a love for reading.

Importance of Food Printables in Learning

Food printables‚ such as those inspired by The Very Hungry Caterpillar‚ play a significant role in early childhood education. They provide engaging‚ hands-on activities that help children develop essential skills like counting‚ sequencing‚ and vocabulary building. These resources align with the story’s themes of food and growth‚ making learning interactive and fun. For instance‚ food cards and matching games enhance memory and recognition‚ while counting exercises introduce basic math concepts. Additionally‚ these printables foster creativity through activities like coloring and crafting‚ which are integral to a child’s cognitive development. By incorporating food-themed printables‚ educators and parents can create a structured yet enjoyable learning environment that caterpillars children’s natural curiosity and love for exploration. These tools are particularly effective for young learners‚ as they simplify complex concepts and make education accessible and engaging.

Food-Themed Printable Activities

Engage young learners with food-themed printables featuring vibrant illustrations from The Very Hungry Caterpillar. Activities include food cards‚ matching games‚ and counting exercises‚ fostering interactive learning and fun. These resources align perfectly with the story’s food-focused narrative‚ making education enjoyable and immersive for children.

Food Cards and Matching Games

Enhance learning with food cards and matching games inspired by The Very Hungry Caterpillar. These printables feature vibrant images of fruits‚ treats‚ and other foods from the story. Children can match cards to corresponding words or pictures‚ improving vocabulary and memory. The activities are ideal for developing fine motor skills and hand-eye coordination. Teachers and parents can use these resources to create interactive lessons‚ making learning fun and engaging. The food cards also introduce counting and sorting concepts‚ aligning with early childhood education goals. Available as downloadable PDFs‚ these matching games are perfect for classroom or homeschool use. They encourage young learners to explore the story’s themes while building essential skills. With their colorful designs and educational value‚ these printables are a great way to keep children entertained and invested in their learning journey.

Counting and Sequencing Exercises

Engage young learners with counting and sequencing exercises based on The Very Hungry Caterpillar. These printables feature activities where children can count fruits‚ sweets‚ and other foods the caterpillar eats. Sequencing exercises help kids arrange images in the order the caterpillar consumes them‚ enhancing their understanding of storytelling and timelines. These exercises are designed to improve math skills and logical thinking. The printables include numbered cards and visual aids‚ making it easy for children to follow along. Teachers and parents can use these resources to create interactive lessons that align with early childhood education goals. Available as downloadable PDFs‚ these exercises are perfect for classroom or homeschool activities. They combine learning with fun‚ keeping children entertained while they develop essential skills. These counting and sequencing activities are a great way to deepen comprehension of the story and its themes.

Coloring Pages Featuring Food Items

Bring the world of The Very Hungry Caterpillar to life with coloring pages that showcase the delicious foods the caterpillar enjoys. These printables feature vibrant illustrations of fruits‚ sweets‚ and other treats‚ allowing children to explore their creativity while engaging with the story. Each page focuses on a different food item‚ helping kids recognize and remember the variety of foods the caterpillar eats. The coloring activities are designed to be both fun and educational‚ promoting fine motor skills and creativity. Parents and educators can use these PDFs to create a hands-on learning experience. The food-themed coloring pages are perfect for children of all ages‚ from toddlers to grade 2 students. They also serve as a great way to reinforce the story’s themes of growth and transformation. Download these printable coloring pages to add a colorful touch to your lessons or activities.

Educational Printables Inspired by the Book

Enhance learning with printables featuring letter tracing‚ word searches‚ and comprehension exercises. These activities align with the story’s themes‚ making education fun and engaging for young learners. Perfect for developing essential skills creatively.

Letter and Number Tracing Worksheets

Engage young learners with letter and number tracing worksheets inspired by The Very Hungry Caterpillar. These printables are designed to help children develop fine motor skills and handwriting while exploring the story’s themes. With activities focused on tracing letters like “C” for caterpillar and numbers that correspond to the days of the week‚ kids can practice writing in a fun‚ story-based context. The worksheets often feature illustrations of the caterpillar and its favorite foods‚ making learning feel like play. Perfect for toddlers‚ preschoolers‚ and early elementary students‚ these resources are a great way to introduce foundational literacy and numeracy skills. Many of these PDFs are available for free download‚ offering parents and educators an easy way to prepare engaging lessons. By incorporating elements from the book‚ these tracing exercises ensure that learning is both enjoyable and meaningful for young minds.

Word Search and Vocabulary Building

Enhance your child’s vocabulary with word search and vocabulary-building activities inspired by The Very Hungry Caterpillar. These printables feature words related to the story‚ such as food items the caterpillar eats‚ like “apple‚” “pear‚” and “pizza.” Word searches are designed to improve spelling and recognition skills‚ while interactive games like matching and crossword puzzles reinforce vocabulary. Children can learn synonyms and understand the context of words used in the story. These exercises make learning fun and engaging‚ encouraging children to explore language in a creative way. Perfect for preschoolers and early learners‚ these PDF resources align with the story’s themes and provide a playful approach to building a strong foundation in vocabulary. With colorful illustrations and easy-to-follow instructions‚ these activities are ideal for both classroom and home use.

Comprehension Questions and Story Recall

Engage young learners with comprehension questions and story recall activities based on The Very Hungry Caterpillar. These printables help children remember key events‚ such as the caterpillar’s journey from egg to butterfly and the variety of foods it eats. Questions are designed to test understanding of the story’s sequence and characters. Activities include matching games‚ sequencing exercises‚ and fill-in-the-blank tasks that reinforce memory and language skills. These resources are perfect for developing critical thinking and encouraging children to reflect on the story’s themes. With colorful illustrations and simple language‚ these PDF worksheets make learning fun and interactive. They are ideal for preschoolers and early learners‚ aligning with educational standards and promoting a deeper connection to the story. Use these activities to help children build a strong foundation in comprehension and storytelling skills.

Craft and Party Ideas Using Printables

Transform your celebrations with DIY decorations and crafts inspired by The Very Hungry Caterpillar. Printables offer themed party ideas‚ such as caterpillar banners‚ food-themed invitations‚ and activity sheets for kids to enjoy during events. Create memorable experiences with these fun and colorful resources‚ perfect for birthday parties or classroom gatherings. These printables add an educational and creative touch to any celebration‚ making them a delightful way to engage children while they learn and play. Use them to craft unique party favors‚ decorations‚ and games that align with the story’s beloved characters and themes.

DIY Decorations for Themed Parties

Bring The Very Hungry Caterpillar to life with charming DIY decorations using printable resources. Create a whimsical setting by printing and assembling caterpillar banners‚ food-themed garlands‚ and fruit-shaped centerpieces. These decorations not only enhance the party atmosphere but also tie into the story’s themes of growth and transformation. Use printable templates to craft giant leaves‚ colorful butterflies‚ and caterpillar segments that can be hung from ceilings or walls. Additionally‚ food-themed printables like apple‚ pear‚ and watermelon cutouts can be used to decorate snack tables‚ creating an immersive experience for kids. These easy-to-make decorations are perfect for birthday parties‚ classroom events‚ or themed gatherings‚ ensuring a memorable and engaging celebration inspired by Eric Carle’s beloved character. With minimal materials and effort‚ you can transform any space into a vibrant Very Hungry Caterpillar wonderland.

Stick Puppet Templates for Storytelling

Engage children in interactive storytelling with stick puppet templates inspired by The Very Hungry Caterpillar. These printable templates feature characters and food items from the book‚ allowing kids to create their own puppets. Simply cut out the images‚ glue them to craft sticks‚ and bring the story to life. This activity encourages creativity and imaginative play while fostering a deeper connection to the narrative. The puppets are ideal for retelling the story or acting out new adventures‚ making learning fun and interactive. Teachers and parents can use these templates to help children develop their storytelling skills and confidence. Additionally‚ the process of assembling the puppets enhances fine motor skills and hand-eye coordination. With these stick puppet templates‚ storytelling becomes a hands-on and memorable experience for young learners.

Interactive Resources for Young Learners

Engage young learners with food-themed puzzles and sorting games inspired by The Very Hungry Caterpillar. These interactive resources help develop problem-solving skills and food recognition while aligning with the story’s themes of growth and exploration.

Food-Themed Puzzles and Sorting Games

Enhance learning with food-themed puzzles and sorting games inspired by The Very Hungry Caterpillar. These activities challenge young learners to match and categorize food items‚ fostering problem-solving skills and hand-eye coordination. Puzzles feature iconic foods from the story‚ such as apples‚ pears‚ and ice cream cones‚ while sorting games encourage children to group foods by type‚ color‚ or sequence. These resources align with the caterpillar’s journey‚ helping kids connect the story’s themes of growth and transformation with hands-on play. Perfect for developing fine motor skills and cognitive abilities‚ these games are both educational and entertaining‚ making them a great addition to any lesson plan or home activity. Use these printable puzzles and sorting games to create an engaging and interactive learning experience for children of all ages.

manual vs electric standing desk

Standing desks promote better posture and reduce sedentary behavior, offering a healthier alternative to traditional seating. They come in manual and electric models, each with unique benefits for modern workspaces.

1.1 Overview of Standing Desks

Standing desks are ergonomic solutions designed to allow users to switch between sitting and standing throughout the day. They promote better posture, reduce sedentary behavior, and enhance productivity. Available in manual and electric models, these desks cater to different preferences and needs. Their height-adjustable surfaces support a variety of tasks, making them versatile for office and home workspaces. They are a popular choice for improving workplace health and comfort.

1.2 Importance of Standing Desks in Modern Workspaces

Standing desks have become essential in modern workspaces due to their ability to promote health and productivity. They reduce sedentary behavior, improve posture, and lower the risk of back and neck pain. By encouraging movement, they enhance energy levels and focus, contributing to a more dynamic work environment. Their popularity reflects a growing emphasis on workplace wellness and ergonomic design, making them a valuable investment for companies prioritizing employee health.

Key Differences Between Manual and Electric Standing Desks

Manual desks rely on physical effort for height adjustment, while electric desks use motors for effortless, precise control, catering to different preferences and needs.

2;1 Mechanism and Operation

Manual standing desks operate via a crank or lever, requiring physical effort to adjust height, while electric desks use motors for smooth, automated height changes at the touch of a button.
These mechanisms cater to different user preferences, with manual desks offering simplicity and electric desks providing convenience and ease of use. Both designs aim to enhance productivity and comfort in the workplace.

2.2 Ease of Adjustment

Electric standing desks offer seamless height adjustments with the press of a button, making transitions between sitting and standing effortless. Manual desks require turning a crank or lifting, which can be time-consuming and physically demanding. Electric models are generally faster and more convenient, while manual desks appeal to those who prefer a simpler, low-maintenance solution without relying on electricity.

2.3 Cost Considerations

Manual standing desks are typically more affordable than electric models, as they lack the motorized components; Electric desks, while offering greater convenience, are generally pricier due to their advanced features and technology. Budget-conscious users may prefer manual desks, while those willing to invest in long-term comfort and ease may opt for electric models, balancing initial costs with potential benefits.

Pros and Cons of Manual Standing Desks

Manual desks are cost-effective and eco-friendly, requiring no electricity, but they demand physical effort for adjustments, which may be less convenient for frequent height changes.

3.1 Advantages of Manual Standing Desks

Manual standing desks are cost-effective and eco-friendly, as they don’t require electricity. They are also quieter and more portable, making them ideal for shared or remote workspaces. Additionally, their simplicity means fewer mechanical parts, reducing the risk of malfunctions. These desks are a practical choice for those seeking a reliable, low-maintenance option that still offers the health benefits of standing while working.

3.2 Disadvantages of Manual Standing Desks

Manual standing desks require more physical effort to adjust, which can be time-consuming and tiring, especially for frequent height changes. They often lack the precision of electric models, making it harder to find the perfect position. Additionally, manual desks may not support as much weight and can be less durable than electric options. This makes them less suitable for users who need consistent, smooth adjustments throughout the day.

Pros and Cons of Electric Standing Desks

Electric standing desks offer effortless height adjustments and programmable settings, promoting productivity and comfort. However, they are more expensive and require electricity, limiting portability and increasing energy use.

4.1 Benefits of Electric Standing Desks

Electric standing desks provide smooth and effortless height adjustments, allowing users to switch between sitting and standing with the touch of a button. This ease of use encourages regular posture changes, reducing muscle fatigue and improving overall comfort. Additionally, programmable height settings enable users to save their preferred positions, ensuring optimal ergonomics for different tasks and individuals. This convenience makes them ideal for enhancing productivity in dynamic work environments.

4.2 Drawbacks of Electric Standing Desks

Electric standing desks are generally more expensive than manual models and require a power source, limiting their portability. The motorized mechanism can generate noise, potentially disturbing quiet work environments. Additionally, some users find the weight capacity restrictions and occasional need for maintenance a drawback. Despite these, electric desks remain popular for their convenience and ease of use in busy, tech-driven workplaces.

Ideal Users for Each Type of Desk

Manual desks suit those needing portability and simplicity, while electric desks are perfect for users prioritizing convenience and smooth height adjustments in dynamic workspaces.

5.1 Who Should Choose a Manual Standing Desk

Manual standing desks are ideal for individuals seeking simplicity and portability. They are cost-effective and suitable for those who prefer minimal adjustments or work in spaces without reliable electricity. Students, home users, and small office setups often benefit from their straightforward design. Manual desks are also a great choice for those who prioritize ease of assembly and maintenance without the need for advanced features.

5.2 Who Should Opt for an Electric Standing Desk

Electric standing desks are perfect for individuals prioritizing convenience and ease of use. They suit busy professionals, taller users, or those with mobility challenges who need smooth height adjustments. Offices with multiple users or shared workspaces also benefit from programmable settings. Electric desks are ideal for anyone willing to invest in long-term comfort and advanced features, despite higher costs.

Additional Features to Consider

Consider desks with built-in cable management for organization and programmable settings for customized height adjustments, enhancing both functionality and user experience significantly.

6.1 Built-in Cable Management Systems

Built-in cable management systems are essential for maintaining a clutter-free workspace. These systems, often featuring integrated cable trays or grommets, keep cords organized and easily accessible. Electric standing desks typically offer more advanced cable management solutions, while manual desks may have simpler setups. A well-organized cable system reduces tripping hazards and enhances the overall aesthetic of the workspace, improving productivity and focus. This feature is particularly valuable in shared or busy environments where multiple devices are connected.

6.2 Programmable Height Settings

Programmable height settings are a convenient feature found in many electric standing desks, allowing users to save their preferred heights for easy switching. This feature enhances customization and efficiency, ensuring a seamless transition between sitting and standing. Unlike manual desks, which require physical effort to adjust, programmable settings offer a modern, tech-driven solution for optimal comfort and productivity in dynamic work environments;

Noise Levels and Workspace Disturbance

Electric standing desks often generate noise due to their motorized mechanisms, while manual desks operate silently, making them ideal for shared or quiet workspaces.

7.1 Manual vs. Electric: Which is Quieter?

Manual standing desks are generally quieter as they lack motorized components, while electric desks may produce noise during height adjustments. Although some electric models are designed to be quieter, manual desks remain the better choice for noise-sensitive environments. The absence of motors in manual desks ensures silent operation, making them ideal for shared workspaces or home offices where minimal disruption is preferred. This difference in noise levels is a key consideration for users prioritizing a disturbance-free working environment.

Adjustability and Customization Options

Electric desks offer smooth, programmable height adjustments, while manual desks provide simpler, tool-free customization options, each catering to different user preferences and workspace needs effectively.

8.1 Range of Height Adjustment

Electric standing desks typically offer a wider range of height adjustment, often between 22 to 50 inches, catering to various user heights. Manual desks, while more limited, still provide ample adjustment options, usually from 29 to 45 inches, ensuring customization for different users. Both types prioritize ergonomics, aiming to enhance comfort and productivity in the workspace.

8.2 Customization Features

Electric standing desks often come with programmable height settings, allowing users to save their preferred positions for easy adjustments. Some models include built-in cable management systems to keep workspaces organized. Manual desks, while simpler, may offer customization through interchangeable tops or ergonomic accessories. Both options cater to individual needs, ensuring a personalized workspace that enhances comfort and efficiency for users of all preferences and work styles.

Ease of Assembly and Maintenance

Manual desks are generally simpler to assemble and maintain, requiring minimal tools and effort. Electric desks may involve more complex setup and occasional motor part replacements.

9.1 Setup Requirements for Manual Desks

Manual standing desks typically require straightforward assembly, often involving simple tools like Allen wrenches. They usually come with clear instructions, making the setup process manageable for most users. Since they don’t rely on electricity, there’s no need for complex wiring or electrical connections. This simplicity makes manual desks a great option for those who prefer a hassle-free setup experience.

9.2 Maintenance Needs for Electric Desks

Electric standing desks require occasional maintenance to ensure optimal performance. Regularly clean the motor and mechanical components to prevent dust buildup. Check for software updates if your desk has programmable settings. Lubricate moving parts periodically to maintain smooth height adjustment. Ensure the desk is placed on a stable, even surface to prevent wobbling. Proper maintenance extends the product’s lifespan and ensures reliable operation.

Health Benefits of Standing Desks

Standing desks promote better posture, reduce back and neck pain, and improve blood circulation. They encourage a healthier, more active work style, boosting overall well-being effectively.

10.1 Improving Posture

Standing desks help maintain a neutral spine alignment, reducing slouching and promoting proper posture. By encouraging users to stand upright, they minimize the risk of long-term spinal strain. Both manual and electric models allow for ergonomic positioning, fostering a healthier working stance and improving body mechanics over time. This benefit is consistent across all standing desk types, making them a valuable investment for workplace well-being.

10.2 Reducing Back and Neck Pain

Standing desks can significantly alleviate back and neck pain by encouraging proper spinal alignment and reducing prolonged sitting. Manual desks require occasional adjustments, which may delay relief, while electric models offer seamless height changes, promoting consistent ergonomic positioning. Both types help distribute weight evenly, easing muscle strain and fostering a more comfortable working experience, ultimately contributing to long-term back and neck health in the workplace.

Environmental Impact

Manual desks are often more eco-friendly due to fewer components, while electric desks consume energy and may have a larger environmental footprint due to their motors and production.

11.1 Eco-Friendliness of Manual Desks

Manual standing desks are generally more eco-friendly than their electric counterparts. They typically require less material to manufacture and operate without electricity, reducing energy consumption. Additionally, manual desks often have fewer components, which means less waste during production. Their simplicity also makes them easier to recycle or repurpose, contributing to a more sustainable option for environmentally conscious consumers.

11.2 Energy Consumption of Electric Desks

Electric standing desks consume energy due to their motorized height adjustment systems. While the power usage is relatively low, typically around 25-50 watts during operation, it still contributes to overall energy consumption. In contrast to manual desks, which require no electricity, electric desks may incur minor ongoing energy costs. However, many modern models now include energy-efficient motors and standby modes to minimize power usage when not in active operation.

Manual and electric standing desks offer distinct benefits, catering to different needs. Manual desks are cost-effective and simple, while electric desks provide ease and customization. Choose based on personal preferences and workspace requirements for optimal comfort and productivity.

12.1 Summary of Key Points

Manual and electric standing desks cater to different preferences and needs. Manual desks are cost-effective, simple, and require no electricity, making them ideal for those prioritizing affordability and ease of use. Electric desks offer superior convenience, customization, and programmable height settings, suiting users who value advanced features and comfort; Both options promote better posture and reduce sedentary behavior, making them beneficial for modern workspaces. The choice between them depends on personal preferences, budget, and specific workspace requirements.

12.2 Final Recommendations

For users seeking simplicity and affordability, manual standing desks are an excellent choice. They are ideal for those who prefer a straightforward setup and do not require frequent height adjustments. On the other hand, electric standing desks are recommended for individuals who value ease of use, programmable settings, and a seamless transition between sitting and standing. Consider your lifestyle, workspace, and budget to make an informed decision that best suits your needs. Ensuring proper posture and regular movement will maximize the benefits of either option.