moen genta faucet ws84760srn manual

Moen Genta Faucet WS84760SRN: A Comprehensive Guide

This detailed resource provides everything you need regarding the Moen Genta WS84760SRN, encompassing installation, troubleshooting, and maintenance for optimal performance and longevity․

Overview of the Moen Genta Series

The Moen Genta Series represents a contemporary design aesthetic for the bathroom, characterized by its sleek, curved edges and substantial build quality․ This collection aims to bring a modern, yet inviting feel to any bathroom space․ The Genta suite isn’t just about looks; it’s engineered for durability and reliable performance, utilizing quality materials in its construction․

Specifically, the Genta faucets, like the WS84760SRN model, are designed for single-hole installation, offering a streamlined appearance․ Moen emphasizes ease of use with its single-handle operation, allowing for effortless control of both water temperature and flow․ The series caters to those seeking a balance between style and functionality, providing a sophisticated upgrade to daily bathroom routines․

Moen provides comprehensive support, including readily available installation guides (INS10365A & INS10554) and customer service, ensuring a smooth experience from purchase to installation and beyond․

Key Features of the WS84760SRN Model

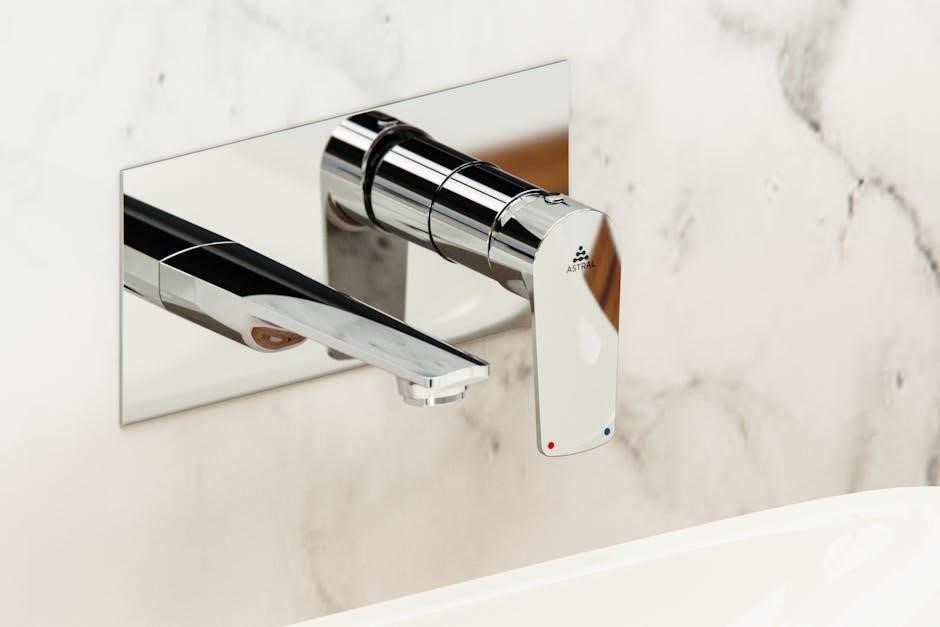
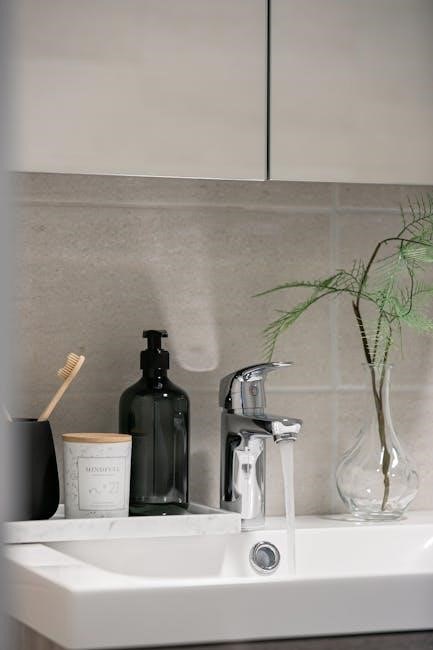
The Moen Genta WS84760SRN bathroom faucet is a single-handle model designed for single-hole installation, offering a clean and modern look․ A standout feature is its 1;2 GPM (gallons per minute) flow rate, balancing water conservation with adequate pressure for everyday use․ The faucet boasts a durable metal shell construction, ensuring longevity and resistance to wear and tear․

Its Spot Resist Brushed Nickel finish is a key selling point, resisting fingerprints and water spots to maintain a pristine appearance․ The single-lever handle provides intuitive control over water temperature and volume․ Moen prioritizes user convenience, offering detailed installation guides (INS10365A & INS10554) and readily accessible customer support via phone (1-800-BUY-MOEN) and their website (www․moen․com)․

This model, identified by SKU VORG7460876 and MPN WS84760SRN, is a practical and stylish addition to any bathroom․

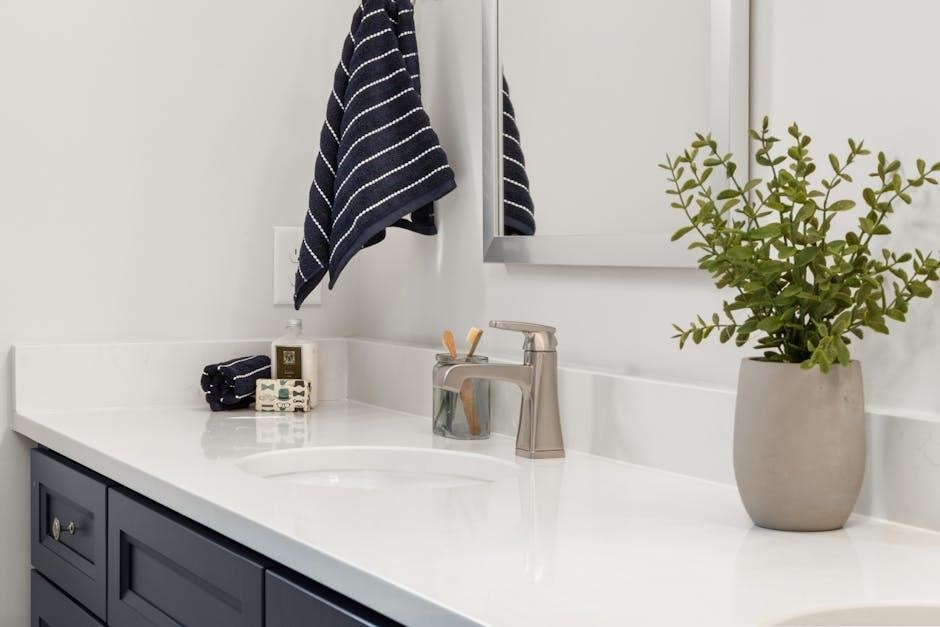
Spot Resist Brushed Nickel Finish

The Moen Genta WS84760SRN features a distinctive Spot Resist Brushed Nickel finish, engineered to minimize water spots and fingerprints․ This specialized coating isn’t simply a plating; it’s a durable layer designed to maintain a clean, pristine appearance with minimal effort․ Unlike traditional chrome finishes, the brushed nickel provides a warmer, more subtle aesthetic that complements a wide range of bathroom décor styles․

This finish significantly reduces the frequency of cleaning required to keep the faucet looking its best․ While regular cleaning is still recommended, the Spot Resist technology offers a practical advantage for busy households․ The finish is applied to a robust metal shell, ensuring both durability and a lasting, attractive appearance․

Moen’s commitment to quality extends to this finish, providing a long-term solution for a beautiful bathroom fixture․

Installation Process

Installing the Moen Genta WS84760SRN bathroom faucet is a manageable DIY project for those with basic plumbing skills․ However, carefully following the provided installation guides – INS10365A and INS10554 – is crucial for a successful outcome․ Moen strongly recommends contacting them directly for assistance, missing parts, or clarification before beginning․ Their customer support is available at 1-800-BUY-MOEN (USA) or via their website, www․moen․com․

The process involves removing the old faucet, preparing the sink surface, and carefully connecting the new faucet according to the step-by-step instructions․ Proper sealing of connections is vital to prevent leaks․ Ensure the water supply is shut off before disconnecting any existing plumbing․

Detailed diagrams within the guides illustrate each stage, making the installation process clear and concise․

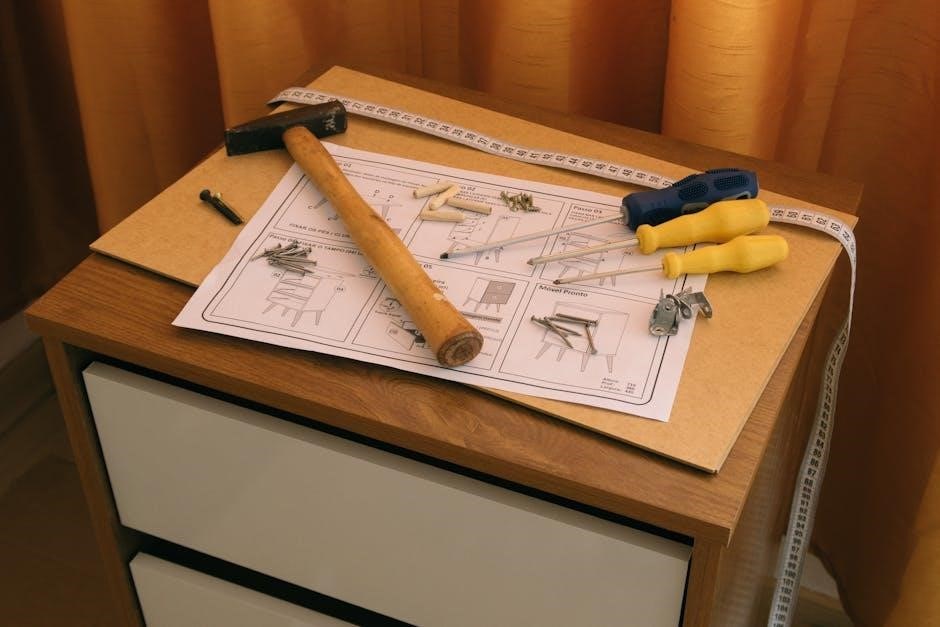
Tools Required for Installation

Before commencing the installation of your Moen Genta WS84760SRN faucet, gathering the necessary tools is essential for a smooth and efficient process․ While the specific requirements may vary slightly depending on your existing plumbing, a standard toolkit will generally suffice․

You will need an adjustable wrench for tightening connections, a basin wrench to access hard-to-reach nuts under the sink, and a Phillips head screwdriver․ A flathead screwdriver may also be useful․ Plumber’s putty is crucial for sealing around the faucet base, and Teflon tape is recommended for threaded connections to prevent leaks․

Additionally, a bucket and towels are necessary to catch any residual water, and a flashlight will aid visibility in dimly lit areas under the sink․ Safety glasses are always recommended to protect your eyes․

Step-by-Step Installation Instructions

Begin by shutting off the water supply to your existing faucet․ Disconnect the old faucet’s water supply lines and remove the old faucet from the sink․ Clean the sink surface thoroughly before applying a bead of plumber’s putty around the base where the new Moen Genta WS84760SRN will sit․

Carefully insert the faucet into the sink opening, ensuring it’s properly aligned․ From underneath the sink, secure the faucet with the mounting hardware provided, tightening it firmly but not excessively․ Connect the water supply lines to the faucet’s tailpieces, using Teflon tape on the threads for a watertight seal․

Finally, turn the water supply back on slowly and check for any leaks․ If leaks are present, tighten the connections further․ Test the faucet’s operation, ensuring both hot and cold water flow correctly․

Connecting Water Supply Lines

Before connecting, ensure the water supply is completely shut off․ Identify the hot and cold water supply lines – typically, red indicates hot and blue indicates cold․ Apply Teflon tape clockwise around the threads of the faucet’s tailpieces to create a watertight seal․ Carefully attach the water supply lines to the tailpieces, hand-tightening initially․

Use adjustable wrenches to gently tighten the connections further, avoiding over-tightening which could damage the faucet or supply lines․ Double-check that the connections are secure and properly aligned․ Slowly turn the water supply back on, monitoring closely for any leaks at the connection points․

If leaks occur, immediately shut off the water and re-tighten the connections․ A drip can indicate a loose connection or damaged supply line; inspect carefully․

Understanding the 1․2 GPM Flow Rate

The Moen Genta WS84760SRN faucet features a 1․2 gallons per minute (GPM) flow rate․ This is a water-efficient design, adhering to modern standards for water conservation without sacrificing adequate water pressure for everyday tasks like handwashing and teeth brushing․ Lower GPM rates reduce water consumption, leading to lower utility bills and a smaller environmental footprint․

While 1․2 GPM is considered efficient, some users accustomed to higher flow rates might perceive a slight difference․ However, Moen’s engineering ensures a satisfying and functional water stream․ The aerator integrated into the faucet mixes air with the water, creating a fuller, more pressurized feel despite the reduced volume․

This flow rate balances performance and responsibility, offering a sustainable solution for your bathroom․

Single-Handle Operation Explained

The Moen Genta WS84760SRN faucet utilizes a straightforward single-handle design for effortless control of both water temperature and flow․ Moving the handle up and down adjusts the water volume, while shifting it left and right controls the temperature․ This intuitive operation allows for quick and precise adjustments with just one hand․

The handle’s smooth range of motion is a key feature, providing a comfortable and responsive user experience․ The design minimizes the effort needed to find your desired water temperature and pressure․ This is particularly convenient when hands are full or when quick adjustments are needed․

Moen prioritizes user-friendly functionality, and the single-handle operation of the Genta faucet exemplifies this commitment․

Faucet Dimensions and Specifications

The Moen Genta WS84760SRN bathroom faucet is designed for single-hole configurations․ While precise dimensions can vary slightly, the overall height typically ranges around 8․19 inches, providing ample clearance for comfortable handwashing․ The spout reach, measuring from the faucet base to the water stream, is approximately 5․12 inches․

The faucet boasts a 1․2 gallons per minute (GPM) flow rate, balancing water conservation with sufficient pressure․ Constructed with a durable metal shell, the Genta ensures long-lasting reliability․ The connection size is a standard ½-inch IPS, facilitating easy integration with existing plumbing․

The Spot Resist Brushed Nickel finish not only enhances aesthetics but also resists fingerprints and water spots, maintaining a pristine appearance․ Detailed specifications are available in installation guides INS10365A & INS10554․

Maintenance and Cleaning

To preserve the beauty and functionality of your Moen Genta WS84760SRN faucet, regular maintenance is key․ Daily wiping with a soft, damp cloth removes water spots and debris․ Avoid abrasive cleaners, as they can damage the Spot Resist Brushed Nickel finish․ For tougher stains, use a mild soap solution and rinse thoroughly․

Recommended Cleaning Products: Moen recommends their own cleaning products designed specifically for their finishes, ensuring no harm comes to the faucet’s protective layers․ Periodically check the aerator for sediment buildup and clean as needed․

Preventative Maintenance Tips: Inspect supply lines for leaks and tighten connections if necessary․ Avoiding Common Issues: Promptly address any drips or unusual noises to prevent more significant problems․ Refer to installation guides INS10365A & INS10554 for detailed care instructions․

Recommended Cleaning Products

Maintaining the pristine look of your Moen Genta WS84760SRN faucet requires the right cleaning agents․ Moen specifically formulates cleaning products designed to protect and enhance their finishes, including the Spot Resist Brushed Nickel․ These are the safest and most effective options for regular cleaning․

Avoid harsh chemicals like bleach, ammonia, or abrasive cleaners, as these can strip the finish and cause permanent damage․ Mild dish soap diluted in warm water is suitable for daily cleaning to remove water spots and grime․ For tougher buildup, consider a dedicated stainless steel cleaner, always testing in an inconspicuous area first․

Microfiber cloths are ideal for cleaning, as they won’t scratch the surface․ Rinse thoroughly after cleaning and dry with a clean, soft towel to prevent watermarks․ Refer to guides INS10365A & INS10554 for further details on product compatibility․

Preventative Maintenance Tips

Proactive care significantly extends the life of your Moen Genta WS84760SRN faucet․ Regularly inspect the faucet for leaks around the base, handle, and supply lines․ Tighten connections as needed, but avoid over-tightening․ Periodically check the aerator for sediment buildup; unscrew and rinse it under running water to maintain optimal flow․

Wipe down the faucet after each use to prevent water spots and mineral deposits, especially if you have hard water․ Avoid placing heavy objects on the faucet handle, as this can damage internal components․ Following the cleaning recommendations – avoiding abrasive cleaners – is crucial for preserving the Spot Resist Brushed Nickel finish․

Consult installation guides INS10365A & INS10554 for diagrams and reminders․ Consistent, gentle maintenance prevents larger issues and ensures years of reliable performance․

Avoiding Common Issues

Many problems with the Moen Genta WS84760SRN faucet are preventable with mindful use․ Avoid applying excessive force to the handle, which can strain internal mechanisms․ Be cautious about what goes down the drain; hair, soap scum, and debris can clog the aerator and reduce water pressure․ Regularly flushing the supply lines can also prevent buildup․

Hard water can lead to mineral deposits, so consider a water softener if you live in an area with hard water․ Always use recommended cleaning products – abrasive cleaners will damage the Spot Resist Brushed Nickel finish․ Refer to installation guides INS10365A & INS10554 for proper installation, as incorrect installation is a frequent cause of leaks․

Promptly address any drips or leaks to prevent further damage and potential water waste․ Consistent attention to these details will ensure long-lasting, trouble-free operation․

Troubleshooting Common Problems

If you encounter issues with your Moen Genta WS84760SRN faucet, start with simple checks․ Low water pressure often stems from a clogged aerator – unscrew and clean it thoroughly․ Check supply lines for kinks or obstructions․ For leaking faucets, inspect connections for tightness; a worn-out O-ring might require replacement․

Handle operation difficulties could indicate sediment buildup within the cartridge; Try removing and cleaning the cartridge, or consider replacing it․ Always shut off the water supply before disassembling any faucet components․ Refer to the installation guides (INS10365A & INS10554) for diagrams and detailed instructions․

If problems persist, don’t hesitate to contact Moen customer support at 1-800-BUY-MOEN for assistance․ Attempting complex repairs without proper knowledge can worsen the issue․

Low Water Pressure Issues

Addressing low water pressure with your Moen Genta WS84760SRN begins with the simplest solutions․ The most frequent cause is a clogged aerator․ Unscrew the aerator at the faucet’s tip and thoroughly rinse it to remove any sediment or debris․ Inspect the water supply lines for any kinks or bends that might restrict flow․

Ensure the shut-off valves under the sink are fully open․ If the issue persists, check for mineral buildup within the faucet cartridge; cleaning or replacing the cartridge may be necessary․ Refer to installation guides INS10365A & INS10554 for detailed disassembly instructions․

Low pressure affecting all faucets suggests a broader plumbing issue, requiring professional attention․ Contact a plumber to assess your home’s water supply․

Leaking Faucet Troubleshooting

A leaking Moen Genta WS84760SRN faucet often stems from a worn-out cartridge, O-rings, or seals․ Begin by shutting off the water supply․ Disassemble the faucet, carefully noting the order of parts – referencing installation guides INS10365A or INS10554 is highly recommended․ Inspect the cartridge for cracks or damage; replacement is usually the best course of action․

Examine the O-rings and seals for wear and tear, replacing them if necessary․ Ensure all connections are tightened securely, but avoid over-tightening, which can cause further damage․ A leak from the base of the faucet might indicate a loose mounting nut․

If the leak persists after these steps, contact Moen customer support at 1-800-BUY-MOEN for assistance or to order replacement parts․

Handle Operation Difficulties

If you experience stiffness or difficulty moving the single handle on your Moen Genta WS84760SRN faucet, the cartridge is the most likely culprit․ Mineral buildup can restrict its movement, or the cartridge itself may be failing․ Begin by attempting to gently work the handle back and forth to loosen any potential obstructions․

If this doesn’t resolve the issue, shut off the water supply and disassemble the faucet, again consulting installation guides INS10365A or INS10554 for guidance․ Inspect the cartridge for corrosion or damage․ Lubricating the cartridge with a plumber’s grease (silicone-based) during reassembly can improve operation․

If the handle remains difficult to move, replacement of the cartridge is recommended․ For further assistance, contact Moen customer support at 1-800-BUY-MOEN․

Warranty Information

Moen extends a limited lifetime warranty on the WS84760SRN Genta faucet to the original purchaser․ This warranty covers defects in materials and workmanship under normal use․ The “lifetime” coverage refers to the duration of the original purchaser’s ownership or occupancy of the property where the faucet is installed․

This warranty does not cover damage resulting from improper installation, misuse, abuse, accidents, cleaning with abrasive products, or normal wear and tear․ For warranty claims, proof of purchase is required․ Moen reserves the right to repair or replace the defective product, at their discretion․

To initiate a warranty claim, contact Moen customer support at 1-800-BUY-MOEN․ Detailed warranty information can also be found on the official Moen website, www․moen․com․

Contacting Moen Customer Support

For immediate assistance with your Moen Genta WS84760SRN faucet, Moen offers several convenient contact options․ You can reach their dedicated customer support team by phone at 1-800-BUY-MOEN (1-800-289-6636)․ Their representatives are available Monday through Friday, from 8:00 AM to 7:00 PM Eastern Time, and on Saturdays from 9:00 AM to 3:00 PM Eastern Time․

Alternatively, Moen provides extensive support through their official website, www․moen․com․ The website features a comprehensive FAQ section, downloadable manuals (including INS10365A & INS10554), and a contact form for submitting inquiries․ Live chat support may also be available during business hours․

When contacting support, have your faucet’s model number (WS84760SRN) and date of purchase readily available to expedite the process․

Finding Replacement Parts

Maintaining your Moen Genta WS84760SRN faucet is simplified by Moen’s readily available replacement parts․ The most efficient way to locate specific components is through the official Moen website, www․moen․com․ Their online parts catalog allows you to search by model number (WS84760SRN) or browse through detailed diagrams of the faucet assembly․

Alternatively, many hardware retailers and plumbing supply stores carry a selection of Moen replacement parts․ When purchasing from a retailer, it’s helpful to have the original part number, if possible, or a clear description of the component you need․

Ensure the replacement part is specifically designed for the Genta series to guarantee compatibility and proper function․ Moen prioritizes making repairs accessible, extending the life of your faucet․

Installation Guide Reference (INS10365A & INS10554)

Moen provides comprehensive installation guides specifically for the Genta series, including the WS84760SRN model․ Two key documents are referenced: INS10365A and INS10554․ These guides offer detailed, step-by-step instructions, accompanied by illustrative diagrams, to ensure a smooth and accurate installation process․

Both guides are available for download directly from the Moen website (www․moen․com) in a PDF format․ They cover everything from preparing the sink to connecting the water supply lines and final testing․ Note that different finishes or slight variations within the Genta series might utilize one guide over the other․

Always consult the appropriate guide for your specific faucet configuration․ Moen strongly encourages referencing these guides before beginning installation and provides customer support contact information within․

Compatibility with Different Sink Types

The Moen Genta WS84760SRN faucet is designed as a single-hole installation, making it broadly compatible with a variety of bathroom sink configurations․ However, certain sink types may require additional components or considerations for a secure and leak-proof fit․

It’s generally suitable for standard countertop sinks with a single pre-drilled faucet hole․ For sinks with multiple holes, a deck plate (escutcheon) might be necessary to cover unused openings, ensuring a clean aesthetic and preventing water damage․ Compatibility also extends to vessel sinks, provided the faucet’s height and reach are appropriate․

Always verify the sink’s hole size and depth before purchasing․ Moen’s installation guides (INS10365A & INS10554) offer guidance on adapting the faucet to different sink setups․

Moen Genta Faucet Variations

The Moen Genta series offers several variations beyond the WS84760SRN model, catering to diverse aesthetic preferences and bathroom designs․ While sharing the signature curved edges and contemporary style, these faucets differ primarily in finish and included accessories․

A prominent alternative is the Genta faucet available in Matte Black, offering a bold and modern look․ Some configurations include an integrated towel ring, providing added convenience․ The core functionality – single-handle operation and a 1․2 GPM flow rate – remains consistent across most Genta models․

It’s crucial to reference the specific model number when ordering replacement parts or consulting installation guides (INS10365A & INS10554) to ensure compatibility․ Moen’s website details all available Genta variations and their respective specifications․

Online Resources and Support (Moen Website)

Moen’s official website, www․moen․com, serves as a comprehensive hub for all Genta faucet support needs․ Users can readily access digital copies of installation guides, including INS10365A and INS10554, offering step-by-step instructions and visual aids․ The site also features detailed product specifications for the WS84760SRN and other Genta variations․

A robust FAQ section addresses common questions regarding installation, maintenance, and troubleshooting․ Furthermore, Moen provides access to a library of helpful videos demonstrating proper installation techniques and preventative maintenance procedures․

For personalized assistance, Moen offers direct customer support via phone (1-800-BUY-MOEN) during business hours (Mon-Fri 8 AM ⸺ 7 PM ET, Sat 9 AM ౼ 3 PM ET)․ The website’s contact form allows for submitting inquiries and receiving prompt responses from Moen’s support team․

Safety Precautions During Installation

Prior to commencing installation of your Moen Genta WS84760SRN faucet, always shut off the water supply to prevent potential flooding and water damage․ Wear appropriate safety glasses to protect your eyes from debris during the process․ Ensure the work area is well-lit and free from obstructions․

Exercise caution when handling tools, following manufacturer’s instructions for safe operation․ Avoid over-tightening connections, as this can damage the faucet or plumbing․ If you are unfamiliar with plumbing procedures, it is strongly recommended to consult a qualified professional․

Be mindful of hot surfaces if working near existing hot water lines․ Properly dispose of all packaging materials and leftover components after installation․ Review the complete installation guide (INS10365A & INS10554) for detailed safety guidelines․

jurassic world evolution 2 trophy guide

Jurassic World Evolution 2 Trophy Guide: A Comprehensive Plan

Embark on a thrilling journey with this guide, detailing all 45 trophies, including the platinum, requiring roughly 83 hours of dedicated gameplay!

Jurassic World Evolution 2’s trophy system presents a substantial challenge for completionists, boasting a total of 45 trophies across the base game, with additional achievements introduced through its four DLC packs. The journey to platinum requires dedication, estimated around 83 hours, encompassing campaign mastery, sandbox perfection, and overcoming unique challenges.

Players will encounter a diverse range of objectives, from completing campaign scenarios on the punishing Jurassic difficulty to meticulously managing park ratings and unlocking every dinosaur species. The system rewards both strategic park building and skillful dinosaur management, demanding a comprehensive understanding of the game’s mechanics.

Platinum Trophy Overview

Achieving the coveted Platinum Trophy in Jurassic World Evolution 2 is a significant undertaking, demanding complete mastery of the game’s multifaceted systems. It necessitates finishing every campaign scenario on the notoriously difficult Jurassic setting, showcasing exceptional strategic planning and adaptability. Beyond the campaign, players must attain 100% game completion, a feat requiring the unlocking of all dinosaur species and the maximization of park ratings across all modes.

This platinum isn’t simply about time investment; it’s about demonstrating a thorough understanding of dinosaur welfare, guest satisfaction, and financial stability. Prepare for a lengthy, yet rewarding, pursuit!

Estimated Platinum Difficulty and Time

The Platinum Trophy for Jurassic World Evolution 2 is considered a challenging endeavor, landing around a 7/10 in difficulty. Expect a substantial time commitment, with most players reporting an estimated completion time of approximately 83 hours. This duration accounts for the demanding campaign scenarios, extensive dinosaur collection, and meticulous park management required for 100% completion.

DLC content will add to this timeframe, potentially extending the platinum run significantly. Patience, strategic planning, and a willingness to learn from failures are crucial for success.

Campaign Mode Trophies

Successfully navigating the campaign demands mastering each scenario, especially on Jurassic Difficulty, unlocking story progression and vital dinosaur-related achievements.

Completing Campaign Scenarios ‒ General Strategies

Prioritize research to unlock essential facilities and dinosaur species quickly, boosting park rating and guest satisfaction. Efficient financial management is crucial; balance income with expenses, focusing on profitable attractions. Maintain high dinosaur welfare to prevent breakouts and ensure breeding success. Strategic placement of amenities and security measures minimizes risks. Respond swiftly to incidents like storms or dinosaur escapes. Complete all objectives within each scenario, including star ratings, for trophy eligibility. Remember to utilize contracts effectively for additional funding and research boosts. Don’t neglect staff training to maximize efficiency and minimize operational costs. Adapt your strategies based on the unique challenges of each location.

Jurassic Difficulty Walkthrough

Jurassic difficulty demands meticulous planning and resource management. Expect frequent and severe storms, escalating dinosaur needs, and reduced financial margins. Prioritize robust security systems – reinforced fences, ample ranger teams, and emergency shelters are vital. Focus on high-profit dinosaurs with lower welfare needs initially. Delay expensive cosmetic upgrades until financially stable. Utilize the loan system cautiously, avoiding excessive debt. Respond instantly to containment breaches; swift action prevents cascading disasters. Master the contract system for consistent income. Save frequently and utilize backup saves to mitigate catastrophic events. Patience and adaptability are key to conquering this challenging mode.

Specific Scenario Challenges & Tips

Each campaign scenario presents unique hurdles. Muerta demands rapid expansion amidst storms; prioritize Triceratops for early income. Isla Nublar requires balancing rescue efforts with park development; focus on containment. The Biosyn Wilderness emphasizes genetic modification; invest heavily in research. Prioritize completing scenario-specific goals before focusing on park rating. Utilize the terrain to your advantage, creating natural barriers. Manage dinosaur comfort levels diligently to prevent breakouts. Don’t neglect staff training; skilled personnel are crucial. Exploit contracts for supplemental income. Save often and reload if a critical event occurs.

Sandbox Mode Trophies

Achieve maximum park rating and unlock all dinosaurs in Sandbox mode; guest satisfaction is key, alongside strategic park management and breeding programs!

Park Rating Maximization

Reaching a five-star park rating in Sandbox mode is crucial for several trophies, demanding meticulous attention to detail. Prioritize guest satisfaction by ensuring ample amenities, diverse food options, and comfortable resting areas.

Maintain high dinosaur welfare through appropriate enclosure sizes, social groupings, and enrichment items. Regularly monitor and address any comfort or health issues. Effective staff management, including ranger teams and security personnel, is vital for preventing escapes and maintaining order.

Financial stability also plays a role; invest wisely in research and development to unlock advanced facilities and attractions, boosting your park’s appeal and overall rating.

Dinosaur Collection Completion

Unlocking every dinosaur species is a significant undertaking, requiring extensive research and successful expeditions. Prioritize genetic modification to achieve optimal dinosaur traits and increase their viability within your park.

Focus on completing all dig sites and genome fragments to unlock new dinosaurs. Successfully hatching and rearing dinosaurs of each species is essential; breeding programs can accelerate this process.

Remember to diversify your collection, including both herbivorous and carnivorous dinosaurs, to create a balanced and engaging park experience. Consistent monitoring of dinosaur health and welfare is paramount for successful breeding and survival.

Guest Satisfaction Strategies

Maintaining high guest satisfaction is crucial for park rating and profitability. Invest in amenities like restaurants, shops, and restrooms, strategically placed throughout the park for convenient access.

Prioritize guest safety by ensuring adequate security measures and responding swiftly to incidents. Regularly monitor guest feedback and address complaints promptly to improve their overall experience.

Enhance the park’s appeal with visually stunning scenery and engaging exhibits. Balancing dinosaur viewing opportunities with comfortable guest facilities is key to maximizing enjoyment and boosting park ratings.

Challenge Mode Trophies

Master unique scenarios demanding strategic park management and quick thinking to unlock exclusive rewards and conquer demanding challenges within the game!

Challenge Mode Specific Strategies

Successfully navigating Challenge Mode requires adapting to unique constraints and objectives. Prioritize rapid response teams and robust security protocols, as containment breaches are frequent. Efficiently manage finances, focusing on essential infrastructure and minimizing unnecessary expenses.

Optimize dinosaur selection based on challenge parameters; some dinosaurs excel in specific scenarios. Utilize research to unlock crucial upgrades, enhancing park safety and guest satisfaction. Regularly assess and adjust park layouts to maximize space and streamline operations.

Remember, completing challenges often demands a balance between profitability, dinosaur welfare, and guest safety – a delicate act requiring careful planning and execution!

Optimizing Challenge Performance

To excel in Challenge Mode, master quick decision-making and resource allocation. Prioritize immediate threats, like dinosaur breakouts, before focusing on long-term park development. Leverage the pause function extensively to analyze situations and issue commands efficiently.

Focus on completing objectives swiftly, as time limits are often strict. Don’t hesitate to utilize loans strategically to address urgent needs, but manage debt carefully. Regularly monitor guest satisfaction and dinosaur welfare to prevent cascading failures.

Remember, adapting to unexpected events is crucial; be prepared to adjust your strategies on the fly to maintain control and achieve victory!

Unlocking All Challenge Rewards

Successfully completing each Challenge Mode scenario unlocks unique rewards, including new dinosaur variants, building blueprints, and cosmetic items for your park. These rewards significantly enhance your options in Sandbox and Campaign modes, offering strategic advantages and aesthetic customization.

Prioritize challenges based on the desirability of their rewards, focusing on those that provide the most impactful benefits for your overall gameplay experience.

Don’t overlook the satisfaction of achieving a perfect score on each challenge, as this demonstrates mastery and unlocks bragging rights within the community!

Dinosaur Management Trophies

Achieve success through dinosaur welfare, breeding programs, and genetic modification – essential for unlocking related trophies and park prosperity!

Dinosaur Welfare & Comfort

Maintaining high dinosaur welfare is crucial for several trophies, demanding attention to their needs. Ensure adequate space, appropriate social groups, and enriching environments. Regularly check dinosaur comfort levels, addressing any stressors like overcrowding or insufficient food.

Prioritize fulfilling species-specific requirements; herbivores need ample vegetation, while carnivores require sufficient prey. Successful breeding programs heavily rely on happy and healthy dinosaurs, directly impacting trophy progression. Ignoring welfare leads to breakouts and negatively affects park rating, hindering overall trophy hunting efforts.

Successful Breeding Programs

Breeding dinosaurs is vital for unlocking the “Genetic Perfection” trophy and completing the dinosaur collection. Prioritize genetic modification to enhance breeding success rates and desirable traits. Ensure dinosaurs have high welfare and are in appropriate social groups to encourage mating.

Carefully manage incubation and rearing facilities, providing optimal conditions for hatchlings. Selling offspring contributes to financial goals, while maintaining genetic diversity is key. Consistent breeding unlocks research opportunities and boosts park appeal, accelerating trophy progress.

Genetically Modifying Dinosaurs

Genetic modification is crucial for unlocking several trophies, including those related to dinosaur welfare and breeding programs. Focus on enhancing dinosaur resilience to diseases and improving their comfort levels in various environments. Prioritize modifications that increase appeal to guests, boosting park ratings and revenue.

Experiment with different gene combinations to create unique dinosaur variants. Successfully modifying dinosaurs unlocks research opportunities and contributes to completing the dinosaur collection. Remember, careful genetic planning is essential for long-term park stability and trophy achievement.

Park Management Trophies

Achieve financial stability, maintain high security, and efficiently manage staff to unlock these trophies – essential for a thriving Jurassic World!

Financial Stability & Profitability

Securing consistent profits is paramount for several Park Management Trophies. Players must carefully balance expenses with revenue, optimizing ticket prices, amenity costs, and research investments. Efficiently managing loans and avoiding bankruptcy are crucial steps.

Focus on guest satisfaction to drive attendance and spending. Strategic placement of shops and restaurants maximizes income. Completing research that boosts park appeal and dinosaur health also contributes to long-term financial success. Regularly reviewing financial reports and adjusting strategies accordingly is key to unlocking these achievements.

Security Measures & Containment Breaches

Maintaining robust security is vital, as containment breaches can lead to significant financial losses and guest casualties. Invest heavily in security fences, patrol teams, and tranquilizer stations. Proactive monitoring of dinosaur welfare minimizes the risk of breakouts due to stress or illness.

Successfully managing a breach – quickly containing the dinosaur and minimizing damage – can unlock specific Park Management Trophies. However, preventing breaches altogether is the most efficient strategy. Regularly assess security vulnerabilities and upgrade infrastructure to ensure park safety and profitability.

Staff Management & Efficiency

Optimizing staff performance is crucial for park efficiency and profitability. Hire scientists with high research skills, security personnel with strong combat stats, and engineers adept at quick repairs. Regularly train staff to improve their abilities and maintain high morale.

Efficient staff allocation – ensuring the right personnel are assigned to the appropriate tasks – minimizes downtime and maximizes output. Addressing staff needs, like providing adequate facilities, boosts productivity. Skilled staff contribute significantly to unlocking Park Management Trophies and achieving overall park success.

DLC Trophy Considerations

Explore the additional challenges! Four DLC packs add 10 trophies, expanding the base game’s 45, demanding mastery of new dinosaurs and scenarios.

Dominion Biosyn Expansion Trophies

The Dominion Biosyn Expansion introduces a new campaign and associated trophies, centered around a compelling narrative mirroring the film. Players will navigate challenging scenarios within a Biosyn Wildlife Sanctuary setting, requiring strategic park management and dinosaur handling. Expect trophies tied to completing campaign missions on varying difficulties, successfully containing breakouts, and achieving specific research milestones.

Furthermore, unlocking all new dinosaurs featured in the expansion is crucial for completionists. Mastering the unique characteristics of these creatures and integrating them into a thriving park will unlock further achievements. Be prepared for demanding objectives that test your skills in both park building and dinosaur welfare, ultimately leading to the expansion’s platinum reward.

Early Cretaceous Expansion Trophies

The Early Cretaceous Expansion focuses on introducing dinosaurs from a previously unexplored period, presenting unique challenges and trophy opportunities. Expect achievements centered around successfully integrating these new species into your parks, managing their specific needs, and completing research objectives related to their behavior and genetics.

Players will likely encounter trophies tied to successfully breeding these early Cretaceous dinosaurs, achieving high welfare ratings, and showcasing them to guests. Mastering the unique demands of these creatures, such as dietary requirements and social behaviors, is key. Completing all campaign missions and unlocking all dinosaurs within the expansion are vital steps towards platinum completion.

Late Cretaceous Expansion Trophies

The Late Cretaceous Expansion adds formidable new dinosaurs, demanding advanced park management skills for trophy hunters. Expect challenges revolving around containing larger, more aggressive species and maintaining guest safety amidst increased threat levels. Trophies will likely reward successful implementation of enhanced security measures and effective response to containment breaches.

Completing research objectives specific to these Late Cretaceous dinosaurs, achieving high genome levels, and successfully breeding them will be crucial. Mastering their unique needs, like specialized habitats and social dynamics, is essential. Expect trophies tied to park rating achievements specifically incorporating these new prehistoric giants;

Camp Cretaceous Expansion Trophies

The Camp Cretaceous expansion introduces unique challenges centered around managing a dinosaur camp for younger visitors, demanding a focus on safety and entertainment. Trophies will likely involve maintaining high camp guest satisfaction, successfully completing camp-specific missions, and ensuring the well-being of campers during various events.

Expect achievements tied to building and upgrading camp facilities, unlocking exclusive camp-themed dinosaurs, and responding effectively to incidents within the camp perimeter. Successfully navigating the narrative elements of the expansion and achieving specific milestones within the camp storyline will also contribute to trophy progression.

Rare & Missable Trophies

Prioritize backup saves! Certain dinosaur unlocks and story choices are easily missed, demanding careful planning and a checklist for 100% completion.

Identifying Missable Achievements

Several achievements in Jurassic World Evolution 2 are easily missed, often tied to specific campaign choices or dinosaur unlocks. Pay close attention during story missions, as branching paths can lock you out of certain trophies. Dinosaur-related achievements, particularly those requiring specific genetic modifications or breeding successes, demand diligent tracking.

Furthermore, DLC content introduces its own set of missable trophies, so ensure thorough exploration and completion of each expansion. Regularly check your trophy progress and utilize a checklist to avoid overlooking crucial objectives; Don’t hesitate to consult online resources and community guides for detailed information on potential pitfalls and optimal strategies.

Strategies for Obtaining Rare Trophies

Securing the rarer trophies in Jurassic World Evolution 2 demands meticulous planning and execution. For dinosaur-focused achievements, prioritize genetic modifications and breeding programs early on, maximizing your chances of success. Campaign trophies on Jurassic difficulty require strategic resource management and a deep understanding of game mechanics.

Sandbox mode offers a controlled environment for tackling collection and park rating challenges. Utilize save backups frequently, especially before attempting difficult scenarios. Community resources and guides can provide invaluable insights and optimized strategies for overcoming particularly challenging objectives.

Backup Saves & Checklist

Regular save backups are crucial for mitigating potential glitches or unforeseen issues during your platinum run in Jurassic World Evolution 2. Prioritize backing up before attempting challenging scenarios, particularly those on Jurassic difficulty, or undertaking complex genetic modifications.

Maintain a detailed checklist to track your progress towards all 45 trophies, including DLC achievements. This ensures you don’t miss any missable objectives. Regularly review the checklist and cross off completed tasks, staying organized throughout your trophy hunting journey for optimal efficiency.

Troubleshooting & Common Issues

Address potential trophy glitches with workarounds, consult community resources for help, and optimize game settings for a smoother, more reliable trophy-hunting experience.

Trophy Glitches & Workarounds

Encountering trophy issues in Jurassic World Evolution 2 can be frustrating, but solutions often exist. Some players have reported trophies failing to unlock after completing requirements, particularly those tied to DLC content. A common workaround involves fully exiting the game and restarting, ensuring a complete shutdown, not just minimizing.

Verify game file integrity through your platform’s verification tool (Steam, PlayStation, Xbox) to address corrupted data. If a specific trophy remains elusive, check online forums and communities for reported glitches and player-discovered fixes. Saving frequently and backing up save files is crucial, mitigating potential data loss from unforeseen errors.

Community Resources & Help

Navigating the path to the Jurassic World Evolution 2 Platinum Trophy is easier with community support! Dedicated forums like Reddit’s r/JurassicWorldEvolution2 and Stratege.ru offer valuable insights, troubleshooting tips, and shared experiences. YouTube channels frequently post trophy guides and gameplay walkthroughs, providing visual assistance for challenging achievements.

Discord servers dedicated to the game foster real-time collaboration and quick answers to questions. Websites like PSNProfiles maintain detailed trophy lists, completion rates, and user-submitted guides. Don’t hesitate to seek help – the community is generally welcoming and eager to assist fellow players!

Optimizing Game Settings for Trophy Hunting

To streamline your trophy journey in Jurassic World Evolution 2, prioritize stability over visual fidelity. Lowering graphics settings can minimize potential glitches and improve performance, especially during demanding tasks like breeding or large-scale park management. Ensure autosaves are frequently enabled to mitigate progress loss from unexpected crashes.

Experiment with game speed; slowing it down can aid precision during challenging scenarios. Regularly check for game updates, as Frontier Developments often releases patches addressing bugs and improving overall stability. A stable game environment is crucial for consistent trophy progress!

th5220d1029 installation manual pdf

Honeywell TH5220D1029 Thermostat: A Comprehensive Guide

Accessing the TH5220D1029 installation manual PDF is crucial for proper setup; Home Depot provides a downloadable version at their website for convenient reference.

The Honeywell TH5220D1029 is a non-programmable digital thermostat designed for reliable and straightforward temperature control within your home. It’s part of the FocusPRO series, catering to systems with up to two stages of heating and cooling. Understanding its functionalities begins with accessing vital documentation, specifically the TH5220D1029 installation manual PDF.

This manual, readily available online – for example, through Home Depot’s website – provides detailed guidance on installation, wiring, and operation. It’s essential reading before commencing any work with the thermostat. The guide covers models TH5110D (1 system), TH5220D (2 systems), and TH5320D (3 heating/2 cooling), ensuring compatibility information is clear.

The TH5220D1029 offers a user-friendly interface, but proper installation, as detailed in the PDF, is paramount for optimal performance and safety. Familiarizing yourself with the manual will empower you to effectively manage your home’s climate control system.

What’s Included in the Box

While a definitive list isn’t explicitly detailed in readily available snippets, referencing the TH5220D1029 installation manual PDF is crucial for confirming the complete contents. Generally, you can expect the thermostat itself – a non-programmable digital unit – and a mounting baseplate for wall installation.

Essential for a successful setup are the included screws and wall anchors, facilitating secure attachment. The package should contain wire labels, vital for correctly identifying existing wiring during the replacement process. However, the manual PDF is the ultimate authority on verifying all components are present.

It’s important to note that professional installation might require additional tools not supplied, such as a screwdriver and wire strippers. Always consult the PDF documentation to ensure you have everything needed before beginning, preventing delays and ensuring a smooth installation experience.

Safety Precautions

Prior to commencing any installation work with the Honeywell TH5220D1029, consulting the TH5220D1029 installation manual PDF is paramount for safety. Crucially, always disconnect power to your heating and cooling system at the breaker box before handling any wiring. This prevents electrical shock and potential damage to the thermostat or system.

Exercise caution when dealing with wiring; incorrect connections can lead to system malfunction or hazardous conditions. If you are uncomfortable working with electrical wiring, it’s strongly recommended to enlist the services of a qualified HVAC technician.

The manual PDF will detail specific warnings regarding proper grounding and adherence to local electrical codes. Never bypass safety features or attempt to modify the thermostat beyond the instructions provided. Following these precautions ensures a safe and successful installation process, protecting both yourself and your home.

Installation Process

The TH5220D1029 installation manual PDF guides users through wiring, mounting, and connection steps, ensuring a smooth and accurate installation of your new thermostat.

Wiring Diagram Overview

The TH5220D1029 installation manual PDF provides detailed wiring diagrams essential for a successful installation. These diagrams illustrate the correct connections for various system types, including conventional heating and cooling, heat pumps, and millivolt systems. Carefully studying the diagram corresponding to your specific system is paramount before commencing any wiring work.

Typically, terminals are labeled for common wire (C), heating (W), cooling (Y), fan (G), and potentially auxiliary heat (AUX) or emergency heat (E). The PDF clarifies which wires from your existing thermostat correspond to these terminals on the Honeywell TH5220D1029 base. Incorrect wiring can lead to system malfunction or damage, so double-checking each connection against the diagram is vital. The manual also often includes notes on compatible wire gauges and potential wiring configurations for different setups, ensuring a secure and functional connection.

Identifying Your System Type (Heating & Cooling)

The TH5220D1029 installation manual PDF emphasizes the importance of correctly identifying your heating and cooling system before installation. The thermostat supports various configurations, including conventional systems (furnace and air conditioner), heat pumps, and even millivolt systems. Misidentifying your system will lead to incorrect wiring and operational issues.

The manual guides you through a series of questions to determine your system type. Consider whether you have a gas furnace, oil furnace, electric furnace, or a heat pump. Note if you have central air conditioning, and if so, whether it’s a single-stage or multi-stage system. The PDF often includes visual aids and descriptions to help differentiate between these systems. Accurate identification ensures you select the appropriate wiring diagram and programming settings within the thermostat, guaranteeing optimal performance and efficiency. Referencing your existing system’s documentation can also be helpful.

Mounting the Thermostat Base

The TH5220D1029 installation manual PDF details a straightforward process for mounting the thermostat base. Begin by turning off power to your HVAC system at the breaker box – a crucial safety step. The manual recommends using the included mounting screws and wall anchors if necessary, ensuring a secure attachment to the wall.

Position the base plate where your old thermostat was located, or choose a new, representative location, avoiding direct sunlight or drafts. Use a level to ensure the base is perfectly horizontal. The PDF provides clear diagrams illustrating proper screw placement. Carefully feed the existing thermostat wires through the opening in the base plate. Once aligned and leveled, securely fasten the base to the wall. Double-check the stability of the mount before proceeding to the wiring stage, as a loose base can cause connection issues and inaccurate readings.

Connecting the Wires – Step-by-Step

The TH5220D1029 installation manual PDF emphasizes careful wire connection for optimal performance. Before starting, reconfirm power is OFF at the breaker. The manual provides a detailed wiring diagram, crucial for identifying each wire’s function (R, W, Y, G, C, etc.).

Using the provided terminal block screws, connect each wire to its corresponding terminal on the thermostat base. Ensure each wire is securely fastened – loose connections can cause malfunctions. The PDF highlights the importance of the ‘C’ wire (common wire) for consistent power. If your old thermostat lacked a ‘C’ wire, the manual suggests consulting a professional for assistance. Double-check all connections against the diagram before proceeding. Gently tug on each wire to confirm it’s firmly held in place. Incorrect wiring can damage your HVAC system, so accuracy is paramount.

Attaching the Thermostat to the Base

The TH5220D1029 installation manual PDF details a straightforward attachment process. After verifying all wiring connections, carefully align the thermostat body with the mounted baseplate. Ensure the thermostat sits flush against the base, avoiding any gaps or misalignment.

The manual illustrates a simple snapping or clipping mechanism to secure the thermostat. Gently press the thermostat onto the base until you hear or feel a click, confirming it’s properly locked in place. Avoid forcing it, as this could damage the internal components. Once attached, lightly test the thermostat’s stability to ensure it’s firmly secured. The PDF advises against excessive force during attachment. A secure fit is essential for reliable operation and prevents accidental disconnections. Refer to the manual’s diagrams for visual guidance on the correct attachment method.

Thermostat Programming & Operation

The TH5220D1029 installation manual PDF explains that this is a non-programmable digital thermostat, offering simple temperature adjustments and system mode selections.

Understanding the Display Icons

The TH5220D1029 installation manual PDF details the various icons displayed on the thermostat’s screen, providing crucial insight into its current operational status. Understanding these symbols is key to effectively managing your home’s heating and cooling system. The display clearly indicates the current system mode – Heat, Cool, or Off – allowing for quick verification of the selected setting.

Furthermore, icons signify whether the fan is operating in Auto mode, circulating air only when heating or cooling, or On mode, providing continuous airflow. The manual explains that a flame icon denotes active heating, while a snowflake icon indicates cooling is in progress. A battery icon alerts users to low battery levels, prompting replacement. Other icons may indicate specific system faults or operational conditions, as detailed within the comprehensive PDF guide. Familiarizing yourself with these icons ensures efficient and informed thermostat operation.

Setting the Temperature

The TH5220D1029 installation manual PDF provides clear instructions on adjusting the desired temperature. The thermostat utilizes up and down arrow buttons to increase or decrease the setpoint, displayed prominently on the screen. The manual emphasizes that the displayed temperature represents the target temperature, not necessarily the current room temperature.

Users can set separate temperatures for heating and cooling modes, tailoring the climate control to their preferences. The guide details how to ensure the selected temperature aligns with comfort levels and energy efficiency goals. It’s important to note that the thermostat responds to button presses with a visual confirmation on the display. The PDF also clarifies that the temperature scale (Fahrenheit or Celsius) is typically set during initial installation, but can sometimes be adjusted within the settings menu, as outlined in the manual. Precise temperature control is readily achievable with careful reference to the provided documentation.

System Mode Selection (Heat, Cool, Off)

The TH5220D1029 installation manual PDF details how to cycle through the available system modes: Heat, Cool, and Off. Typically, a dedicated “Mode” button allows users to select the desired operation. The manual stresses the importance of selecting the correct mode based on the season and desired climate control. In “Heat” mode, the thermostat activates the heating system when the room temperature falls below the setpoint. Conversely, “Cool” mode activates the cooling system when the temperature exceeds the setpoint.

The “Off” mode disables both heating and cooling, allowing for manual control or ventilation; The PDF clarifies that some models may feature an “Auto” mode, automatically switching between heating and cooling to maintain the set temperature. Understanding these modes, as explained in the manual, is crucial for efficient and comfortable operation. The guide also highlights potential limitations based on the system wiring and configuration.

Fan Control Settings (Auto, On)

The TH5220D1029 installation manual PDF thoroughly explains the fan control options: “Auto” and “On.” In “Auto” mode, the fan operates only during heating or cooling cycles, circulating air when the system is actively working to adjust the temperature. This is the most energy-efficient setting. Selecting “On” forces the fan to run continuously, regardless of whether heating or cooling is active, providing consistent air circulation and potentially improving air quality.

The manual details that continuous fan operation can slightly increase energy consumption. It also notes that some systems may benefit from constant air circulation, particularly those with uneven temperature distribution. The PDF emphasizes that the optimal setting depends on individual preferences and the specific characteristics of the home’s HVAC system. Proper understanding, as outlined in the manual, ensures comfortable and efficient climate control.

Troubleshooting Common Issues

The TH5220D1029 installation manual PDF offers guidance for resolving problems, including power failures, temperature inaccuracies, and unresponsive heating/cooling systems.

Thermostat Not Powering On

If your Honeywell TH5220D1029 thermostat fails to power on, consulting the TH5220D1029 installation manual PDF is the first step. Begin by verifying the power source – ensure the system’s breaker hasn’t tripped. The manual details checking the wiring connections at both the thermostat and the furnace/air handler, confirming secure and correct placement according to the wiring diagram.

A common issue involves a disconnected or faulty C-wire (common wire), essential for providing continuous power. The manual illustrates how to identify and test the C-wire connection. Additionally, inspect the batteries (if applicable) and replace them if necessary. The PDF guide also provides troubleshooting steps for scenarios where the transformer supplying power to the system may be defective, advising on when to contact a qualified HVAC technician for further assistance. Always prioritize safety and disconnect power before inspecting wiring.

Incorrect Temperature Readings

When the Honeywell TH5220D1029 displays inaccurate temperature readings, the TH5220D1029 installation manual PDF suggests several checks. First, ensure the thermostat isn’t directly exposed to sunlight, drafts, or heat-generating appliances, as these can skew readings. The manual details proper thermostat placement for optimal accuracy.

Next, explore the temperature calibration feature, outlined in the PDF, allowing for minor adjustments to align the displayed temperature with a trusted thermometer. If the issue persists, verify the thermostat’s internal sensor hasn’t been damaged. The manual provides guidance on identifying potential sensor failures. Furthermore, confirm that the thermostat is correctly configured for your system type (heat pump vs. conventional). Incorrect settings can lead to inaccurate temperature reporting. If calibration doesn’t resolve the problem, professional HVAC assistance may be required.

Heating or Cooling Not Responding

If your Honeywell TH5220D1029 isn’t initiating heating or cooling, consult the TH5220D1029 installation manual PDF for troubleshooting steps. Begin by verifying the system mode is correctly set to “Heat” or “Cool,” as detailed in the manual’s operation section. Next, check the thermostat’s wiring connections against the diagram within the PDF, ensuring all wires are securely fastened to their corresponding terminals.

The manual emphasizes checking your breaker panel to confirm the HVAC system’s circuit hasn’t tripped. Also, confirm the furnace or air conditioner is receiving power. If wiring appears correct and power is confirmed, the issue might lie with the system itself, not the thermostat. The PDF suggests contacting a qualified HVAC technician for further diagnosis and repair. Remember to review the manual’s safety precautions before attempting any electrical checks.

Display Errors and Codes

The TH5220D1029 installation manual PDF provides a comprehensive list of display errors and corresponding troubleshooting steps. These codes indicate specific issues within the system, ranging from wiring problems to sensor malfunctions. The manual details how to interpret each code, guiding users toward potential solutions. For instance, certain codes may signal a faulty temperature sensor, while others point to communication errors between the thermostat and the HVAC equipment.

Referencing the manual’s error code section is crucial before attempting any repairs. It advises against disassembling the thermostat itself, as this could void the warranty. If an error code persists despite following the manual’s instructions, it’s recommended to contact Honeywell support or a qualified HVAC technician. The PDF also emphasizes the importance of noting the exact error code when seeking assistance, facilitating a quicker and more accurate diagnosis.

Advanced Features & Settings

The TH5220D1029 installation manual PDF details advanced settings like filter change reminders and temperature calibration, offering customized control over your HVAC system.

Filter Change Reminder

The Honeywell TH5220D1029 thermostat offers a valuable filter change reminder feature, enhancing your HVAC system’s efficiency and air quality. Detailed instructions on enabling and customizing this reminder are readily available within the TH5220D1029 installation manual PDF. This feature doesn’t automatically track usage; instead, it allows you to program a reminder based on a time interval – typically 1, 3, 6, or 12 months – to prompt filter replacement.

Consulting the manual is essential to understand how to access the settings menu and navigate to the filter reminder option. Properly maintaining your air filter is crucial for optimal system performance, reducing energy consumption, and prolonging the lifespan of your heating and cooling equipment. The manual provides clear, step-by-step guidance to ensure you can effectively utilize this beneficial feature.

Temperature Calibration

The Honeywell TH5220D1029 thermostat allows for temperature calibration, a useful function if you suspect the displayed temperature doesn’t accurately reflect the actual room temperature. The TH5220D1029 installation manual PDF provides detailed instructions on how to access and utilize this calibration feature. It’s important to note that calibration should only be performed if you have a reliable, calibrated thermometer for comparison.

The manual guides you through navigating the thermostat’s settings menu to locate the temperature offset adjustment. You can then increase or decrease the displayed temperature in small increments (typically 1 or 2 degrees) until it matches your reference thermometer. Accurate calibration ensures your system operates efficiently and maintains comfortable temperatures. Avoid excessive calibration, as it can impact system performance; refer to the manual for recommended calibration ranges.

Resetting the Thermostat to Factory Defaults

Occasionally, you might need to reset your Honeywell TH5220D1029 thermostat to its original factory settings. This is particularly useful when troubleshooting persistent issues or preparing the thermostat for a new installation. The TH5220D1029 installation manual PDF outlines the specific procedure for performing a factory reset, which typically involves a combination of button presses and holding them for a designated duration.

Before initiating a reset, understand that this action will erase all personalized settings, including programmed schedules, temperature preferences, and any calibration adjustments. After the reset, you’ll need to reconfigure the thermostat from scratch. The manual emphasizes carefully following the steps to avoid unintended consequences. A factory reset can resolve software glitches and restore the thermostat to a known working state, ensuring optimal performance.

Resources & Documentation

The TH5220D1029 installation manual PDF, readily available online via Home Depot, provides comprehensive guidance for installation, operation, and troubleshooting your Honeywell thermostat.

Downloading the TH5220D1029 Installation Manual PDF

Accessing the official installation manual in PDF format is a vital first step before beginning any work with your Honeywell TH5220D1029 thermostat. Fortunately, Honeywell makes this resource easily available. A direct link to the PDF can be found on the Home Depot website, specifically within the product catalog section – look for the document identifier c50ba4f9-6ab4-4427-8bf6-6ca7b2fe1649.pdf.

This comprehensive document details everything from initial wiring diagrams and system type identification to step-by-step installation instructions and troubleshooting guides. It’s essential for both DIY enthusiasts and professional installers. The manual covers non-programmable digital thermostat operation, ensuring you understand all features. Downloading and reviewing this PDF will prevent errors and guarantee a successful installation, maximizing the performance and longevity of your Honeywell TH5220D1029.

Honeywell Support Contact Information

While the TH5220D1029 installation manual PDF provides extensive guidance, direct support from Honeywell is readily available should you encounter difficulties. Though specific contact details weren’t explicitly provided in the sourced information, Honeywell’s general support channels are accessible through their official website. These typically include a comprehensive online help center with FAQs, troubleshooting articles, and downloadable resources – including potentially updated manuals.

For more personalized assistance, Honeywell usually offers phone support and email contact options. Searching “Honeywell Home support” will lead you to the most current contact information. Remember to have your thermostat’s model number (TH5220D1029) readily available when contacting support. Utilizing these resources, alongside the readily available PDF manual, ensures a smooth installation and ongoing operation of your Honeywell thermostat, resolving any issues efficiently.

Finding Local Distributors

Although the TH5220D1029 installation manual PDF offers comprehensive self-help, sometimes a local expert is invaluable. Honeywell’s website features a “Locate a Distributor” tool, enabling you to find authorized dealers and retailers near your location. These distributors can provide the thermostat itself, alongside any necessary accessories like wiring or mounting hardware. They also offer professional installation services if you prefer not to tackle the project yourself.

Major home improvement retailers, such as Home Depot (where the manual PDF is hosted), frequently stock Honeywell thermostats, including the TH5220D1029. Local HVAC (Heating, Ventilation, and Air Conditioning) supply stores are another excellent resource. Visiting these stores allows you to discuss your specific heating and cooling system with knowledgeable staff, ensuring compatibility and a successful installation. Remember to bring a copy of the manual PDF for reference during your consultation.

column manual shifter

Column manual shifters, offering full control, simplified braking, were prevalent before automatics improved significantly in the late 90s and 2000s.

Historical Context of Column Shifters

Early automotive designs frequently employed column shifters, particularly the “three-on-the-tree” configuration, gaining prominence in the 1930s and continuing through the 1960s. This layout offered a space-saving solution within the vehicle cabin, predating the widespread adoption of floor-mounted shifters.

Initially, column shifters were favored for their simplicity and cost-effectiveness. However, as automatic transmissions gained traction, the demand for manual transmissions—and consequently, column shifters—began to decline. The late 1990s and early 2000s witnessed a turning point; automatics started achieving comparable, and even superior, performance metrics, like 0-60 times, to manual counterparts.

Despite this shift, column shifters maintained a presence in certain American-made vehicles until the early 2000s, representing a nostalgic link to a bygone era of automotive engineering.

Advantages of Column Shifters

Column shifters historically provided distinct advantages, notably offering drivers full control over the vehicle’s operation. This direct mechanical connection translated to a more engaging driving experience, particularly valued before the refinement of automatic transmissions. A key benefit was simplified braking, as the absence of a torque converter in manual systems allowed for more immediate response.

Furthermore, the design freed up floor space, a consideration in earlier vehicle interiors. While requiring more driver focus—necessitating attention to both feel and the shifter pattern—some drivers appreciated the distinct haptic feedback, resembling polystable gear shifters.

The stopping sensation during shifts could aid accuracy, a feature valued by those accustomed to the system.

Disadvantages of Column Shifters

Column shifters, despite their historical appeal, presented several drawbacks. The design demanded significant driver attention, increasing the risk of inadvertently sliding past the intended gear. This was particularly true with simpler “mono I/J” patterns, requiring constant mental mapping of the shifter’s layout.

Reliance on tactile feedback was crucial, as drivers needed to feel the engagement of each gear, adding a layer of complexity. Compared to modern shifters, the haptic cues could be less definitive, potentially leading to shifting errors.

The increased cognitive load could detract from overall driver focus, and the system’s inherent complexity wasn’t universally intuitive, especially for new drivers.

Mechanical Components of a Column Manual Shifter

Column shifters utilize a shift linkage system integrated into the steering column, incorporating a crucial neutral safety switch for operational functionality and driver protection.

Shift Linkage System

The shift linkage system is the core mechanical connection between the column-mounted shifter and the transmission itself. This system translates the driver’s lever movements into gear selections within the gearbox. Early systems often employed simple rods and levers, sometimes susceptible to wear and requiring periodic adjustment to maintain precise shifting.

These linkages needed to be robust enough to withstand the forces applied during gear changes, yet flexible enough to accommodate the vehicle’s chassis flex. Proper adjustment is critical; loose linkages can result in imprecise shifts or even difficulty selecting a gear. Conversely, overly tight linkages can strain the system and lead to premature failure. The design aimed for a direct and positive feel, though often lacking the precision of floor-mounted setups.

Steering Column Integration

Integrating the shifter directly into the steering column presented unique engineering challenges. Designers had to ensure the shifting mechanism didn’t interfere with steering functionality or driver comfort. This often involved careful packaging of components within the column itself, alongside wiring for signals and potentially the horn.

The column needed to be reinforced to handle the stresses imposed by shifting, particularly in older vehicles. Universal joints and bearings were crucial for smooth operation and to prevent binding. The placement of the shifter lever also impacted ergonomics; finding a natural and accessible position was key. This integration, while space-saving, sometimes compromised the direct feel and precision compared to floor-mounted shifters.

Neutral Safety Switch Functionality

Neutral safety switches are critical components in column shifter systems, preventing the engine from starting unless the transmission is in Park or Neutral. This safety feature mitigates accidental vehicle movement during startup, a vital consideration for driver and bystander safety. The switch is mechanically linked to the shifter linkage, ensuring accurate detection of the transmission’s position.

These switches often incorporate multiple contacts for redundancy and may also control other functions, like the transmission lock-out. Failure of the neutral safety switch can prevent starting, or, more dangerously, allow starting in gear. Regular inspection and testing of this switch are essential maintenance procedures for vehicles equipped with column shifters, ensuring continued safe operation.

Types of Column Shifters

Column shifters evolved from three-on-the-tree to four-speed configurations, with modern variations emerging, adapting to changing automotive technology and driver preferences.

Three-on-the-Tree Shifters

Three-on-the-tree shifters represent the earliest widespread form of column-mounted manual transmissions. This system, common from the 1930s through the 1960s, featured a single column stalk controlling gear selection with a distinct pattern – typically Reverse, First, and Second on the steering column itself, with Third and Fourth gears accessible by pushing the lever further down and moving it laterally.

Drivers needed to memorize the ‘H’ pattern and rely heavily on tactile feedback, as visual cues were minimal. The risk of mis-shifting was higher, requiring focused attention on feeling the gear engagement. While offering a unique driving experience, these shifters demanded more driver involvement compared to later designs or floor-mounted alternatives. The stopping sensation resembled polystable gear shifters, providing a tactile advantage.

Four-Speed Column Shifters

Four-speed column shifters emerged as an evolution of the three-on-the-tree design, offering an additional gear for improved highway cruising and overall efficiency. These systems retained the column-mounted stalk but incorporated a more complex shift pattern to accommodate the fourth gear. While still relying on tactile feedback and driver memorization of the ‘H’ pattern, the added gear provided a wider range of ratios.

Like their three-speed predecessors, four-speed column shifters demanded driver focus to avoid mis-shifts, particularly when transitioning between gears. The stopping sensation was crucial for confirming engagement. These shifters were prevalent through the 1970s, representing a peak in column-shift manual transmission technology before floor shifters gained dominance, offering full control.

Modern Column Shifter Variations

Modern column shifter variations are exceedingly rare, largely confined to specialized applications or retro-styled vehicles. While true manual column shifters have largely disappeared, some vehicles employ column-mounted levers for electronically controlled automatic transmissions with manual mode. These systems often utilize buttons or a toggle switch for gear selection, rather than a traditional mechanical linkage.

These modern iterations aim to offer a semblance of the classic column-shift feel, but lack the direct mechanical connection and tactile feedback of older designs. The shift experience relies heavily on visual cues and electronic confirmation. Though offering convenience, they don’t replicate the full control of a traditional manual, and automatics have surpassed them in speed and efficiency.

Usability and Ergonomics

Column shifters demanded driver focus on feel and pattern, with mono T stopping sensations resembling polystable gear shifters, reducing sliding errors.

Comparison of Haptic Feedback in Different Shifter Designs

Haptic feedback varied significantly between shifter designs, notably comparing column shifters to more modern counterparts. The “three-on-the-tree” column shift offered a distinct stopping sensation, particularly with the mono T pattern, which some drivers found resembled the feel of polystable gear shifters.

This tactile feedback aided in preventing accidental overshifting, a common concern with simpler mono I/J designs where it was easier to slide past the intended gear. Modern shifters, including those with manual modes in automatics, often rely on more subtle cues, requiring greater driver awareness. The column shifter’s pronounced stopping point provided a clear indication of gear engagement, potentially reducing shifting errors and enhancing driver confidence, especially in older vehicles.

Impact of Visual Cues on Shifting Accuracy

Visual cues played a crucial role in the accurate operation of column manual shifters, demanding drivers maintain a mental map of the shift pattern. Unlike modern shifters with defined gates, the column shifter required constant visual confirmation of the selected gear. The driver needed to actively remember the shifter’s layout – whether a three-on-the-tree or four-speed configuration – to avoid mis-shifts.

The absence of strong haptic feedback in some designs further emphasized the importance of visual awareness. Drivers had to focus on the shifter’s position relative to the steering column, increasing cognitive load. This reliance on visual memory contrasted with more intuitive shifter designs, highlighting the unique challenges presented by column-mounted manual transmissions.

Driver Focus and Shifting Errors

Column shifters demanded a higher degree of driver concentration due to the less intuitive shifting experience. The risk of “sliding past” the intended gear, particularly with simpler I/J patterns, increased the potential for errors. Drivers needed to simultaneously manage steering, braking, and gear selection, placing a significant cognitive burden on the operator.

The lack of robust haptic feedback meant drivers relied heavily on feel and memory, making mis-shifts more common. Maintaining awareness of the shifter pattern was paramount, and distractions could easily lead to incorrect gear engagement. This contrasts with modern transmissions, where clearer feedback minimizes such errors, emphasizing the need for heightened focus when operating a column manual shifter.

Performance Considerations

Older cars with manuals were faster, but automatics improved significantly in the late 90s-2000s, eventually surpassing manuals in speed and efficiency.

Manual vs. Automatic with Manual Mode: Speed and Efficiency

Historically, a manual gearbox, like those paired with column shifters, offered superior speed and efficiency compared to automatics. However, this dynamic shifted considerably towards the late 1990s and into the 2000s. Advancements in automatic transmission technology began to close, and then surpass, the performance gap.

Initially, the advantage of a manual lay in its direct mechanical connection, minimizing power loss. Yet, modern automatics, particularly those with manual modes (paddle shifters or selectable gear ranges), implemented sophisticated control systems and faster shift times. These improvements allowed automatics to achieve comparable, and often better, acceleration figures – specifically in 0-60 mph times – than their manual counterparts.

The subjective experience also plays a role; the engagement of a clutch and precise shifting in a manual provides a different driving feel, but doesn’t necessarily translate to quantifiable speed advantages in contemporary vehicles.

Evolution of Automatic Transmission Performance (Late 90s ⎼ 2000s)

The period between the late 1990s and the 2000s witnessed a remarkable evolution in automatic transmission technology, directly impacting the relevance of column manual shifters. Early automatics suffered from inefficiencies and slower shift speeds, placing them at a disadvantage against manual transmissions.

However, manufacturers began incorporating features like more sophisticated electronic control units (ECUs), improved torque converters, and increased gear ratios. These advancements allowed automatics to optimize shift points for both performance and fuel economy. A handful of automatics started demonstrating 0-60 times competitive with manuals.

Furthermore, the introduction of manual shift modes – initially as gated shifters and later as paddle-shift systems – provided drivers with greater control, mimicking the experience of a manual gearbox. This evolution ultimately contributed to the decline in demand for column-mounted manual shifters.

Impact on 0-60 Times

Historically, vehicles equipped with column manual shifters often boasted quicker 0-60 times compared to their automatic counterparts. This advantage stemmed from the direct mechanical connection between the engine and wheels, minimizing power loss during gear changes. However, this dynamic shifted dramatically in the late 1990s and early 2000s.

As automatic transmission technology advanced, incorporating features like optimized shift programming and improved torque converters, automatics began to close – and in some instances, surpass – the 0-60 times of manual vehicles. While initially a limited number of automatics achieved this, the trend accelerated.

This improvement in automatic performance diminished a key selling point of manual transmissions, including those utilizing column shifters, contributing to their eventual decline in popularity and production. The gap continued to widen as automatics became more refined.

Shift Knob Design and Materials

Shift knob shapes are determined by design and ergonomics, then reviewed by regulatory groups, ensuring production vehicles meet specific engineering and safety standards.

Plain Ball Shifter Preference

Many drivers express a strong preference for the simplicity of a plain ball shifter, particularly those with decades of manual transmission experience. This preference isn’t merely nostalgic; it stems from a direct connection and tactile feedback. A smooth, round ball allows for intuitive hand placement and a clear sense of gear selection without unnecessary ornamentation.

The design prioritizes function over form, offering a consistent feel regardless of hand size or grip style. Experienced drivers often find that complex knob shapes introduce unwanted variables, potentially hindering quick and precise shifts. Furthermore, the plain ball shifter’s design is often favored due to its inherent simplicity and ease of manufacturing, contributing to its enduring appeal across generations of manual transmission enthusiasts.

Ergonomic Considerations in Shift Knob Design

Ergonomic considerations are paramount in shift knob design, involving input from dedicated ergonomics groups within automotive design offices. These teams assess how the knob’s shape and surface finish interact with the driver’s hand during gear changes. The goal is to minimize strain and maximize comfort, promoting efficient and accurate shifting.

Factors like knob weight, diameter, and texture are carefully evaluated to ensure a secure and natural grip. The design process isn’t solely driven by aesthetics; it’s a collaborative effort between designers, engineers, and regulatory bodies. Finalized shapes undergo review to ensure they meet safety standards and don’t introduce unintended hazards, balancing driver experience with regulatory compliance.

Regulatory Review of Shift Knob Shapes

Shift knob shapes undergo rigorous regulatory review post-design finalization by the design office. This process isn’t merely cosmetic; it’s a critical safety assessment. Automotive regulatory groups scrutinize designs to prevent potential hazards arising from sharp edges, excessive weight, or configurations that could impede driver control.

The review ensures knobs won’t cause injury during operation or in the event of a collision. Engineering teams translate the approved design into a manufacturable product, adhering to strict tolerances and material specifications. This multi-layered approach—design, ergonomics input, and regulatory approval—guarantees that shift knobs meet both performance and safety standards, protecting drivers and passengers alike.

Maintenance and Repair

Column shifters can experience common issues, often requiring shift linkage adjustments or complete shifter replacement to restore smooth, accurate gear selection and operation.

Common Issues with Column Shifters

Column manual shifters, while offering a unique driving experience, are prone to specific mechanical problems over time. A frequent issue involves wear and looseness within the shift linkage system, leading to imprecise shifting and difficulty selecting the desired gear. This can manifest as sloppy movements or a feeling of vagueness when attempting to change gears.

Another common concern is the deterioration of the neutral safety switch, which prevents the engine from starting unless the shifter is firmly in Park or Neutral. A faulty switch can cause starting problems or allow the vehicle to start in gear, posing a safety hazard. Internal wear within the shifter mechanism itself, including detents and springs, can also contribute to shifting difficulties. Finally, corrosion and grime accumulation can impede smooth operation, requiring cleaning and lubrication.

Adjusting Shift Linkage

Adjusting the shift linkage on a column manual shifter is crucial for restoring precise gear selection. The process typically involves locating the linkage connections, usually under the vehicle near the transmission. Begin by disconnecting the linkage at either the transmission or the shifter column, depending on the vehicle’s design.

Carefully inspect all joints and bushings for wear or damage, replacing them if necessary. Reconnect the linkage, ensuring proper alignment. Fine-tuning often requires adjusting the linkage rods using threaded sections or adjustment screws. The goal is to achieve accurate engagement in each gear, eliminating any binding or looseness. A test drive after each adjustment is essential to verify correct operation and ensure smooth, reliable shifting performance.

Replacing a Column Shifter

Replacing a column shifter involves several steps, demanding careful attention to detail. Begin by disconnecting the battery to prevent electrical issues. Remove any trim panels surrounding the steering column to access the shifter mechanism. Disconnect the shift linkage from the shifter, noting its configuration for reassembly.

Unbolt the shifter assembly from the steering column, carefully maneuvering it out of position. Install the new shifter, ensuring proper alignment with the steering column and shift linkage. Reconnect the linkage, verifying smooth operation through all gear positions. Reattach the trim panels and reconnect the battery. A final test drive confirms correct functionality and eliminates any binding or imprecise shifting.

The Last Column Shift Manual Cars

Final American-made column shift manual vehicles are now highly collectible, discontinued due to the rise of automatic transmissions and evolving driver preferences.

Identifying the Final American-Made Column Shift Manual Vehicles

Pinpointing the absolute last American-made vehicle offered with a column-shift manual transmission proves surprisingly complex, shrouded in production variations and limited records. However, the 1965 Chevrolet Corvair and 1965 Ford Falcon frequently appear as strong contenders for this distinction. These models represent the twilight of this configuration, as manufacturers rapidly transitioned towards floor-mounted shifters and, ultimately, automatic transmissions.

The 1964 and 1965 Buick Skylark also offered a column shift manual, but production numbers dwindled quickly. Determining the very last one requires tracing individual vehicle identification numbers (VINs), a task complicated by incomplete data. These final examples are now prized by collectors, representing a unique and rapidly disappearing piece of automotive history, embodying a simpler era of driving engagement.

Reasons for Discontinuation

Several converging factors led to the decline and eventual discontinuation of column-shift manual transmissions. The rising popularity of automatic transmissions, offering increased convenience, played a significant role. Simultaneously, automatic transmission performance dramatically improved in the late 1990s and 2000s, even surpassing some manuals in acceleration and efficiency.

Furthermore, concerns regarding driver focus and shifting errors, particularly the risk of inadvertently selecting the wrong gear, contributed to their demise. Ergonomic considerations also favored floor-mounted shifters, offering more intuitive haptic feedback. Regulatory pressures and evolving consumer preferences ultimately sealed the fate of the column shifter, prioritizing ease of use and performance over the traditional driving experience.

Legacy and Collectibility

Despite their disappearance from new vehicles, column-shift manual transmissions hold a unique place in automotive history, evoking nostalgia for a simpler era of driving. The final American-made column shift manual vehicles are now highly sought after by collectors and enthusiasts. Their rarity and distinct driving experience contribute to their increasing value.

These vehicles represent a tangible link to a time when drivers were more directly engaged with the mechanics of their cars. The legacy extends beyond mere collectibility; they symbolize a specific automotive design philosophy. Today, owning a column-shift manual car is often seen as a statement, celebrating a bygone era and a more connected driving experience, ensuring their continued appreciation.

history of the rosary pdf

History of the Rosary: A Comprehensive Overview

Exploring the rich history of the Rosary reveals its evolution from early prayer practices to a beloved Catholic devotion. Numerous resources‚ including offer detailed insights into its origins and development‚ often available as a history of the rosary PDF.

Early Origins & Precursors (Before 15th Century)

Before the formalized Rosary of the 15th century‚ several devotional practices laid the groundwork for its development. The roots trace back to the early Church’s monastic tradition of reciting the 150 Psalms‚ a practice deeply embedded in liturgical prayer. However‚ accessibility proved challenging for the laity‚ many of whom lacked the resources – like a Psalter – or literacy skills to participate directly.

These early forms of prayer demonstrate a desire for a simplified‚ yet substantial‚ devotional practice mirroring the monastic life‚ setting the stage for the Rosary’s eventual formalization.

The Psalter of 150 Psalms & Lay Prayer

The monastic tradition of reciting the entire Psalter – all 150 Psalms – formed a cornerstone of liturgical prayer in the medieval period. This practice‚ central to the daily office of monks‚ provided a structured and comprehensive form of devotion. However‚ its complexity and the requirements of literacy and access to a Psalter presented significant barriers for the lay faithful.

Recognizing this disparity‚ a desire arose to provide a comparable devotional practice accessible to those outside the monastic orders. The Psalter‚ while spiritually enriching‚ was simply impractical for most laypeople. This need fueled the development of alternative forms of prayer‚ aiming to replicate the Psalter’s completeness in a more manageable format. Detailed accounts of this transition can be found in resources like a dedicated history of the rosary PDF.

This quest for accessible prayer ultimately paved the way for the emergence of practices like the recitation of 150 Our Fathers‚ a direct response to the limitations of engaging with the full Psalter.

The 150 Our Fathers Devotion

As a practical alternative to reciting the 150 Psalms of the Psalter‚ a new devotional practice emerged among the laity: the recitation of 150 Our Fathers throughout the day. This adaptation addressed the challenges of literacy and access to the Psalter‚ offering a readily available and easily repeatable prayer form for those unable to engage with the more complex monastic practice.

This practice laid the foundational groundwork for the eventual formalization and expansion into the Rosary as we know it today.

Saint Dominic and the Rosary (1221)

A pivotal moment in Rosary history centers around Saint Dominic and a reported apparition of the Virgin Mary around the year 1221. While combating the Albigensian heresy‚ a significant challenge to the Catholic faith in Southern France‚ Dominic received Mary’s guidance and a powerful spiritual weapon.

According to tradition‚ Mary presented Dominic with the Rosary‚ instructing him to preach this devotion to the faithful. She promised that his apostolic endeavors would be greatly blessed if he embraced this practice. This divine endorsement provided a crucial impetus for the Rosary’s propagation‚ particularly within the Dominican Order.

The Dominicans actively promoted the Rosary‚ recognizing its potential to combat heresy and foster deeper faith. Detailed accounts of this period‚ including the historical context and theological significance‚ can be found in resources like a comprehensive history of the rosary PDF‚ offering a deeper understanding of this foundational event.

The Albigensian Heresy & Mary’s Apparition

The 13th century witnessed the rise of the Albigensian heresy‚ a dualistic belief system challenging core Catholic doctrines in Southern France. This posed a significant threat to the Church’s authority and the spiritual well-being of the faithful‚ necessitating a robust response.

Amidst this turmoil‚ the story unfolds of Saint Dominic’s tireless efforts to combat the heresy. Tradition holds that Mary appeared to Dominic around 1221‚ offering him a powerful tool for conversion and defense against the Albigensians – the Rosary. This apparition wasn’t merely a comforting vision‚ but a strategic intervention.

Dominican Order’s Role in Rosary Propagation

Following Saint Dominic’s receipt of the Rosary from Mary‚ the Dominican Order became its primary champion and dedicated themselves to its widespread dissemination. Recognizing its potential as a powerful instrument for evangelization and spiritual renewal‚ they actively promoted the devotion throughout Europe and beyond.

The Dominicans didn’t simply advocate for the Rosary; they integrated it into their preaching and missionary work. They understood its accessibility – requiring no literacy or wealth – made it uniquely suited for reaching the common people. This strategic approach proved remarkably effective in countering the Albigensian heresy and fostering a deeper faith among the laity.

Their commitment extended to establishing Rosary confraternities and encouraging its recitation in parishes and communities. Detailed accounts of the Dominican Order’s pivotal role can be found in resources like a comprehensive history of the rosary PDF‚ highlighting their enduring legacy in shaping this beloved prayer tradition.

Development of the Rosary (15th ⎯ 16th Centuries)

During this period‚ the Rosary underwent significant formalization‚ notably with the articulation of the Fifteen Mysteries. Resources‚ like a detailed history of the rosary PDF‚ document this evolution.

The Fifteen Mysteries – Formalization

The 15th century witnessed a crucial step in the Rosary’s development: the formalization of the Fifteen Mysteries. While the practice of reciting 150 Our Fathers and Hail Marys existed prior‚ grouping these prayers around meditations on the life of Christ and Mary provided a structured devotional framework. This arrangement‚ attributed largely to Alan de Rupe‚ offered a more comprehensive and engaging prayer experience for the faithful.

Alan de Rupe‚ a Dominican priest‚ is credited with dividing the 150 prayers into three sets – Joyful‚ Sorrowful‚ and Glorious – each consisting of five Mysteries. This systematization greatly aided in memorization and contemplation. He presented this structure in his book‚ De laudibus B. Mariae Virginis (In Praise of the Blessed Virgin Mary)‚ around 1470.

The Role of Alan de Rupe

Alan de Rupe‚ a 15th-century Dominican priest‚ stands as a central figure in the Rosary’s formal development. While the practice of reciting 150 prayers existed‚ it was de Rupe who systematized the meditations accompanying them‚ dividing them into the Joyful‚ Sorrowful‚ and Glorious Mysteries. His work provided a structured framework that significantly enhanced the Rosary’s devotional appeal and accessibility.

Around 1470‚ de Rupe presented his arrangement in his book‚ De laudibus B. Mariae Virginis (In Praise of the Blessed Virgin Mary). He emphasized the importance of contemplating the life of Christ and Mary through these fifteen Mysteries‚ transforming the Rosary from a simple recitation into a profound meditative practice.

Scholarly resources and detailed history of the rosary PDFs highlight de Rupe’s contribution. His efforts were instrumental in popularizing the Rosary and establishing it as a powerful tool for personal and communal prayer within the Catholic Church.

The Fraternity of the Rosary

The establishment of the Fraternity of the Rosary in the late 15th century marked a pivotal moment in the Rosary’s propagation. Founded by Alan de Rupe‚ this lay confraternity was dedicated to promoting the Rosary devotion and spreading its benefits throughout Christendom. It quickly gained popularity‚ establishing branches across Europe and beyond.

The Fraternity provided a structured network for Rosary recitation and fostered a sense of community among its members. It actively encouraged the public recitation of the Rosary‚ particularly in times of crisis or need‚ believing in its power to intercede for peace and salvation.

The Rosary as a “Poor Man’s Breviary”

The moniker “Poor Man’s Breviary” highlights a crucial aspect of the Rosary’s historical development and accessibility. During the medieval period‚ the Divine Office‚ or Breviary‚ was the official set of prayers recited by clergy and religious orders throughout the day. However‚ it was largely inaccessible to the laity due to literacy rates and the cost of Psalters – the books containing the Psalms.

As a parallel to the monastic recitation of the 150 Psalms‚ the practice emerged of praying the Our Father 150 times daily. This provided a simplified‚ yet substantial‚ form of prayer for those unable to engage with the Breviary. The Rosary‚ evolving from this practice‚ offered a similar spiritual benefit to the common people.

The Rosary in the 17th & 18th Centuries

Papal Endorsements & Promotion

Throughout the 17th and 18th centuries‚ the Rosary experienced a surge in popularity‚ largely fueled by consistent and enthusiastic papal endorsements. Popes actively promoted the devotion as a powerful weapon against heresy and a means of securing divine grace for the faithful. These endorsements weren’t merely symbolic; they often involved the commissioning of Rosary-themed artwork‚ the establishment of Rosary confraternities‚ and the issuance of papal bulls explicitly encouraging its recitation.

The Rosary in Missionary Work

As the Catholic Church expanded its missionary efforts across the globe during the 17th and 18th centuries‚ the Rosary proved to be an invaluable tool for evangelization. Missionaries found it to be a readily accessible and culturally adaptable devotional practice‚ easily taught and embraced by new converts. The simplicity of the Rosary – requiring only beads and a basic understanding of prayers – made it particularly effective in regions with limited literacy or complex theological frameworks.

The Rosary served as a common ground for prayer and a powerful symbol of shared faith‚ fostering a sense of community among diverse populations. Missionaries utilized the Rosary to catechize‚ reinforce beliefs‚ and offer solace to those facing hardship. Further exploration of the Rosary’s role in spreading the faith‚ alongside a detailed historical account‚ is available through various history of the rosary PDFs and online resources‚ illuminating its enduring impact on global Catholicism.

The Development of Rosary Beads

Initially‚ the faithful utilized readily available objects – pebbles‚ seeds‚ or knots tied in cords – to keep track of the 150 prayers comprising the Rosary. These early “counting beads” gradually evolved into more refined forms as the devotion gained popularity. Throughout the 16th and 17th centuries‚ artisans began crafting beads from materials like wood‚ bone‚ and ivory‚ often incorporating precious metals and gemstones for wealthier patrons.

The 19th & 20th Centuries: Renewed Emphasis

Pope Leo XIII & Rosary Confraternities

Pope Leo XIII played a pivotal role in the 19th-century revival of the Rosary‚ recognizing its power as a weapon against societal ills and a source of grace for the faithful. Throughout his pontificate (1878-1903)‚ he issued numerous encyclicals dedicated to the Rosary‚ most notably Rosarium Virginis Mariae (1897)‚ urging its widespread recitation and promoting its benefits.

He actively encouraged the establishment and growth of Rosary Confraternities‚ recognizing them as vital instruments for disseminating this devotion. These confraternities‚ often parish-based‚ fostered communal prayer and provided a structure for promoting the Rosary within local communities.

The Rosary and Marian Apparitions (Fatima)

The 20th century witnessed a significant resurgence in Rosary devotion‚ powerfully linked to the Marian apparitions at Fatima‚ Portugal‚ in 1917. Our Lady appeared to three shepherd children – Lucia‚ Jacinta‚ and Francisco – repeatedly urging them‚ and through them the world‚ to pray the Rosary as a means of obtaining peace and salvation.

The messages of Fatima emphasized the Rosary’s efficacy in converting sinners‚ preventing war‚ and achieving world peace. Our Lady specifically requested the daily recitation of the Rosary‚ highlighting its importance in the face of growing global conflicts and spiritual apathy. The children’s accounts detailed the profound impact of Rosary prayer during the apparitions.

Fatima dramatically increased the Rosary’s popularity worldwide‚ solidifying its place as a central devotion within the Catholic Church. Detailed analyses of the Fatima events and their connection to the Rosary are readily available in scholarly works and accessible resources‚ including a comprehensive history of the rosary PDF‚ offering deeper insights into this pivotal moment.

The Addition of the Mysteries of Light (2002)

In 2002‚ Pope John Paul II introduced the Luminous Mysteries to the Rosary‚ a significant addition after centuries of tradition. These five new mysteries – the Baptism of Jesus‚ the Wedding at Cana‚ the Proclamation of the Kingdom‚ the Transfiguration‚ and the Institution of the Eucharist – focus on Jesus’ public ministry‚ illuminating his divine identity and mission.

The Pope explained that these mysteries were intended to complement the existing Joyful‚ Sorrowful‚ and Glorious Mysteries‚ providing a more complete portrait of Christ and deepening the faithful’s understanding of his teachings. He believed they were particularly relevant for contemporary society‚ offering a focus on light and hope.

The Rosary Today

facilitate modern adaptation and continued devotion.

The Rosary in Contemporary Catholic Practice

Today‚ the Rosary continues to be a deeply cherished and widely practiced devotion within the Catholic Church. It serves as a powerful tool for personal prayer‚ meditation on the mysteries of Christ’s life‚ and intercession through the Blessed Virgin Mary. Families frequently pray the Rosary together‚ fostering a sense of unity and spiritual connection.

Parishes and dioceses often organize Rosary groups and events‚ encouraging communal prayer and deepening faith. The Rosary is also frequently recited during significant liturgical seasons‚ such as October (the Month of the Rosary) and May (the Month of Mary).

Digital Rosaries & Modern Adaptations

The 21st century has witnessed a fascinating intersection of ancient tradition and modern technology in the practice of the Rosary. Digital Rosaries‚ ranging from simple apps on smartphones to sophisticated electronic devices‚ offer features like automated bead counting‚ audio guidance‚ and customizable prayer schedules. These tools cater to a variety of preferences and lifestyles‚ making the Rosary more accessible to a wider audience.

Adaptations also include creative prayer formats‚ such as themed Rosaries focused on specific intentions or incorporating contemporary music. These innovations demonstrate the Rosary’s remarkable adaptability and its continued relevance in a rapidly changing world‚ ensuring its enduring spiritual power for generations to come.

Resources for Learning the Rosary (PDFs & Online Guides)

Websites like Franciscan Media offer detailed guides‚ explanations of each mystery‚ and instructions for praying the Rosary effectively. Dynamic Catholic provides interactive resources and downloadable materials‚ simplifying the learning process.

Many Catholic parishes also offer Rosary instruction and prayer groups. Printable PDFs outlining the prayers and mysteries are widely accessible‚ facilitating personal devotion. These resources cater to diverse learning styles‚ ensuring that anyone interested can embark on a meaningful Rosary journey and deepen their faith through this powerful prayer tradition.

orbit 57894 manual

Orbit 57894 Sprinkler Timer: A Comprehensive Manual Guide

This guide details the Orbit 57894 timer‚ offering easy-set logic for flexible watering programs‚ covering installation‚ programming‚ and maintenance procedures effectively.

Welcome to the Orbit 57894 Sprinkler Timer – a user-friendly solution for automated lawn and garden watering! This timer‚ brought to you by Orbit Irrigation Products‚ Inc.‚ simplifies maintaining a healthy landscape while conserving water. Designed with “easy-set logic‚” the 57894 model allows for the creation of customized watering schedules tailored to your specific needs.

Whether you’re a seasoned gardener or new to irrigation‚ this timer offers flexibility and convenience. This manual will guide you through every step‚ from initial setup and programming to advanced features and troubleshooting. It’s a powerful tool for efficient water management‚ ensuring your plants thrive without constant manual intervention. Prepare to experience effortless lawn care with the Orbit 57894!

What’s Included in the Box

Upon opening your Orbit 57894 Sprinkler Timer package‚ please verify that all components are present. You should find the Orbit 57894 Timer unit itself‚ designed for straightforward installation and operation. Included is a detailed user manual – this document! – providing step-by-step instructions for setup‚ programming‚ and troubleshooting.

Additionally‚ the box contains mounting screws and hardware necessary to securely attach the timer to a wall or hose bib. While batteries are not included‚ the timer requires AA batteries for operation. Ensure you have a fresh set readily available. Inspect all parts for any damage during shipping; contact Orbit customer support if anything is missing or defective before proceeding with installation.

Timer Overview: Parts and Functions

The Orbit 57894 timer features a user-friendly interface designed for intuitive operation. The large LCD screen clearly displays the current time‚ date‚ and programmed watering schedules. Navigation is managed through several buttons: ‘Set’ for accessing programming modes‚ ‘Menu’ for cycling through options‚ and directional arrows for adjusting values.

The timer body houses the internal electronics and battery compartment. Multiple zone outputs allow control of several valves independently. A manual override button enables immediate watering‚ bypassing programmed schedules. The timer’s housing is designed for weather resistance‚ protecting internal components. Understanding these parts and their functions is crucial for effective programming and maintenance of your sprinkler system.

Setting Up Your Orbit 57894 Timer

Proper setup involves selecting a suitable location‚ securely mounting the timer‚ and correctly connecting valves and the water supply for optimal performance.

Selecting a Mounting Location

Choosing the right location is crucial for your Orbit 57894 timer’s longevity and ease of use. Ideally‚ select a spot close to a power outlet if you’re using the optional AC adapter‚ ensuring the cord reaches comfortably. The location should also be within range of your sprinkler valves.

Protect the timer from direct sunlight and extreme weather conditions; a shaded area is preferable. Avoid locations prone to flooding or standing water. Ensure the mounting surface is stable and can support the timer’s weight‚ especially when hoses are connected. Consider accessibility for programming and manual adjustments – you’ll want to easily reach the controls. A flat‚ vertical surface‚ like a wall or fence post‚ works best for secure mounting.

Mounting the Timer to a Wall or Hose Bib

Securely mounting your Orbit 57894 timer prevents damage and ensures reliable operation. For wall mounting‚ use the provided screws to attach the mounting bracket to a solid surface. Ensure the screws are appropriate for the wall material (wood‚ brick‚ etc.).

Alternatively‚ you can mount the timer directly to a hose bib; Hand-tighten the timer onto the bib‚ avoiding excessive force that could damage the threads. A slight application of Teflon tape to the bib threads can help create a watertight seal. Verify the timer is firmly attached and doesn’t wobble. Regularly inspect the mounting to ensure it remains secure‚ especially after exposure to weather elements.

Connecting the Valve(s) to the Timer

The Orbit 57894 timer utilizes standard hose-thread connections for easy valve integration. Each zone on the timer corresponds to a specific valve controlling a section of your irrigation system. Carefully connect the valve(s) to the timer’s designated zone outlets‚ ensuring a snug‚ hand-tight fit.

Using Teflon tape on the valve threads is recommended to prevent leaks. If you’re using multiple valves‚ clearly label each one to correspond with its programmed zone. Double-check all connections before turning on the water supply. Incorrect valve connections will result in water flowing to the wrong zones‚ potentially causing inefficiencies or damage.

Connecting the Water Supply

Before connecting the water supply‚ ensure all valve connections to the Orbit 57894 timer are secure and leak-proof. Attach a garden hose to the timer’s water inlet‚ and then connect the hose to your outdoor faucet or water source. Slowly turn on the water supply‚ monitoring for any leaks at the connections.

If leaks are detected‚ immediately turn off the water and tighten the connections further‚ or reapply Teflon tape if necessary. Avoid over-tightening‚ as this can damage the threads; Once the water is flowing without leaks‚ the timer is ready for programming and operation. Proper water supply connection is crucial for reliable irrigation.

Programming the Orbit 57894 Timer

Effectively utilize the easy-set logic to establish flexible watering programs‚ defining start times‚ durations‚ and zone assignments for optimal irrigation control.

Understanding the Programming Logic

The Orbit 57894 timer employs a straightforward‚ user-friendly programming logic designed for flexible watering schedules. It operates on a program-based system‚ allowing you to create multiple independent watering programs‚ each tailored to specific zones or plant types.

Each program consists of a start time‚ watering duration‚ and the days of the week on which it will run. You can assign individual zones to each program‚ enabling customized irrigation for different areas of your yard. The timer supports multiple start times per program‚ offering further flexibility.

Understanding this structure is key to maximizing the timer’s capabilities. It’s not a complex system‚ but rather a modular approach to irrigation control‚ allowing for precise and efficient water management.

Setting the Current Time and Date

Accurate time and date settings are crucial for the Orbit 57894 timer to function correctly. Begin by pressing the “Set Clock” button. The display will flash‚ prompting you to enter the current hour. Use the “Hour” and “Minute” buttons to adjust the values‚ ensuring AM or PM is correctly selected.

Next‚ set the date using the “Month‚” “Day‚” and “Year” buttons. Cycle through the options until the correct values are displayed. Confirm each setting by pressing the “Set” or “Enter” button.

Double-check the displayed time and date for accuracy. Incorrect settings will lead to inaccurate watering schedules. Proper setup ensures your programs run when intended.

Programming Watering Start Times

To program watering start times on your Orbit 57894 timer‚ first select the desired program (A‚ B‚ or C) using the “Program” button. Press “Set Time” and the display will flash‚ indicating you can input the start time for that program. Utilize the “Hour” and “Minute” buttons to set the desired start hour and minute.

You can program multiple start times per program‚ allowing for flexible watering schedules. After setting the first start time‚ press “Set Time” again to add another. Repeat this process until all desired start times are programmed.

Confirm each start time by pressing “Enter” or “Set”.

Setting Watering Duration

After establishing the watering start times‚ you must define the duration for each watering cycle on your Orbit 57894 timer. Within the selected program‚ press the “Run Time” button. The display will begin to flash‚ signaling you to input the desired watering duration.

Use the “Hour” and “Minute” buttons to precisely set the watering time‚ ranging from one minute to several hours‚ depending on your landscaping needs. Consider factors like plant type and soil conditions when determining the appropriate duration.

Confirm the set duration by pressing “Enter” or “Set”.

Assigning Zones to Watering Programs

The Orbit 57894 timer allows for independent control of multiple watering zones‚ optimizing water usage across your landscape. To assign a zone to a specific program‚ first‚ select the desired program number using the program selection buttons.

Next‚ press the “Zone” button. The display will prompt you to enter the zone number you wish to assign to this program. Utilize the number buttons to input the corresponding zone number.

Confirm your selection by pressing “Enter” or “Set”. Repeat this process for each zone‚ assigning them to the appropriate programs based on their watering requirements.

Advanced Features and Settings

Explore enhanced functionalities like rain delay‚ manual override‚ and seasonal adjust‚ providing customized control and efficient water management for your irrigation system.

Rain Delay Functionality

The Orbit 57894 timer incorporates a convenient Rain Delay feature‚ allowing you to temporarily suspend scheduled watering programs during periods of rainfall. This prevents overwatering and conserves water resources. To activate Rain Delay‚ navigate to the appropriate setting within the timer’s programming menu. You’ll typically be prompted to specify the duration of the delay‚ often ranging from hours to several days.

During the Rain Delay period‚ all programmed watering cycles will be automatically paused. Once the delay expires‚ the timer will resume its normal watering schedule. This feature is particularly useful for responding to unexpected weather events‚ ensuring your landscape receives only the necessary amount of water. Remember to deactivate the Rain Delay manually when conditions return to normal‚ or the timer will continue to postpone watering.

Manual Watering Override

The Orbit 57894 timer provides a Manual Watering Override function‚ granting you immediate control over your irrigation system‚ independent of the programmed schedule. This is incredibly useful for spot-watering specific areas or addressing unforeseen dryness. To initiate a manual cycle‚ access the override option within the timer’s interface. You’ll then select the zone you wish to water and specify the desired duration.

The timer will immediately activate the chosen zone for the set period‚ overriding any existing programmed schedules. Once the manual cycle completes‚ the timer will automatically revert back to its regularly scheduled programming. This feature offers flexibility and responsiveness‚ allowing you to tailor watering to your landscape’s specific needs. Remember to cancel the override if needed‚ preventing unintended prolonged watering.

Seasonal Adjust Feature

The Orbit 57894 timer incorporates a Seasonal Adjust feature‚ allowing you to globally modify your watering schedules to accommodate changing weather patterns throughout the year. As temperatures rise or fall‚ your landscape’s water requirements shift. This feature enables you to increase or decrease watering durations across all zones proportionally‚ without needing to reprogram each zone individually.

Access the Seasonal Adjust setting through the timer’s menu and input a percentage adjustment – positive for increased watering during hotter months‚ and negative for reduced watering during cooler‚ wetter periods. This simplifies water conservation and ensures your landscape receives optimal hydration. Regularly reviewing and adjusting this setting will maximize efficiency and promote healthy plant growth‚ adapting to the natural seasonal changes.

Winterization and Storage

Proper winterization is crucial to protect your Orbit 57894 timer from freezing temperatures and potential damage. Before the first frost‚ disconnect the timer from the water supply and any connected valves. Thoroughly drain all water from the timer housing and valve connections to prevent ice formation‚ which can crack components.

Remove the batteries to prevent corrosion during prolonged storage. Store the timer indoors in a dry‚ frost-free location. Avoid storing it in direct sunlight or extreme temperatures. When spring arrives‚ inspect the timer for any signs of damage before reconnecting it. Following these steps ensures your timer remains functional and ready for the next watering season‚ extending its lifespan considerably.

Troubleshooting Common Issues

This section addresses typical problems like power failures‚ valve malfunctions‚ time display errors‚ and programming mistakes for the Orbit 57894 timer.

Timer Not Powering On

If your Orbit 57894 timer fails to power on‚ begin by verifying the battery installation. Ensure the batteries are fresh and correctly inserted‚ observing the proper polarity (+ and -) as indicated within the battery compartment.

Next‚ check the battery contacts for any corrosion or debris that might be hindering a solid connection. Gently clean the contacts if necessary. If using an AC adapter (if your model supports it)‚ confirm it’s securely plugged into both the timer and a functioning power outlet.

Also‚ inspect the adapter’s cord for any damage. A faulty adapter can prevent the timer from receiving power. Finally‚ if none of these steps resolve the issue‚ the timer itself may be defective‚ and contacting Orbit customer support is recommended.

Valve Not Activating

If a valve connected to your Orbit 57894 timer isn’t activating during a programmed watering cycle‚ first confirm the valve is receiving power from the timer. Check the zone wiring connections at both the timer and the valve itself‚ ensuring they are secure and free from corrosion.

Verify the valve is not manually turned off. Some valves have a manual override switch. Also‚ ensure the programmed watering duration for that specific zone isn’t set to zero.

Inspect the valve solenoid for any visible damage or obstructions. A faulty solenoid can prevent the valve from opening. If the problem persists‚ try testing the valve with a different zone on the timer to isolate whether the issue lies with the valve or the timer itself.

Incorrect Time Display

An inaccurate time display on your Orbit 57894 timer can lead to incorrect watering schedules. Begin by verifying the timer’s battery level; low batteries often cause timekeeping errors. If the batteries are fresh‚ carefully re-enter the current time and date following the programming instructions in the manual.

Ensure you’ve selected the correct AM/PM setting during time setup. Double-check that the date is also correctly entered‚ as some timers synchronize time based on date information.

If the issue continues‚ try resetting the timer to its factory defaults and then re-programming the time and date. This can resolve any internal software glitches affecting the time display.

Programming Errors

Encountering programming errors with your Orbit 57894 timer is common‚ often stemming from incorrect button presses or sequence misunderstandings. If a program isn’t running as expected‚ carefully review each step of the programming process‚ comparing it to the manual’s instructions.

Pay close attention to start times‚ durations‚ and zone assignments. A common mistake is accidentally overlapping watering schedules for different zones. Try deleting the problematic program and recreating it from scratch‚ ensuring each setting is correct.

Resetting the timer to factory defaults and re-programming everything can also resolve complex errors.

Maintenance and Care

Regular cleaning‚ battery checks‚ and winterization are crucial for extending the life of your Orbit 57894 timer‚ ensuring reliable performance year after year.

Cleaning the Timer Housing

To maintain the longevity and optimal functionality of your Orbit 57894 Sprinkler Timer‚ regular cleaning of the housing is recommended. Begin by disconnecting the timer from both the water supply and the power source – either batteries or the electrical outlet.

Use a damp cloth‚ possibly with a mild soap solution‚ to gently wipe down the exterior of the timer housing. Avoid abrasive cleaners or harsh chemicals‚ as these can damage the plastic casing or affect the electronic components.

Pay particular attention to areas where dirt and debris may accumulate‚ such as around the display screen and the valve connection points. Ensure no water enters the timer’s internal components during cleaning. After wiping‚ use a dry cloth to thoroughly dry the housing before reconnecting the timer.

Battery Replacement

The Orbit 57894 timer utilizes batteries as a power source‚ and timely replacement is crucial for uninterrupted operation. When the low battery indicator appears on the display‚ or if the timer functions erratically‚ it’s time for a change.

First‚ disconnect the timer from the water supply. Locate the battery compartment‚ typically on the back or side of the unit‚ and open it according to the manufacturer’s instructions. Remove the old batteries‚ noting their correct polarity (+ and -).

Insert new‚ alkaline batteries of the correct size and type‚ ensuring proper alignment with the polarity markings. Close the battery compartment securely. The timer should now power on and function normally. Dispose of used batteries responsibly‚ following local regulations.

Protecting from Freezing Temperatures

To ensure the longevity of your Orbit 57894 timer‚ proper winterization is essential‚ particularly in regions experiencing freezing temperatures. Water left inside the unit can expand when frozen‚ causing significant damage to internal components and rendering the timer unusable.

Before the first freeze‚ disconnect the timer from both the water supply and the valve(s). Open the manual release valve (if equipped) to drain any remaining water from the timer’s internal passages. Remove the batteries to prevent accidental operation and potential damage.

Store the timer indoors in a dry‚ frost-free location. Avoid storing it in sheds or garages that are not adequately insulated. Proper storage will safeguard your investment and ensure reliable performance next season.

Warranty Information

Orbit’s limited warranty covers defects in materials and workmanship; details are available online or by contacting customer support for specific coverage terms.

Orbit’s Limited Warranty Details

Orbit Irrigation Products‚ Inc. provides a limited warranty on the Orbit 57894 Sprinkler Timer against defects in materials and workmanship for a period of one year from the date of purchase. This warranty does not cover damage resulting from improper installation‚ misuse‚ neglect‚ accidental damage‚ or unauthorized modification.

The warranty specifically excludes damage caused by freezing temperatures‚ electrical surges‚ or the use of incompatible accessories. To obtain warranty service‚ the purchaser must provide proof of purchase and return the defective timer to Orbit or an authorized service center. Orbit‚ at its option‚ will repair or replace the defective timer free of charge.

This warranty is non-transferable and applies only to the original purchaser. For complete warranty details and limitations‚ please visit the Orbit website or contact their customer support team directly.

Contacting Orbit Customer Support

For assistance with your Orbit 57894 Sprinkler Timer‚ Orbit Irrigation Products offers multiple channels for customer support. You can reach their dedicated support team via phone during business hours‚ typically Monday through Friday. Their website‚ www.orbitonline.com‚ provides a comprehensive FAQ section‚ troubleshooting guides‚ and downloadable manuals‚ including the 57894 model’s documentation.

Additionally‚ Orbit offers email support for more complex issues‚ allowing you to submit detailed inquiries with specific details about your timer’s problem. Live chat support may also be available on their website for immediate assistance. When contacting support‚ have your timer’s model number and date of purchase readily available to expedite the process.

Orbit is committed to providing excellent customer service and resolving any issues you may encounter with their products.

a ladies guide to blowjobs

Exploring intimate connection, this guide delves into techniques for mutual pleasure, acknowledging female anatomy and dismantling societal stigmas surrounding oral sex․

Understanding Female Anatomy & Pleasure

Female pleasure is intricately linked to understanding the clitoris – a highly sensitive organ with over 8,000 nerve endings․ The vagina, while responsive, often requires direct or indirect clitoral stimulation for orgasm․

Internal structures like the G-spot can enhance arousal for some, but individual experiences vary greatly․ Recognizing these nuances empowers women to communicate preferences and explore what brings them the most satisfaction during intimate encounters․

Preparation & Setting the Mood

Creating a comfortable and sensual atmosphere is key – dim lighting, soft music, and open communication foster relaxation and enhance the overall experience․

Hygiene & Safety Considerations

Prioritizing health is paramount․ Thoroughly washing before any intimate contact minimizes risk․ Dental dams offer a barrier against STIs, promoting safer exploration․ Openly discuss sexual health history with your partner, ensuring mutual awareness and respect․ Regular check-ups are vital for maintaining well-being․ Remember, comfort and safety enhance pleasure, fostering a positive and trusting connection․ Prioritize open communication about boundaries and concerns․

Creating a Relaxing Atmosphere

Setting the mood is crucial for enjoyment․ Dim lighting, soft music, and comfortable surroundings enhance intimacy․ Consider aromatherapy or candles to create a sensual ambiance․ Communication about preferences is key – discuss what feels good and relaxing; Minimize distractions and create a private space where both partners feel safe and uninhibited․ A relaxed state fosters deeper connection and pleasure․

Techniques: A Step-by-Step Guide

Begin with gentle exploration, utilizing foreplay to build arousal․ Varying speed and pressure, alongside lubrication, enhances sensation and ensures comfort for both partners․

Initial Exploration & Foreplay

Start by creating a relaxed and sensual atmosphere․ Gentle kissing and caressing the body, focusing on erogenous zones, builds anticipation․ Use your hands to explore, lightly tracing contours and increasing arousal․ Communication is key – ask about preferences and observe non-verbal cues․

Transition to oral stimulation gradually, beginning with soft kisses and licks․ This allows for comfort and builds excitement; Remember, foreplay isn’t just preparation; it’s an integral part of the experience, enhancing overall pleasure for both individuals involved․

Varying Speed & Pressure

Experimentation is crucial! Alternate between slow, gentle strokes and faster, more intense movements․ Observe your partner’s reactions to gauge their preferences․ Light pressure can be incredibly sensitive, while firmer pressure can build intensity․

Pay attention to non-verbal cues – moans, body language, and facial expressions offer valuable feedback․ Don’t be afraid to ask directly what feels good․ Varying rhythm and depth keeps the experience engaging and maximizes pleasure for both partners․

The Use of Hands & Lubrication

Enhance the experience by incorporating your hands! Gently caress the shaft, tease the testicles, or provide rhythmic stroking alongside oral stimulation․ Lubrication is essential for comfort and reduces friction․ Water-based or silicone-based lubricants are excellent choices․

Apply liberally to ensure smooth gliding and prevent irritation․ Reapply as needed to maintain consistent moisture․ Hands and lubricant work synergistically to heighten sensation and create a more pleasurable encounter․

Advanced Techniques & Variations

Explore diverse positions like “69” for mutual enjoyment, experiment with mouth angles, and consider incorporating toys for intensified sensations and playful exploration․

The “69” Position & Mutual Pleasure

Simultaneous oral stimulation offers a uniquely reciprocal experience, fostering intense connection and shared arousal․ Communication is key – discuss comfort levels and preferred pressures․ Ensure both partners are relaxed and aligned for optimal enjoyment․ Experiment with head positioning and gentle movements to maximize sensation․ This position requires coordination and open dialogue to ensure both individuals reach peak pleasure, creating a deeply intimate and satisfying encounter․

Utilizing Different Mouth Positions

Varying your technique enhances sensation and prevents numbness․ Employing a ‘deep throat’ approach requires practice and comfort, prioritizing safety․ Alternating between using lips, tongue, and the soft palate creates diverse stimulation․ Gentle suction and circling motions can heighten pleasure․ Remember, communication is vital; adjust positions based on your partner’s feedback for a truly satisfying and explorative experience․

Incorporating Toys & Accessories

Enhance the experience with carefully chosen accessories․ Vibrators designed for oral use can add intense stimulation, while textured rings offer varied sensations․ Lubricant remains essential, even with toys, to maintain comfort and prevent friction․ Introduce these elements gradually, gauging your partner’s response․ Prioritize body-safe materials and proper hygiene for a playful and satisfying exploration of pleasure․

Communication & Consent

Open dialogue is crucial; discuss desires and boundaries․ Affirmative consent—verbal and non-verbal cues—ensures comfort and mutual enjoyment throughout the intimate encounter․

Verbal & Non-Verbal Cues

Clearly expressing preferences is paramount․ Use “safe words” or phrases to halt or modify activity․ Pay attention to body language – relaxed posture, moans, or leaning in indicate pleasure, while tension or withdrawal signal discomfort․
Non-verbal cues, like gentle guiding or mirroring actions, enhance connection․ Regularly check in, asking “Does this feel good?” or “Are you enjoying this?” fosters trust and ensures a pleasurable experience for both partners, prioritizing enthusiastic consent․

Ensuring Comfort & Boundaries

Prioritize your well-being; comfort is non-negotiable․ Establish clear boundaries before intimacy begins, discussing what feels good and what doesn’t․ It’s okay to say “no” at any time, even mid-act, without explanation․ Respect your partner’s boundaries as well․
Open communication builds trust and allows for a safe, enjoyable experience․ Remember, enthusiastic consent is essential, and boundaries can evolve․

Addressing Common Concerns

Navigating potential discomforts like dryness or sensitivity is key; lubrication and open communication are vital for a pleasurable experience, easing anxieties․

Dryness & Lubrication Solutions

Experiencing dryness during oral sex is common, often stemming from insufficient arousal or hormonal factors․ Prioritizing extended foreplay can naturally increase lubrication․ However, high-quality lubricants are invaluable! Water-based options are generally recommended for their compatibility and ease of cleanup․ Silicone-based lubricants offer longer-lasting glide, while oil-based varieties should be avoided with condoms․ Experiment to discover what feels most comfortable and enhances pleasure for both partners, ensuring a smooth and enjoyable experience․

Sensitivity & Pain Management

Navigating sensitivity is crucial; open communication is key! Start gently, gradually increasing pressure as comfort allows․ If discomfort arises, immediately slow down or pause․ Utilizing fingers alongside oral stimulation can help gauge pressure tolerance․ Remember, the clitoris is highly sensitive – a light touch is often preferred․ Lubrication significantly reduces friction and potential pain․ Prioritize relaxation and a comfortable position for optimal enjoyment and minimize any discomfort experienced․

Overcoming Inhibition & Anxiety

Addressing anxieties requires self-compassion and open dialogue with your partner․ Understand that feeling hesitant is normal․ Start with gentle exploration and focus on sensations, not performance․ Creating a safe, judgment-free environment fosters relaxation․ Mindfulness techniques can help stay present and reduce overthinking․ Remember, pleasure is the goal, and it’s okay to set boundaries and communicate needs clearly to build confidence․

Male vs․ Female Perspectives

Understanding differing expectations is key; women can proactively communicate desires and take control, fostering empowerment and mutual satisfaction during intimate encounters․

Understanding Male Expectations

Many men appreciate enthusiastic participation and a willingness to explore․ While expectations vary greatly, open communication about preferences is crucial․ Some may enjoy specific techniques or a particular pace, but assuming is detrimental․ Recognizing that vulnerability exists allows for a safe space to discuss desires․

Focusing on his enjoyment shouldn’t overshadow your own comfort and pleasure; it’s about a balanced, mutually satisfying experience․

Female Empowerment & Taking Control

Oral sex is an opportunity for women to dictate the pace and explore their own agency․ Don’t hesitate to guide, direct, and communicate your boundaries clearly․ Taking control doesn’t mean abandoning his pleasure, but ensuring yours is prioritized․

Experiment with different techniques and confidently express what feels good, fostering a dynamic where your desires are central․

Post-Oral Sex Care

Hydration and gentle cleansing are key․ Nurture emotional closeness through cuddling and conversation, solidifying the intimate connection you’ve shared․

Hygiene & Refreshment

Following intimate activity, prioritize gentle hygiene․ Warm water is preferable to scented soaps, preventing irritation․ Both partners should cleanse thoroughly․ Staying hydrated is crucial – drink plenty of water to replenish fluids․ A refreshing drink or light snack can also contribute to overall well-being and a comfortable post-intimacy experience․ Consider a quick shower together for enhanced bonding․

Emotional Connection & Aftercare

Beyond the physical, nurture the emotional bond․ Cuddling, affectionate touch, and sincere conversation deepen intimacy․ Share positive affirmations and express gratitude for the shared experience․ Create a safe space for open communication about feelings and desires․ Aftercare isn’t just about physical comfort; it’s about reinforcing emotional closeness and mutual respect․

Debunking Myths & Misconceptions

Challenging outdated beliefs, we address societal stigmas and promote healthy sexual attitudes, fostering open communication and dismantling harmful misconceptions about oral sex․

Addressing Societal Stigmas

Historically, societal norms have often placed undue shame and judgment on oral sex, particularly for women․ These stigmas stem from patriarchal views and misconceptions about female sexuality, creating unnecessary inhibition․ It’s crucial to recognize that oral sex is a natural and pleasurable act, deserving of acceptance and open discussion․ Challenging these ingrained biases empowers individuals to explore their desires without guilt or fear, fostering a healthier and more equitable sexual landscape․

Promoting Healthy Sexual Attitudes

Cultivating a positive mindset towards sexuality is paramount․ Healthy attitudes embrace open communication, consent, and mutual respect․ Prioritize pleasure and self-discovery, rejecting societal pressures and unrealistic expectations․ Education about anatomy and sexual response empowers informed choices․ Normalizing discussions about desires and boundaries fosters intimacy and strengthens relationships, leading to fulfilling and enjoyable sexual experiences for all involved․

Resources & Further Learning

Explore reputable books and online communities dedicated to sexual health, offering comprehensive information and support for continued learning and exploration․

Books & Articles on Sexual Health

Delve into resources like “The Guide to Getting It On” by Paul Joannides, offering comprehensive sexual education․ Explore articles from reputable sources such as Scarleteen and Planned Parenthood, providing accurate information on anatomy, pleasure, and safe practices․ Seek out feminist perspectives on sexuality to empower informed decision-making and challenge societal norms․ Remember to prioritize credible sources and evidence-based information for a fulfilling and healthy sexual life․

Online Communities & Support Groups

Connect with others through platforms like Reddit’s r/sex or Scarleteen’s forums for open discussions and shared experiences․ These spaces offer anonymity and support for exploring questions and concerns․ Remember to prioritize respectful interactions and verify information cautiously․ Online groups can foster a sense of community and normalize conversations around sexual health and pleasure, promoting empowerment and self-discovery․

The Role of Lubricant

Lubricant enhances comfort and reduces friction, crucial for pleasurable oral sex․ Water-based options are generally recommended, prioritizing sensitivity and compatibility with bodies․

Types of Lubricants Available

A diverse range of lubricants caters to individual preferences and sensitivities․ Water-based lubricants are most popular, being body-safe, easy to clean, and compatible with all sex toys․ Silicone-based options offer longer-lasting lubrication, ideal for extended play, but require specific cleaning․ Oil-based lubricants, while moisturizing, aren’t condom-safe and can stain fabrics․ Hybrid lubricants combine benefits, and flavored options add a playful element․ Consider ingredients carefully, avoiding those with potential irritants like parabens or glycerin, especially for sensitive tissues․

Choosing the Right Lubricant for Sensitivity

Prioritizing comfort is key; select lubricants formulated for sensitive skin․ Hypoallergenic, fragrance-free, and paraben-free options minimize irritation․ Water-based lubricants are generally gentler, but may require reapplication․ Silicone lubricants provide a smoother glide, potentially reducing friction, but test a small area first․ Avoid oil-based lubricants if prone to yeast infections․ Always patch-test new lubricants to ensure compatibility and prevent adverse reactions, enhancing pleasure and minimizing discomfort during intimate encounters․

Understanding Female Sexual Response

Female arousal involves complex physiological changes, varying individually; clitoral stimulation is often central, alongside psychological factors, influencing orgasm and overall satisfaction․

Stages of Arousal & Orgasm

The arousal process typically begins with initial excitement, marked by increased blood flow to the genitals, leading to lubrication and clitoral swelling․ Plateau follows, intensifying these sensations, with heightened sensitivity․ Orgasm itself is a peak experience, characterized by rhythmic muscle contractions and intense pleasure․ Resolution then occurs, as the body returns to its pre-aroused state, though multiple orgasms are possible․ Understanding these stages empowers exploration and enhances intimacy, recognizing individual variations in timing and intensity․

Individual Differences in Pleasure

Pleasure is subjective; what feels good varies greatly between individuals․ Factors like anatomy, past experiences, and emotional state all play a role․ Some women prefer direct clitoral stimulation, while others enjoy indirect approaches; Sensitivity levels differ, impacting preferred pressure and speed․ Open communication is key to discovering unique preferences and ensuring mutual satisfaction, embracing experimentation and self-discovery․

Communication about Preferences

Honest dialogue is crucial․ Clearly express likes, dislikes, and boundaries, fostering a safe space for vulnerability and ensuring a pleasurable experience for both partners․

Discussing Likes & Dislikes

Openly communicating your preferences is paramount for satisfying oral sex․ Don’t hesitate to articulate what feels good – speed, pressure, specific techniques, or areas of focus․ Similarly, clearly express anything that causes discomfort or isn’t enjoyable․ This creates a trusting environment where experimentation flourishes, and both partners feel empowered to contribute to a mutually pleasurable experience․ Remember, vocalizing desires enhances intimacy and ensures everyone’s needs are met․

Creating a Safe Space for Honesty

Establishing trust is crucial for open sexual communication․ A safe space means feeling comfortable expressing desires and boundaries without judgment or fear of rejection․ Encourage vulnerability by actively listening and validating your partner’s feelings․ Reassure them that honesty enhances intimacy, leading to a more fulfilling experience for both of you․ Prioritize emotional safety alongside physical pleasure․

vectors worksheet with answers pdf

Vectors Worksheet with Answers PDF: A Comprehensive Plan

Vectors worksheets‚ complete with detailed answer keys‚ are invaluable resources for students mastering physics and mathematics. These PDFs offer targeted practice‚
ranging from basic component calculations to complex problem-solving scenarios‚ ensuring a solid grasp of vector concepts and applications.

Vectors represent more than just magnitude; they embody direction‚ a crucial distinction from scalar quantities. Understanding vectors is fundamental in physics‚ particularly when dealing with displacement‚ velocity‚ and force. A vectors worksheet with answers PDF serves as an excellent starting point for students to build this foundational knowledge. These resources typically begin with defining what vectors are – quantities possessing both magnitude and direction – and then progress to illustrating how they differ from scalars‚ which are defined solely by magnitude;

The worksheets often include visual representations‚ aiding comprehension of vector concepts. They progressively introduce mathematical operations involving vectors‚ such as addition‚ subtraction‚ and scalar multiplication. The inclusion of answer keys is paramount‚ allowing students to self-assess their understanding and identify areas needing further study. Mastering vectors unlocks a deeper understanding of numerous scientific and engineering principles.

What are Vectors? ⏤ Definition and Basic Concepts

Vectors are mathematical objects possessing both magnitude (size) and direction. Unlike scalars‚ which are fully described by a single number (like temperature or mass)‚ vectors require both pieces of information for complete definition. A vectors worksheet with answers PDF effectively illustrates this core concept. These worksheets typically define a vector as an arrow‚ where the length represents the magnitude and the arrowhead indicates the direction.

Basic concepts explored include initial and terminal points‚ representing the starting and ending points of the vector‚ respectively. Worksheets often emphasize that vectors are not tied to a specific location; they represent a displacement from one point to another. Understanding these fundamental definitions is crucial before tackling vector operations. The provided answer keys allow students to verify their understanding of these basic principles and build a strong foundation for more complex problems.

Scalar Quantities vs. Vector Quantities

A key distinction in understanding vectors lies in differentiating them from scalar quantities. Scalar quantities are fully defined by magnitude alone – examples include speed‚ temperature‚ and mass. A vectors worksheet with answers PDF often begins by highlighting this contrast. Vector quantities‚ however‚ require both magnitude and direction; velocity‚ force‚ and displacement are prime examples.

Worksheets frequently present exercises requiring students to identify whether given quantities are scalar or vector. This reinforces the understanding that simply knowing “how much” isn’t enough for vectors – you must also know “which way.” The answer keys provide immediate feedback‚ solidifying this crucial distinction. Mastering this difference is fundamental‚ as vector operations are meaningless without considering directional components. Recognizing this difference is the first step towards successfully solving vector problems.

Vector Representation

Vectors are mathematically represented in several ways‚ and a comprehensive vectors worksheet with answers PDF will cover these methods. Commonly‚ vectors are denoted by a letter with an arrow above it (e.g.‚ →v )‚ indicating both magnitude and direction. Alternatively‚ boldface letters (v) are used. Worksheets often include exercises translating between these notations.

Understanding these representations is crucial for performing vector operations. The PDF resources typically demonstrate how to represent vectors graphically as directed line segments – the length representing magnitude and the arrow indicating direction. Furthermore‚ they introduce component form (discussed later)‚ a vital algebraic representation. Answer keys provide visual confirmations of correct graphical representations and ensure accurate algebraic notation. Proficiency in vector representation is foundational for all subsequent vector calculations and problem-solving.

Graphical Representation of Vectors

A vectors worksheet with answers PDF heavily emphasizes graphical representation‚ as it builds initial intuition. Vectors are visually depicted as arrows‚ where the arrow’s length corresponds to the vector’s magnitude and its direction indicates the vector’s line of action. Worksheets provide practice drawing vectors to scale‚ using a specified scale factor (e.g.‚ 1 cm = 5 m/s).

These exercises often involve plotting vectors on coordinate planes‚ reinforcing understanding of quadrants and angles. The answer keys include accurately drawn vectors for comparison‚ allowing students to self-assess their scaling and directional accuracy. Furthermore‚ graphical methods are used to illustrate vector addition and subtraction (head-to-tail and parallelogram methods)‚ providing a visual understanding before introducing algebraic techniques. Mastering this visual aspect is key to grasping vector concepts before tackling more complex calculations.

Component Form of Vectors (i‚ j notation)

Vectors worksheet PDFs transition from graphical methods to the algebraic representation using i and j notation. This involves resolving vectors into their horizontal (x) and vertical (y) components. Worksheets present vectors and require students to express them in the form v = ai + bj‚ where ‘a’ is the x-component and ‘b’ is the y-component.

Problems often involve finding components given the magnitude and direction (angle)‚ utilizing trigonometric functions (sine and cosine). The answer keys provide the correct component values‚ enabling students to verify their calculations. Conversely‚ worksheets also ask students to determine magnitude and direction from given components. This reinforces the relationship between component form‚ magnitude‚ and direction‚ solidifying a crucial skill for advanced vector operations and physics applications.

Vector Operations

Vectors worksheet PDFs dedicate significant practice to mastering fundamental vector operations. These include addition‚ subtraction‚ and scalar multiplication‚ often presented with accompanying answer keys for self-assessment. Worksheets frequently begin with simple two-dimensional vector problems‚ gradually increasing complexity to include multiple vectors and varied orientations.

Students learn to perform these operations both graphically (head-to-tail and parallelogram methods) and algebraically‚ using component form. Scalar multiplication problems test understanding of how changing a vector’s magnitude affects its components. The provided solutions demonstrate step-by-step calculations‚ clarifying common errors. Advanced worksheets may incorporate vector operations within physics contexts‚ such as calculating resultant forces or velocities‚ bridging mathematical concepts to real-world applications.

Vector Addition: Head-to-Tail Method

Vectors worksheet PDFs extensively utilize the head-to-tail method for visualizing and solving vector addition problems. This graphical technique involves placing the tail of the second vector at the head of the first‚ continuing this process for all vectors. The resultant vector is then drawn from the tail of the first vector to the head of the last.

Worksheets provide diagrams for students to practice this method‚ often requiring them to accurately measure angles and magnitudes to determine the resultant. Answer keys include completed diagrams and calculated resultant vectors‚ allowing for self-checking. These exercises build a strong intuitive understanding of vector addition‚ complementing algebraic approaches. Some worksheets incorporate component decomposition alongside the graphical method‚ reinforcing the connection between visual and analytical techniques.

Vector Addition: Parallelogram Method

Vectors worksheet PDFs frequently feature the parallelogram method as an alternative graphical approach to vector addition. This technique involves constructing a parallelogram with the two vectors as adjacent sides. The diagonal of the parallelogram‚ extending from the common origin of the vectors‚ represents the resultant vector.

Worksheets present scenarios where students must accurately draw parallelograms and measure the resultant vector’s magnitude and direction. Detailed answer keys provide pre-drawn diagrams and calculated results for verification. This method emphasizes the geometric relationship between vectors and their sum‚ offering a different perspective than the head-to-tail approach. Many worksheets include problems requiring both graphical solutions using the parallelogram method and algebraic calculations for comparison‚ solidifying comprehension.

Scalar Multiplication of Vectors

Vectors worksheet PDFs dedicate significant practice to scalar multiplication‚ a fundamental vector operation. This involves multiplying a vector by a scalar (a real number)‚ resulting in a new vector with a modified magnitude but potentially unchanged direction (or reversed if the scalar is negative). Worksheets present problems requiring students to calculate the new vector components after scalar multiplication.

Answer keys provide step-by-step solutions‚ demonstrating how to correctly apply the scalar to each component of the vector. These exercises reinforce the understanding that scalar multiplication scales the vector’s length. More advanced worksheets incorporate scalar multiplication within larger vector calculations‚ such as combined addition and subtraction problems. Mastery of this concept is crucial for understanding vector transformations and their applications in physics and engineering.

Vector Subtraction

Vector subtraction is a core skill emphasized in vectors worksheet PDFs. It’s typically presented as adding the negative of a vector – effectively reversing its direction and then performing vector addition. Worksheets provide numerous problems requiring students to subtract vectors expressed in component form or graphically.

Detailed answer keys demonstrate both methods‚ showing how to subtract corresponding components or construct the resultant vector using the head-to-tail method with the negative vector. These resources often include visual aids to clarify the process. More complex worksheets integrate vector subtraction into multi-step problems involving displacement‚ velocity‚ and force calculations. Understanding vector subtraction is vital for determining relative motion and net forces‚ solidifying a student’s grasp of vector operations.

Vector Magnitude and Direction

Vectors worksheet PDFs heavily emphasize calculating both magnitude and direction‚ as these fully define a vector. Magnitude‚ representing the vector’s length‚ is commonly found using the Pythagorean theorem when vectors are in component form – √(x² + y²). Answer keys meticulously show each step of this calculation.

Determining direction often involves using trigonometric functions like arctangent (tan⁻¹) to find the angle relative to a reference axis. Worksheets present vectors in different quadrants‚ requiring students to adjust the angle accordingly. Detailed solutions demonstrate how to correctly apply these functions and interpret the resulting angles in degrees or radians. Mastery of magnitude and direction is crucial for accurately representing and interpreting vector quantities in physics and engineering applications.

Calculating the Magnitude of a Vector

Vectors worksheet PDFs consistently feature problems focused on calculating vector magnitude‚ a fundamental skill in vector analysis. These worksheets present vectors in both component form (⟨x‚ y⟩) and graphical representations. The core method involves applying the Pythagorean theorem: ||v|| = √(x² + y²)‚ where ||v|| represents the magnitude.

Answer keys provide step-by-step solutions‚ illustrating how to correctly substitute component values and perform the calculation. Many worksheets include vectors in three dimensions‚ extending the formula to ||v|| = √(x² + y² + z²). Students practice finding magnitudes of vectors resulting from addition‚ subtraction‚ and scalar multiplication. Understanding magnitude is essential for interpreting the ‘size’ or strength of a vector quantity‚ like velocity or force‚ within physical contexts.

Determining the Direction of a Vector

Vectors worksheet PDFs dedicate significant practice to determining vector direction‚ often expressed as an angle relative to a reference axis (typically the positive x-axis). The primary tool used is the arctangent function (tan⁻¹)‚ calculated as θ = tan⁻¹(y/x)‚ where θ is the angle‚ y is the vector’s y-component‚ and x is the vector’s x-component.

Answer keys meticulously detail quadrant considerations‚ as the arctangent function yields angles only within -90° to +90°. Worksheets guide students to adjust the angle based on the vector’s quadrant to obtain the correct bearing. Some problems present vectors in three dimensions‚ requiring more complex angular calculations. Mastering direction is crucial for fully defining a vector and accurately predicting its effect in physical scenarios‚ like projectile motion or force resolution.

Vector Components and Resolution

Vectors worksheet PDFs heavily emphasize vector decomposition – resolving a vector into its perpendicular x and y components. This is fundamental for simplifying complex problems. Students learn to use trigonometric functions (sine and cosine) to calculate these components: x = |v|cos(θ) and y = |v|sin(θ)‚ where |v| represents the vector’s magnitude and θ is the angle it makes with the x-axis.

Answer keys provide step-by-step solutions‚ demonstrating how to correctly apply these formulas and handle different angle measurements. Worksheets often include diagrams to visually reinforce the concept of resolving vectors. Understanding components allows for easier vector addition‚ subtraction‚ and analysis of forces or velocities. This skill is essential for success in physics and engineering applications‚ as real-world forces rarely act along simple axes.

Finding X and Y Components of a Vector

Vectors worksheet PDFs dedicate significant practice to determining the x and y components of vectors‚ a cornerstone of vector analysis. These exercises typically present vectors with given magnitudes and angles‚ requiring students to apply trigonometric functions. The x-component is calculated using cosine (adjacent/hypotenuse)‚ while the y-component utilizes sine (opposite/hypotenuse).

Detailed answer keys demonstrate the correct application of these functions‚ often including unit vectors (i and j) to represent the components. Worksheets progressively increase in difficulty‚ introducing vectors in different quadrants‚ demanding careful attention to angle signs. Mastering this skill is crucial for subsequent vector operations like addition and subtraction. Accurate component calculation forms the basis for solving complex physics problems involving forces‚ velocities‚ and displacements.

Using Components for Vector Addition

Vectors worksheet PDFs heavily emphasize vector addition using the component method‚ a more precise alternative to graphical techniques. Students decompose each vector into its x and y components‚ then add the corresponding components separately. This results in a resultant vector’s x and y components‚ which are then used to find the magnitude and direction of the resultant.

Answer keys provide step-by-step solutions‚ showcasing the correct component addition and the subsequent use of the Pythagorean theorem to calculate the magnitude. Trigonometric functions (arctan) are then applied to determine the direction. Worksheets often include multiple vectors‚ building complexity. This method minimizes errors inherent in graphical approaches and is essential for solving real-world physics problems involving forces and velocities.

Applications of Vectors

Vectors worksheet PDFs frequently demonstrate the practical relevance of vectors beyond abstract mathematical exercises. They illustrate how vectors are fundamental in physics‚ particularly in describing displacement‚ velocity‚ acceleration‚ and force. Real-world examples‚ often included in problem sets‚ showcase applications like calculating the resultant force on an object or determining the velocity of an airplane affected by wind.

These worksheets bridge the gap between theory and practice‚ showing students how vector addition and resolution are used to analyze motion and interactions. Answer keys not only provide numerical solutions but also contextualize them within the physical scenarios presented. This reinforces understanding and prepares students for more advanced applications in engineering and other scientific fields.

Vectors in Physics: Displacement‚ Velocity‚ and Force

Vectors worksheet PDFs heavily emphasize the application of vectors within core physics concepts. Displacement‚ being a change in position‚ is inherently a vector quantity‚ demanding both magnitude and direction for complete description. Velocity‚ the rate of change of displacement‚ similarly relies on vector representation to accurately portray speed and direction of motion. Force‚ crucial in understanding interactions‚ is also a vector‚ requiring both strength and direction to define its effect.

Worksheets often present problems requiring students to decompose forces into components‚ calculate resultant velocities‚ or determine displacement vectors. The provided answer keys are vital for verifying calculations and understanding the correct application of vector principles to these fundamental physics concepts‚ solidifying a strong foundation for further study.

Real-World Examples of Vector Applications

Vectors worksheet PDFs frequently bridge the gap between theoretical understanding and practical application. Consider navigation: pilots and sailors utilize vectors to calculate headings and account for wind drift‚ ensuring accurate course corrections. In engineering‚ vectors are essential for analyzing structural forces on bridges and buildings‚ guaranteeing stability and safety. Even video game development relies heavily on vector mathematics for character movement‚ physics simulations‚ and realistic graphics.

These worksheets often present scenarios mirroring these real-world situations‚ prompting students to apply vector principles to solve practical problems. The accompanying answer keys allow for self-assessment and reinforce the relevance of vector concepts beyond the classroom‚ demonstrating their pervasive influence in diverse fields.

Worksheet Problems and Solutions

Vectors worksheet PDFs excel by providing a diverse range of problems‚ progressively increasing in complexity. Initial exercises often focus on finding vector components given magnitude and direction‚ or vice versa. Subsequent problems build upon this foundation‚ incorporating vector addition‚ subtraction‚ and scalar multiplication. More advanced worksheets present real-world scenarios‚ like calculating resultant forces or determining velocities after impacts.

Crucially‚ these PDFs include detailed‚ step-by-step solutions. These aren’t merely answers; they demonstrate the correct methodology‚ clarifying common pitfalls and reinforcing problem-solving strategies. Students can compare their work‚ identify errors‚ and deepen their understanding. The availability of complete solutions transforms the worksheet from a test into a powerful learning tool.

Example Problem 1: Vector Addition with Given Components

Let’s consider two vectors: A = (4‚ -2) and B = (-1‚ 5). To find the resultant vector R = A + B‚ we add the corresponding components. This means Rx = Ax + Bx = 4 + (-1) = 3‚ and Ry = Ay + By = -2 + 5 = 3. Therefore‚ the resultant vector R is (3‚ 3).

Worksheet solutions typically extend this by calculating the magnitude of R using the Pythagorean theorem: |R| = √(32 + 32) = √18 ≈ 4.24. The direction (θ) is found using the arctangent function: θ = tan-1(Ry/Rx) = tan-1(3/3) = 45°. Thus‚ the resultant vector has a magnitude of approximately 4;24 units at an angle of 45°.

Example Problem 2: Finding Magnitude and Direction

Suppose a vector V is defined by its components: Vx = -5 and Vy = 12. A typical worksheet problem asks to determine both the magnitude and direction of this vector. The magnitude‚ |V|‚ is calculated using the Pythagorean theorem: |V| = √((-5)2 + 122) = √(25 + 144) = √169 = 13.

To find the direction (θ)‚ we use the arctangent function. However‚ we must consider the quadrant in which the vector lies. Since Vx is negative and Vy is positive‚ the vector is in the second quadrant. Therefore‚ θ = tan-1(Vy/Vx) + 180° = tan-1(12/-5) + 180° ≈ -67.38° + 180° = 112.62°. Thus‚ the vector has a magnitude of 13 units and a direction of approximately 112.62°.

Answer Key for Common Vector Worksheet Problems

A comprehensive answer key is crucial for effective learning with vectors worksheets. For instance‚ if a problem asks for the magnitude of the vector <1‚ 5>‚ the answer is √26‚ derived from √(12 + 52). Determining the direction of <3√2‚ 3√2> yields 3π/4‚ calculated using the arctangent function and considering the vector’s quadrant.

Describing the graph of f(x) = x‚ x2 correctly identifies it as a straight line. Performing the vector operation 9‚ 5 requires understanding vector addition rules. Worksheet solutions should clearly demonstrate each step‚ including component-wise calculations and trigonometric function applications. Providing detailed solutions fosters independent learning and reinforces conceptual understanding‚ allowing students to verify their work and identify areas needing further review.

Resources for Further Learning

Beyond worksheets‚ numerous online tools enhance vector comprehension. Online vector calculators simplify complex calculations‚ verifying solutions and aiding visualization. Websites like Khan Academy offer free video tutorials and practice exercises‚ covering vector concepts from basic definitions to advanced applications in physics and engineering.

Recommended textbooks include “Physics for Scientists and Engineers” by Serway and Jewett‚ providing a rigorous mathematical treatment of vectors. For a more accessible approach‚ “University Physics with Modern Physics” by Young and Freedman is excellent. Kristeligt Dagblad’s digital platform‚ including their Wordle game‚ demonstrates engaging learning environments. Exploring these resources complements worksheet practice‚ fostering a deeper and more versatile understanding of vector principles and their real-world relevance.

Online Vector Calculators

Numerous online vector calculators serve as powerful supplementary tools for students working through worksheets. These calculators efficiently perform vector addition‚ subtraction‚ scalar multiplication‚ dot products‚ and cross products‚ instantly verifying hand-calculated results. Websites offering these tools include Vector Calculator (vectorcalculator.com) and Symbolab‚ providing step-by-step solutions alongside the final answer.

These resources are particularly helpful when tackling complex problems involving multiple vectors or when checking the accuracy of component-based calculations. While not a replacement for understanding the underlying principles‚ they offer a valuable means of self-assessment and error detection. Remember that Kristeligt Dagblad’s Wordle‚ though a different skill set‚ highlights the benefits of interactive learning. Utilizing these calculators alongside practice worksheets accelerates learning and builds confidence.

Recommended Textbooks and Websites

For a comprehensive understanding of vectors‚ several textbooks are highly recommended. “Physics for Scientists and Engineers” by Serway and Jewett provides a thorough treatment of vector mechanics‚ while “University Physics with Modern Physics” by Young and Freedman offers detailed explanations and numerous practice problems. These texts often include worked examples mirroring worksheet exercises.

Online‚ Khan Academy’s physics section delivers free video tutorials and practice exercises covering vector concepts. Hyperphysics (hyperphysics.phy-astr.gsu.edu) is another excellent resource‚ offering concise explanations and interactive diagrams. Supplementing worksheet practice with these resources‚ similar to engaging with Kristeligt Dagblad’s Wordle for mental agility‚ fosters a deeper understanding. Remember to cross-reference information and utilize multiple sources for a well-rounded learning experience‚ ensuring mastery of vector principles.

genie 7055 manual

Genie 7055 Manual: Comprehensive Guide

This comprehensive guide details operation, installation, troubleshooting, and maintenance for the Genie 7055 StealthDrive 750 garage door opener, ensuring optimal performance.

The Genie 7055 StealthDrive 750 is a popular garage door opener known for its quiet operation and reliable performance. This opener utilizes a belt drive system, contributing to its smooth and silent functionality, a significant upgrade from chain-driven models. This manual provides detailed instructions for installation, programming, and maintenance, ensuring users can maximize the lifespan and efficiency of their Genie 7055.

Understanding the features and safety precautions outlined within this guide is crucial for proper operation. It covers everything from initial setup and remote programming to troubleshooting common issues and performing routine maintenance. Always refer to this manual before attempting any repairs or adjustments to your Genie opener.

Model 7055 Overview & Key Features

The Genie 7055 StealthDrive 750 boasts several key features designed for convenience and reliability. Its core is the robust belt drive system, delivering exceptionally quiet operation – significantly quieter than traditional chain drives. This model includes a powerful motor, ensuring smooth lifting even for heavier garage doors. Safety is paramount, featuring safety sensors that halt operation if obstructions are detected.

Furthermore, the Genie 7055 is compatible with smart home integration, allowing for remote control and monitoring via compatible systems (if applicable). The included wall control provides a convenient alternative to remote operation. This opener is designed for easy installation and offers a long-lasting, dependable solution for residential garage door automation.

Installation & Setup

Proper installation is crucial for safe and reliable operation; carefully follow the included instructions for rail mounting, door connection, and electrical wiring.

Unboxing and Component Checklist

Upon receiving your Genie 7055 opener, carefully inspect the box for any shipping damage. Once opened, verify all components are present before proceeding with installation. The package should include the opener unit itself, a rail system (typically a 5-piece belt or chain drive), a safety sensor set, two remote controls, a wall control panel, mounting hardware (brackets, bolts, screws), a trolley and carriage assembly, and this comprehensive installation manual.

Cross-reference the included parts list within the manual to ensure nothing is missing. If any components are damaged or absent, immediately contact Genie customer service for replacements. Do not attempt to install a damaged or incomplete opener, as this could compromise safety and performance. Retain the original packaging for potential returns or warranty claims.

Mounting the Rail System

Begin by securely attaching the header bracket to a solid ceiling joist or mounting surface, ensuring it’s level and properly aligned with the garage door’s center. Next, assemble the rail sections according to the manual’s diagrams, connecting them firmly to create the complete rail length. Carefully position the assembled rail system, aligning it with the header bracket and supporting it with temporary clamps or supports.

Attach the rail to the header bracket using the provided hardware, ensuring a tight and stable connection. Then, install the rear hanger bracket, again verifying its secure attachment to a structural element. Double-check the rail’s alignment and stability before proceeding; a properly mounted rail is crucial for smooth and reliable operation of your Genie 7055 opener.

Connecting the Opener to the Door

Position the garage door in the closed position and disconnect any existing springs or manual locking mechanisms for safety. Attach the door bracket to the top section of the garage door, centering it for balanced operation. Connect the arm to both the door bracket and the opener’s carriage, ensuring a secure and aligned connection.

Verify that the arm length is appropriately adjusted to maintain a smooth arc during door travel. Manually test the door’s movement with the opener connected to confirm it operates freely without binding or obstruction. Proper connection is vital; misaligned connections can cause damage or prevent the Genie 7055 from functioning correctly. Re-engage safety features after confirming proper operation.

Wiring and Power Connection

Before commencing, ALWAYS disconnect the main power supply to the garage to prevent electrical shock. Locate the designated wiring compartment on the Genie 7055 opener unit. Connect the power cable, ensuring correct polarity – typically black to live, white to neutral, and green or bare copper to ground. Securely fasten the wiring connections within the compartment to avoid loose connections;

If integrating safety sensors or wall controls, connect their respective wires to the designated terminals, referencing the wiring diagram in the owner’s manual. Double-check all connections before restoring power. Improper wiring can damage the opener or create a safety hazard. Once confirmed, restore power and test the unit’s functionality.

Operation & Programming

Effectively program remotes, align safety sensors, utilize the wall control, and explore smart home integration options for your Genie 7055 opener.

Remote Control Programming

Programming your Genie 7055 remote is a straightforward process. Begin by locating the “Learn” button on the opener motor unit – it’s typically yellow or orange. Press and release this button; a small LED indicator light will illuminate. Within 30 seconds, press and hold the desired button on your remote control until the garage door opener activates.

You may need to repeat this process for each additional remote control. If the door doesn’t respond, ensure the batteries are fresh and that you’re within range. Some models may require clearing existing remote codes before adding new ones; consult the full owner’s manual for specific instructions. Successful programming is indicated by the garage door operating with the remote.

Safety Sensor Alignment & Testing

Proper safety sensor alignment is crucial for safe operation of your Genie 7055. These sensors, located near the door tracks, create an invisible beam. If the beam is interrupted, the door will stop and reverse. To test, simply walk through the beam while the door is closing; it should immediately reverse.

If the door doesn’t respond, check for obstructions – even dust or cobwebs can interfere; Ensure the sensors are aligned facing each other, and the indicator lights on both sensors are lit steadily. Misalignment is a common issue. Adjust the sensor brackets until both lights are solid green. Refer to the owner’s manual for detailed diagrams and troubleshooting steps if problems persist.

Using the Wall Control

The wall control panel provides a convenient, fixed location to operate your Genie 7055 garage door opener. A single press of the “Open” or “Close” button initiates the corresponding action. The wall control also features a “Stop” button, immediately halting door movement.

For safety, the wall control overrides remote commands. If a remote is used while the wall control is operating, the wall control takes precedence. Programming the wall control typically involves pressing the “Learn” button on the opener unit and then the desired button on the wall control. Consult your owner’s manual for specific programming instructions, as procedures can vary slightly depending on the model.

Smart Home Integration (if applicable)

The Genie 7055 model can be enhanced with smart home connectivity via compatible add-on modules, like Aladdin Connect. This integration allows control of your garage door through smartphone apps, voice commands (using Amazon Alexa or Google Assistant), and automated schedules.

Installation typically involves connecting the module to the opener and following the app’s setup instructions. Benefits include remote monitoring of door status, receiving alerts for activity, and granting access to guests. Ensure compatibility with your existing smart home ecosystem before purchasing any add-ons. Detailed instructions for smart home integration are available in the separate module’s manual and on the Genie website.

Maintenance & Troubleshooting

Regular maintenance and prompt troubleshooting are crucial for the Genie 7055’s longevity and safe operation; consult the owner’s manual for details.

Regular Maintenance Schedule

To ensure the longevity and smooth operation of your Genie 7055 opener, a consistent maintenance schedule is vital. Inspect the entire system monthly, checking for loose bolts, worn cables, and any signs of damage. Lubricate moving parts – the chain or belt, rollers, and hinges – every six months using a silicone-based lubricant.

The safety sensors should be tested monthly to confirm proper alignment and functionality; obstructions must be removed immediately. Visually inspect the door itself for any signs of wear, rust, or damage, addressing issues promptly. A full inspection, including the trolley and carriage, should be performed annually. Refer to the owner’s manual for specific recommendations tailored to your door type and opener model, as additional maintenance may be required.

Belt and Chain Maintenance

The Genie 7055 utilizes either a belt or chain drive system, each requiring specific care. For belt drives, inspect regularly for cracks, fraying, or excessive wear; Clean the belt with a damp cloth to remove debris, avoiding harsh chemicals. Chain drives need more frequent attention; lubricate the chain every six months with a quality chain lubricant to reduce friction and prevent rust.

Ensure proper chain tension – too loose and it can slip, too tight and it strains the motor. Check for worn or damaged chain links, replacing them as needed; Regularly inspect the sprockets for wear. Consistent lubrication and timely replacement of worn components will significantly extend the life of your Genie opener’s drive system.

Troubleshooting: Opener Clicks But Doesn’t Move

If your Genie 7055 opener clicks but the door doesn’t move, several issues could be present. First, verify the trolley and carriage are properly engaged with the rail. Inspect the safety sensors; misalignment or obstructions will prevent operation. Confirm the door isn’t manually locked or obstructed, making it difficult to lift.

Check the remote control batteries and reprogram if necessary. A failing capacitor within the opener itself can also cause this symptom. Ensure the door springs are properly balanced; if they’re weak, the opener struggles. If these steps don’t resolve the issue, professional service may be required to diagnose and repair the motor or internal components.

Troubleshooting: Safety Sensor Issues

Genie 7055 safety sensors are crucial for preventing door-related accidents. If the door isn’t closing, or reverses unexpectedly, suspect sensor problems. First, ensure the sensors are aligned – the lenses must face each other directly. Check for obstructions like dirt, cobwebs, or debris blocking the beam. Verify the wiring connections to the opener are secure and undamaged.

A flashing LED on the sensor indicates a problem. Try cleaning the lenses with a soft cloth. If alignment is difficult, gently reposition the sensors. If the issue persists, consult the owner’s manual for specific troubleshooting steps or contact Genie customer service for assistance. Never bypass the safety sensors!

Troubleshooting: Remote Control Problems

If your Genie 7055 remote isn’t working, begin with the simplest solutions. First, check the battery – a weak battery is a common cause. Replace it with a fresh one, ensuring correct polarity. Next, reprogram the remote to the opener; refer to the “Remote Control Programming” section of this manual for detailed instructions. Interference from other devices can sometimes disrupt the signal.

Try moving closer to the opener when testing. If multiple remotes aren’t working, the issue likely lies with the opener itself. Inspect the antenna wire connected to the opener; ensure it’s securely attached and not damaged. For persistent problems, consult the Genie customer service team.

Safety Precautions

Always disconnect power before maintenance, never allow children near the door during operation, and familiarize yourself with the emergency release procedure;

General Safety Guidelines

Prioritize safety during installation, operation, and maintenance of your Genie 7055 opener. Always disconnect the power supply before performing any adjustments or repairs to prevent electrical shock. Keep children and pets away from the garage door area during operation, as moving parts pose a significant risk.

Never allow anyone to bypass or disable safety features like the safety sensors. Regularly inspect the door’s balance to ensure it moves smoothly and doesn’t require excessive force. Do not operate the opener if the door is damaged or malfunctioning.

Consult the full owner’s manual for detailed instructions and warnings. Proper use and adherence to these guidelines will help prevent accidents and ensure long-lasting, safe operation of your garage door system.

Emergency Release Procedure

In case of power outage or opener malfunction, you must manually operate the garage door using the emergency release cord. Locate the cord hanging from the trolley – never pull it unless the door is fully closed. Pulling the cord disengages the opener, allowing manual operation.

Exercise caution, as the door may be under spring tension. Support the door during operation to prevent sudden drops or injuries. After restoring power or repairing the opener, re-engage the trolley by pulling the cord towards the opener until it clicks into place.

Always test the opener’s functionality after re-engagement. Refer to the complete manual for detailed illustrations and safety precautions regarding the emergency release mechanism.

Avoiding Damage to the Door

Protect your garage door and opener by adhering to preventative measures. Never force the door open if it encounters resistance; investigate the cause first. Regularly inspect the door’s tracks for obstructions, bends, or loose hardware, addressing any issues promptly. Avoid using the opener to operate a damaged or unbalanced door, as this can exacerbate the problem.

Ensure the door is properly lubricated, focusing on hinges, rollers, and tracks, to facilitate smooth operation. Do not allow children to play near the door or operate the opener. Always disconnect power before performing any maintenance or repairs. Following these guidelines will prolong the lifespan of both your door and the Genie 7055 opener.

Technical Specifications

The Genie 7055 boasts a powerful motor, specific power requirements, and defined dimensions and weight – crucial details for installation and operation.

Motor Specifications

The Genie 7055 utilizes a robust ½ horsepower DC motor, designed for reliable and efficient operation of various garage door sizes and weights. This DC motor provides smooth, quiet performance compared to traditional AC motors, contributing to a more peaceful home environment. It’s engineered for durability, ensuring long-lasting service with minimal maintenance requirements.

The motor operates on a standard voltage, detailed in the power requirements section, and features thermal overload protection to prevent damage from overheating during extended use. Its construction prioritizes energy efficiency, reducing power consumption while maintaining optimal lifting force. The motor’s design also contributes to the opener’s compact size, facilitating easier installation in garages with limited headroom.

Power Requirements

The Genie 7055 garage door opener requires a standard 120-volt, 60Hz electrical supply. A dedicated 15-amp circuit is recommended to prevent overloading and ensure reliable operation. It’s crucial to verify that the electrical outlet is properly grounded for safety. The opener does not operate on battery power alone; a constant AC power source is essential.

Avoid using extension cords, as they can reduce voltage and potentially damage the motor. If a dedicated circuit isn’t available, consult a qualified electrician to install one. Proper wiring is paramount for safe and efficient performance. The power consumption is relatively low during standby mode, but increases during operation. Always disconnect power before performing any maintenance or repairs.

Dimensions and Weight

The Genie 7055 opener’s dimensions vary slightly depending on the rail length installed. Typically, the motor unit itself measures approximately 11 inches high, 7 inches wide, and 13 inches deep. A standard 8-foot rail system will add approximately 8 feet to the overall length, while shorter rail options are also available. The complete assembled unit, including the rail, can weigh around 30-35 pounds.

These measurements are crucial for ensuring adequate headroom and space within your garage. Always verify sufficient clearance before installation. The compact design of the 7055 allows for installation in garages with limited space. Accurate weight estimation is important for safe handling during setup and mounting procedures.

Warranty Information

Genie provides warranty coverage details for the 7055 model; contact Genie customer service to obtain warranty service and explore coverage specifics.

Warranty Coverage Details

Genie offers a limited warranty on the 7055 StealthDrive 750 garage door opener, covering defects in materials and workmanship. The duration of coverage varies based on component type; the motor typically has a longer warranty period than parts like the remote controls or accessories.

Specifically, the motor assembly is often covered for a lifetime, while parts are usually covered for a specific period, such as one or two years. Labor costs associated with warranty repairs may or may not be included, depending on the terms. To fully understand your warranty rights, carefully review the warranty documentation included with your opener.

Proof of purchase is essential for any warranty claim. Modifications or misuse of the opener can void the warranty. Contact Genie customer service for detailed warranty information and claim procedures.

Contacting Genie Customer Service

Genie provides several avenues for customers needing assistance with their 7055 opener. For immediate support, you can reach their customer service team via phone during business hours. Their website, www.geniecompany.com, is a valuable resource, offering FAQs, troubleshooting guides, and downloadable manuals.

The website also features a contact form for submitting inquiries. When contacting support, have your model number (7055) and purchase date readily available. This information expedites the assistance process.

Additionally, Genie maintains a presence on social media platforms where you might find helpful information or be able to connect with their support team. For warranty claims or complex issues, be prepared to provide proof of purchase and a detailed description of the problem.

free standing patio cover plans pdf

Discover how free standing patio cover plans, often available as PDF downloads, offer cost-effective shade solutions. These plans empower DIY enthusiasts
and homeowners to create beautiful, functional outdoor spaces without extensive costs.

What is a Free Standing Patio Cover?

A free standing patio cover is an outdoor structure providing shade and shelter, not directly attached to your house. Unlike attached patios, these covers have their own independent support system – typically posts set in concrete. PDF plans detail this construction, offering designs ranging from simple to elaborate. They create defined outdoor living areas, protecting from sun and light rain. These structures are ideal where attaching to the house isn’t feasible or desired, offering flexibility in placement and design. They’re a versatile addition to any backyard.

Why Choose a Free Standing Design?

Opting for a free standing patio cover offers several advantages. PDF plans allow for customization without altering your home’s structure. These designs provide greater placement flexibility, ideal for maximizing yard space or creating secluded areas. They avoid potential issues with house attachment, like flashing or structural concerns. Furthermore, a free standing cover can enhance property value and extend outdoor living seasons. Utilizing readily available PDF plans simplifies the building process, offering a cost-effective solution for comfortable outdoor enjoyment.

Planning Your Project

Careful planning, utilizing free standing patio cover plans in PDF format, is crucial. Consider size, location, building codes, budget, and material choices before starting.

Determining Patio Cover Size and Location

Selecting the ideal size and location for your free standing patio cover, guided by PDF plans, requires thoughtful consideration. Measure your desired outdoor space, accounting for furniture and traffic flow.
Consider sun angles to maximize shade during peak hours. Ensure sufficient clearance from property lines and existing structures. PDF plans often include recommended dimensions, but adapt them to your specific needs and landscape.
Prioritize accessibility and integration with your home’s layout for a seamless outdoor living experience.

Local Building Codes and Permits

Before commencing construction using your free standing patio cover plans (often PDF format), verify local building codes and permit requirements. Regulations vary significantly by location, impacting size, height, and foundation specifications. PDF plans may offer general guidance, but local codes supersede them.
Contact your city or county building department to understand necessary permits and inspections. Ignoring these steps can result in fines or removal orders, so diligent research is crucial for a compliant project.

Budgeting for Materials and Labor

Carefully estimate costs when utilizing free standing patio cover plans (typically PDF downloads). Material expenses – wood, metal, roofing – fluctuate. PDF plans detail material lists, aiding accurate budgeting. Factor in concrete for footings, fasteners, and finishing touches. If not DIY-ing, obtain quotes from qualified contractors for labor. Contingency funds (10-15%) are vital for unexpected expenses. Thorough budgeting prevents financial surprises during your patio cover project.

Types of Free Standing Patio Covers

PDF-based free standing patio cover plans showcase diverse styles: Gable, Hip, Shed, and Arbor/Pergola. Choose a design complementing your home and outdoor space.

Gable Style Patio Covers

Gable style patio covers, frequently detailed in free standing patio cover plans PDF formats, are characterized by their classic, peaked roofline resembling a traditional house gable. These plans often include instructions for constructing a sturdy frame, typically using wood or metal posts supporting rafters that meet at a central ridge.

The simplicity of the gable design makes it a popular choice for DIY projects, with many PDF plans offering step-by-step guidance for builders of varying skill levels. They provide excellent protection from the elements and can be customized with different roofing materials like shingles or metal, as illustrated in the downloadable plans.

Hip Style Patio Covers

Hip style patio covers, readily found within comprehensive free standing patio cover plans PDF resources, feature a roof that slopes downwards on all four sides, creating a more complex yet aesthetically pleasing structure. These plans typically detail the angled cuts required for the rafters and the precise measurements for a secure fit.

PDF guides often showcase variations, including single hip and double hip designs, offering builders choices based on their skill and desired visual impact. Hip roofs provide excellent stability and weather resistance, making them a durable option detailed in many downloadable plans.

Shed Style Patio Covers

Shed style patio covers, frequently illustrated in free standing patio cover plans PDF documents, present a simple, single-sloping roof design. These plans emphasize ease of construction, making them ideal for beginner DIY projects. The straightforward design minimizes complex cuts and framing requirements, reducing both time and material costs.

PDF guides often include detailed diagrams showing the roof pitch and support post placement. Shed roofs efficiently channel water runoff, providing practical protection, and are a popular choice detailed within readily available plans.

Arbor/Pergola Style Covers (Semi-Covered)

Arbor or pergola style covers, often found within free standing patio cover plans PDF resources, offer a blend of shade and open-air ambiance. These plans typically detail construction using posts supporting crossbeams, creating a partially covered space. They’re excellent for supporting climbing plants, enhancing aesthetic appeal.

PDF guides showcase varying degrees of coverage, from light filtering to more substantial shade. These plans frequently emphasize decorative elements, making them a visually appealing addition to any outdoor area, detailed with measurements and material lists.

Materials for Construction

Free standing patio cover plans PDF often detail wood (cedar, pine), metal (aluminum, steel), and roofing options like shingles or polycarbonate.

Wood Options: Cedar, Redwood, Pressure-Treated Pine

Free standing patio cover plans PDF frequently showcase wood as a primary building material due to its aesthetic appeal and workability. Cedar offers natural resistance to decay and insects, requiring minimal treatment, though it’s pricier. Redwood shares similar qualities, boasting a beautiful reddish hue. Pressure-treated pine is a cost-effective choice, but necessitates regular sealing and staining to prevent rot and ensure longevity.

Metal Options: Aluminum, Steel

Free standing patio cover plans PDF often detail metal framing options for durability and low maintenance. Aluminum is lightweight, rust-resistant, and ideal for coastal environments, though it can be less strong than steel. Steel provides superior strength and can span greater distances, but requires protective coatings – like galvanization – to prevent corrosion.

Roofing Materials: Shingles, Metal Roofing, Polycarbonate Panels

Free standing patio cover plans PDF will showcase diverse roofing choices. Shingles offer a traditional look and are cost-effective, but require periodic replacement. Metal roofing provides longevity and weather resistance, though it’s pricier. Polycarbonate panels allow light transmission, creating a bright space, and are impact-resistant, offering a modern aesthetic.

Finding Free Plans (PDF Format)

Numerous websites offer free standing patio cover plans in PDF format, providing detailed instructions and material lists for DIY construction projects.

Reliable Online Sources for Free Plans

Several online platforms consistently provide accessible free standing patio cover plans in PDF format. Websites like MyOutdoorPlans and PlansNow are frequently cited for their comprehensive collections, catering to various skill levels and design preferences. Pinterest also serves as a valuable discovery tool, linking to numerous DIY blogs and project pages hosting downloadable plans.

Additionally, checking reputable lumberyard and home improvement store websites—such as Lowe’s or Home Depot—can reveal exclusive plans offered as customer resources. Always verify the source’s credibility and user reviews before commencing any building project.

Understanding Plan Details and Symbols

Decoding free standing patio cover plans (often PDFs) requires familiarity with common architectural symbols. Expect to see representations for posts, beams, rafters, and roofing materials. Pay close attention to dimensions, typically indicated in feet and inches, and material lists specifying lumber sizes and quantities;

Key elements include foundation details, framing specifications, and fastening schedules. Understanding these symbols and notations is crucial for accurate construction and ensuring structural integrity. Don’t hesitate to research unfamiliar terms!

Checking Plan Accuracy and Completeness

Before commencing construction with your free standing patio cover plans (PDF format), meticulously verify their accuracy and completeness. Cross-reference dimensions across multiple views to identify discrepancies. Ensure a comprehensive material list is included, detailing quantities and specifications.

Confirm the plans adhere to local building codes and include necessary structural calculations. A complete plan set should encompass foundation details, framing layouts, and roofing instructions. Missing information could lead to costly errors.

Construction Process Overview

Building from free standing patio cover plans (PDF) involves foundation work, framing the structure, installing the roof, and adding finishing touches for enjoyment.

Foundation and Post Installation

Proper foundation is crucial when utilizing free standing patio cover plans (PDF). Begin by marking post locations according to your chosen plan, ensuring accurate measurements. Dig post holes to the depth specified, typically below the frost line for stability. Set posts, using concrete for secure anchoring, and verify plumbness.

Bracing posts during concrete curing is essential. Allow sufficient drying time before proceeding to framing. Some plans may require a perimeter footing, adding further support. Accurate post placement directly impacts the overall structural integrity of your patio cover.

Framing the Structure

Following your free standing patio cover plans (PDF), begin framing the structure with lumber specified for strength and durability. Construct the header, beam, and rafter system, ensuring square corners and proper alignment. Utilize appropriate fasteners – screws or nails – as indicated in the plans.

Accurate cuts and secure connections are vital for a stable frame. Consider adding bracing for increased wind resistance. Double-check all measurements against the PDF before securing components. A well-framed structure forms the backbone of your patio cover.

Roofing Installation

Referring to your free standing patio cover plans (PDF), carefully install the chosen roofing material. Begin with underlayment for weather protection, followed by shingles, metal roofing, or polycarbonate panels. Ensure proper overlap and secure fastening according to manufacturer instructions and the PDF guidelines.

Maintain consistent alignment and spacing for a visually appealing and watertight roof. Flashing around posts and edges is crucial to prevent leaks. A correctly installed roof safeguards against the elements and extends the cover’s lifespan.

Finishing Touches: Railings, Lighting, and More

Consult your free standing patio cover plans (PDF) for guidance on adding finishing elements. Railings enhance safety and aesthetics, while outdoor lighting extends usability into the evening. Consider electrical wiring requirements before roofing installation for seamless integration.

Personalize your space with decorative features like screens, curtains, or planters. Ensure all additions comply with local building codes and enhance the overall design, referencing the PDF for structural considerations.

Tools and Equipment Needed

Review your free standing patio cover plans (PDF) to determine necessary tools. Essential items include saws, drills, levels, and safety gear for successful construction.

Essential Power Tools

Successfully executing your free standing patio cover plans (PDF) demands specific power tools. A circular saw is crucial for accurate lumber cuts, while a power drill—with various bits—handles screw and bolt fastening. Consider a reciprocating saw for demolition or adjustments.
A miter saw ensures precise angled cuts for a professional finish. Power sanders streamline surface preparation. Don’t forget a nail gun for efficient framing, and always prioritize safety with appropriate protective gear when operating these tools.

Hand Tools for Precision Work

Complementing your power tools, several hand tools are vital when working with free standing patio cover plans (PDF). A quality tape measure ensures accurate dimensions, while a speed square aids in marking precise angles. Utilize a level to guarantee a perfectly horizontal structure. Hand saws offer control for delicate cuts, and chisels refine joints. Don’t overlook a hammer, screwdrivers, and wrenches for assembly. These tools provide the finesse power tools sometimes lack, ensuring a polished result.

Safety Equipment

Prioritizing safety is paramount when executing free standing patio cover plans (PDF). Always wear safety glasses to protect your eyes from debris. A dust mask shields against wood particles and irritants. Work gloves enhance grip and prevent splinters. Sturdy work boots provide foot protection. When using power tools, ear protection is crucial. A hard hat is recommended for overhead work. Remember, a safe work environment ensures a successful and enjoyable project completion.

Cost Breakdown

Estimating expenses for free standing patio cover plans (PDF) involves materials, potential labor, and permit fees. Careful budgeting ensures project affordability and prevents unexpected costs.

Material Costs Estimate

Estimating material costs for a free standing patio cover, utilizing PDF plans, varies greatly. Wood options like cedar or pressure-treated pine typically range from $3 to $8 per board foot. Metal, such as aluminum or steel, can cost $2 to $5 per linear foot. Roofing materials—shingles, metal, or polycarbonate—add $1 to $4 per square foot.

Foundation materials (concrete, posts) contribute $5 to $15 per post. Fasteners, railings, and finishing touches add another $200-$500. Total material costs generally fall between $1,000 and $5,000, depending on size, materials chosen, and local pricing.

Labor Costs (If Hiring Professionals)

Professional installation of a free standing patio cover, even with readily available PDF plans, typically ranges from $5 to $15 per square foot. This encompasses foundation work, framing, roofing, and finishing. Expect to pay a minimum of $500 for smaller projects, escalating to $3,000+ for larger, more complex designs.

Hourly rates for contractors can vary from $40 to $80. Obtaining multiple quotes is crucial. Permits and inspections, often required, add an additional $50 to $500 to overall labor expenses.

Permit and Inspection Fees

Permit costs for a free standing patio cover, even when utilizing PDF plans, fluctuate significantly based on location and project scope. Expect fees ranging from $50 to $500, sometimes higher in areas with stringent building codes. Inspections, ensuring code compliance, typically add $50 to $200 per visit.

These fees cover structural integrity, safety, and adherence to zoning regulations. Failing to obtain necessary permits can result in fines and project delays, so diligent research is vital.

DIY vs. Professional Installation

Utilizing free standing patio cover plans (PDF format) allows DIY installation, saving labor costs, but requires skill. Professionals offer expertise and guarantee quality.

Pros and Cons of DIY

Embarking on a DIY project using free standing patio cover plans (often found as PDF downloads) presents significant cost savings by eliminating labor expenses. However, it demands considerable time, physical effort, and a solid understanding of construction techniques. Potential drawbacks include errors leading to structural issues, code violations, and the need for costly corrections. Successfully completing the project requires meticulous attention to detail, accurate measurements, and adherence to safety protocols. Conversely, a professionally installed cover guarantees quality workmanship and compliance with local regulations, offering peace of mind, though at a higher price point;

When to Hire a Contractor

Consider a professional contractor when your free standing patio cover plans (sourced as PDF documents) involve complex designs, electrical work, or require navigating intricate local building codes. If you lack extensive construction experience, or time is limited, hiring a pro ensures structural integrity and code compliance. Furthermore, permits often necessitate professional oversight. Contractors offer expertise in material selection, efficient installation, and can manage potential challenges, ultimately saving you time, stress, and potentially costly mistakes. Prioritize professional help for larger, more demanding projects.

Maintenance and Care

Regular inspection and cleaning, informed by your free standing patio cover plans (PDF format), are crucial. Protect wood with treatments and metal from rust.

Regular Cleaning and Inspection

Consistent upkeep, guided by your free standing patio cover plans (often in PDF format), significantly extends the life of your structure. Inspect regularly for loose fasteners, wood rot, or metal corrosion. Remove debris like leaves and dirt, as these can trap moisture and accelerate deterioration. Check roofing materials for damage – shingles may crack, and polycarbonate panels can become brittle. Address any issues promptly to prevent minor problems from escalating into costly repairs. A thorough annual inspection ensures continued enjoyment and safety.

Wood Treatment and Protection

Referencing your free standing patio cover plans (typically PDF downloads), proper wood treatment is crucial for longevity. Apply a high-quality sealant or stain annually to protect against moisture, UV rays, and insect damage. Cedar and redwood offer natural resistance, but still benefit from treatment. Pressure-treated pine requires less frequent application, but should still be inspected. Consider a water-repellent preservative to minimize warping and cracking. Regular re-application, as outlined in your plans, safeguards your investment and maintains aesthetic appeal.

Metal Rust Prevention

Consult your free standing patio cover plans (often in PDF format) for specific metal treatment recommendations. Aluminum is naturally rust-resistant, but steel requires diligent protection. Apply a rust-inhibiting primer followed by exterior-grade paint. Regularly inspect for scratches or chips, promptly repairing any damage to expose the metal. Galvanized steel offers enhanced protection, but still benefits from coating. Consider using stainless steel hardware to prevent corrosion. Proper maintenance, guided by your plans, extends the life of your metal structure.

Design Considerations

Review your free standing patio cover plans (PDF) to ensure the design complements your home’s style and maximizes shade, ventilation, and aesthetic appeal.

Matching Your Home’s Architecture

Carefully examine your home’s existing architectural style when selecting free standing patio cover plans (often found as PDF downloads). A modern home benefits from sleek, minimalist designs, while a traditional house pairs well with gable or hip roof styles.

Consider roof pitch, materials, and color schemes to create a harmonious extension of your home. PDF plans often showcase various design options; choose one that seamlessly integrates with your existing structure, enhancing curb appeal and overall aesthetic coherence. Prioritize visual consistency for a polished look.

Incorporating Shade and Ventilation

Effective shade and ventilation are crucial for comfortable outdoor living. Free standing patio cover plans (available as PDFs) should address these needs. Consider the sun’s path and design the cover to provide optimal shade during peak hours.

Incorporate features like open rafters, lattice panels, or adjustable louvers to promote airflow. PDF plans may offer options for integrating fans or screens. Balancing shade with ventilation ensures a pleasant space, mitigating heat buildup and maximizing enjoyment.

Adding Aesthetic Features

Enhance your free standing patio cover with decorative elements! Many PDF plans offer suggestions for customization. Consider adding integrated lighting, such as string lights or recessed fixtures, to create ambiance. Railings can be styled to complement your home’s architecture.

Planters, climbing vines, or decorative posts add visual appeal. PDF plans might showcase different design options. Personalize your space to reflect your style, transforming a functional structure into a beautiful outdoor retreat.

Resources and Further Information

Explore online forums and local lumberyards for free standing patio cover plans in PDF format. Professionals can also offer guidance and support.

Online Forums and Communities

Engage with fellow DIY enthusiasts on dedicated online forums to access a wealth of knowledge regarding free standing patio cover plans. These communities frequently share PDF versions of plans, offering diverse designs and construction techniques.
Expect to find detailed discussions about material selection, building codes, and problem-solving tips. Platforms like Reddit (r/HomeImprovement) and dedicated woodworking forums are excellent starting points.
Remember to verify information and prioritize safety when implementing advice found online, always cross-referencing with official building guidelines.

Local Hardware Stores and Lumberyards

Visit your local hardware stores and lumberyards; surprisingly, some offer basic free standing patio cover plans, occasionally in PDF format, with material purchases. Staff can provide invaluable advice on suitable lumber, fasteners, and roofing options for your project.
They may also be aware of local building codes and permit requirements. Building relationships with these professionals can unlock access to specialized knowledge and potential discounts, streamlining your build.

Professional Patio Cover Installers

Engaging professional patio cover installers offers expertise, even if you’re starting with free standing patio cover plans found as PDF downloads. They can assess your property, ensure code compliance, and handle permitting. While adding to project costs, professionals guarantee structural integrity and proper installation. Obtain multiple quotes and verify licenses/insurance before hiring. Discuss plan modifications and material choices for a tailored outcome.