history of the rosary pdf

History of the Rosary: A Comprehensive Overview

Exploring the rich history of the Rosary reveals its evolution from early prayer practices to a beloved Catholic devotion. Numerous resources‚ including offer detailed insights into its origins and development‚ often available as a history of the rosary PDF.

Early Origins & Precursors (Before 15th Century)

Before the formalized Rosary of the 15th century‚ several devotional practices laid the groundwork for its development. The roots trace back to the early Church’s monastic tradition of reciting the 150 Psalms‚ a practice deeply embedded in liturgical prayer. However‚ accessibility proved challenging for the laity‚ many of whom lacked the resources – like a Psalter – or literacy skills to participate directly.

These early forms of prayer demonstrate a desire for a simplified‚ yet substantial‚ devotional practice mirroring the monastic life‚ setting the stage for the Rosary’s eventual formalization.

The Psalter of 150 Psalms & Lay Prayer

The monastic tradition of reciting the entire Psalter – all 150 Psalms – formed a cornerstone of liturgical prayer in the medieval period. This practice‚ central to the daily office of monks‚ provided a structured and comprehensive form of devotion. However‚ its complexity and the requirements of literacy and access to a Psalter presented significant barriers for the lay faithful.

Recognizing this disparity‚ a desire arose to provide a comparable devotional practice accessible to those outside the monastic orders. The Psalter‚ while spiritually enriching‚ was simply impractical for most laypeople. This need fueled the development of alternative forms of prayer‚ aiming to replicate the Psalter’s completeness in a more manageable format. Detailed accounts of this transition can be found in resources like a dedicated history of the rosary PDF.

This quest for accessible prayer ultimately paved the way for the emergence of practices like the recitation of 150 Our Fathers‚ a direct response to the limitations of engaging with the full Psalter.

The 150 Our Fathers Devotion

As a practical alternative to reciting the 150 Psalms of the Psalter‚ a new devotional practice emerged among the laity: the recitation of 150 Our Fathers throughout the day. This adaptation addressed the challenges of literacy and access to the Psalter‚ offering a readily available and easily repeatable prayer form for those unable to engage with the more complex monastic practice.

This practice laid the foundational groundwork for the eventual formalization and expansion into the Rosary as we know it today.

Saint Dominic and the Rosary (1221)

A pivotal moment in Rosary history centers around Saint Dominic and a reported apparition of the Virgin Mary around the year 1221. While combating the Albigensian heresy‚ a significant challenge to the Catholic faith in Southern France‚ Dominic received Mary’s guidance and a powerful spiritual weapon.

According to tradition‚ Mary presented Dominic with the Rosary‚ instructing him to preach this devotion to the faithful. She promised that his apostolic endeavors would be greatly blessed if he embraced this practice. This divine endorsement provided a crucial impetus for the Rosary’s propagation‚ particularly within the Dominican Order.

The Dominicans actively promoted the Rosary‚ recognizing its potential to combat heresy and foster deeper faith. Detailed accounts of this period‚ including the historical context and theological significance‚ can be found in resources like a comprehensive history of the rosary PDF‚ offering a deeper understanding of this foundational event.

The Albigensian Heresy & Mary’s Apparition

The 13th century witnessed the rise of the Albigensian heresy‚ a dualistic belief system challenging core Catholic doctrines in Southern France. This posed a significant threat to the Church’s authority and the spiritual well-being of the faithful‚ necessitating a robust response.

Amidst this turmoil‚ the story unfolds of Saint Dominic’s tireless efforts to combat the heresy. Tradition holds that Mary appeared to Dominic around 1221‚ offering him a powerful tool for conversion and defense against the Albigensians – the Rosary. This apparition wasn’t merely a comforting vision‚ but a strategic intervention.

Dominican Order’s Role in Rosary Propagation

Following Saint Dominic’s receipt of the Rosary from Mary‚ the Dominican Order became its primary champion and dedicated themselves to its widespread dissemination. Recognizing its potential as a powerful instrument for evangelization and spiritual renewal‚ they actively promoted the devotion throughout Europe and beyond.

The Dominicans didn’t simply advocate for the Rosary; they integrated it into their preaching and missionary work. They understood its accessibility – requiring no literacy or wealth – made it uniquely suited for reaching the common people. This strategic approach proved remarkably effective in countering the Albigensian heresy and fostering a deeper faith among the laity.

Their commitment extended to establishing Rosary confraternities and encouraging its recitation in parishes and communities. Detailed accounts of the Dominican Order’s pivotal role can be found in resources like a comprehensive history of the rosary PDF‚ highlighting their enduring legacy in shaping this beloved prayer tradition.

Development of the Rosary (15th ⎯ 16th Centuries)

During this period‚ the Rosary underwent significant formalization‚ notably with the articulation of the Fifteen Mysteries. Resources‚ like a detailed history of the rosary PDF‚ document this evolution.

The Fifteen Mysteries – Formalization

The 15th century witnessed a crucial step in the Rosary’s development: the formalization of the Fifteen Mysteries. While the practice of reciting 150 Our Fathers and Hail Marys existed prior‚ grouping these prayers around meditations on the life of Christ and Mary provided a structured devotional framework. This arrangement‚ attributed largely to Alan de Rupe‚ offered a more comprehensive and engaging prayer experience for the faithful.

Alan de Rupe‚ a Dominican priest‚ is credited with dividing the 150 prayers into three sets – Joyful‚ Sorrowful‚ and Glorious – each consisting of five Mysteries. This systematization greatly aided in memorization and contemplation. He presented this structure in his book‚ De laudibus B. Mariae Virginis (In Praise of the Blessed Virgin Mary)‚ around 1470.

The Role of Alan de Rupe

Alan de Rupe‚ a 15th-century Dominican priest‚ stands as a central figure in the Rosary’s formal development. While the practice of reciting 150 prayers existed‚ it was de Rupe who systematized the meditations accompanying them‚ dividing them into the Joyful‚ Sorrowful‚ and Glorious Mysteries. His work provided a structured framework that significantly enhanced the Rosary’s devotional appeal and accessibility.

Around 1470‚ de Rupe presented his arrangement in his book‚ De laudibus B. Mariae Virginis (In Praise of the Blessed Virgin Mary). He emphasized the importance of contemplating the life of Christ and Mary through these fifteen Mysteries‚ transforming the Rosary from a simple recitation into a profound meditative practice.

Scholarly resources and detailed history of the rosary PDFs highlight de Rupe’s contribution. His efforts were instrumental in popularizing the Rosary and establishing it as a powerful tool for personal and communal prayer within the Catholic Church.

The Fraternity of the Rosary

The establishment of the Fraternity of the Rosary in the late 15th century marked a pivotal moment in the Rosary’s propagation. Founded by Alan de Rupe‚ this lay confraternity was dedicated to promoting the Rosary devotion and spreading its benefits throughout Christendom. It quickly gained popularity‚ establishing branches across Europe and beyond.

The Fraternity provided a structured network for Rosary recitation and fostered a sense of community among its members. It actively encouraged the public recitation of the Rosary‚ particularly in times of crisis or need‚ believing in its power to intercede for peace and salvation.

The Rosary as a “Poor Man’s Breviary”

The moniker “Poor Man’s Breviary” highlights a crucial aspect of the Rosary’s historical development and accessibility. During the medieval period‚ the Divine Office‚ or Breviary‚ was the official set of prayers recited by clergy and religious orders throughout the day. However‚ it was largely inaccessible to the laity due to literacy rates and the cost of Psalters – the books containing the Psalms.

As a parallel to the monastic recitation of the 150 Psalms‚ the practice emerged of praying the Our Father 150 times daily. This provided a simplified‚ yet substantial‚ form of prayer for those unable to engage with the Breviary. The Rosary‚ evolving from this practice‚ offered a similar spiritual benefit to the common people.

The Rosary in the 17th & 18th Centuries

Papal Endorsements & Promotion

Throughout the 17th and 18th centuries‚ the Rosary experienced a surge in popularity‚ largely fueled by consistent and enthusiastic papal endorsements. Popes actively promoted the devotion as a powerful weapon against heresy and a means of securing divine grace for the faithful. These endorsements weren’t merely symbolic; they often involved the commissioning of Rosary-themed artwork‚ the establishment of Rosary confraternities‚ and the issuance of papal bulls explicitly encouraging its recitation.

The Rosary in Missionary Work

As the Catholic Church expanded its missionary efforts across the globe during the 17th and 18th centuries‚ the Rosary proved to be an invaluable tool for evangelization. Missionaries found it to be a readily accessible and culturally adaptable devotional practice‚ easily taught and embraced by new converts. The simplicity of the Rosary – requiring only beads and a basic understanding of prayers – made it particularly effective in regions with limited literacy or complex theological frameworks.

The Rosary served as a common ground for prayer and a powerful symbol of shared faith‚ fostering a sense of community among diverse populations. Missionaries utilized the Rosary to catechize‚ reinforce beliefs‚ and offer solace to those facing hardship. Further exploration of the Rosary’s role in spreading the faith‚ alongside a detailed historical account‚ is available through various history of the rosary PDFs and online resources‚ illuminating its enduring impact on global Catholicism.

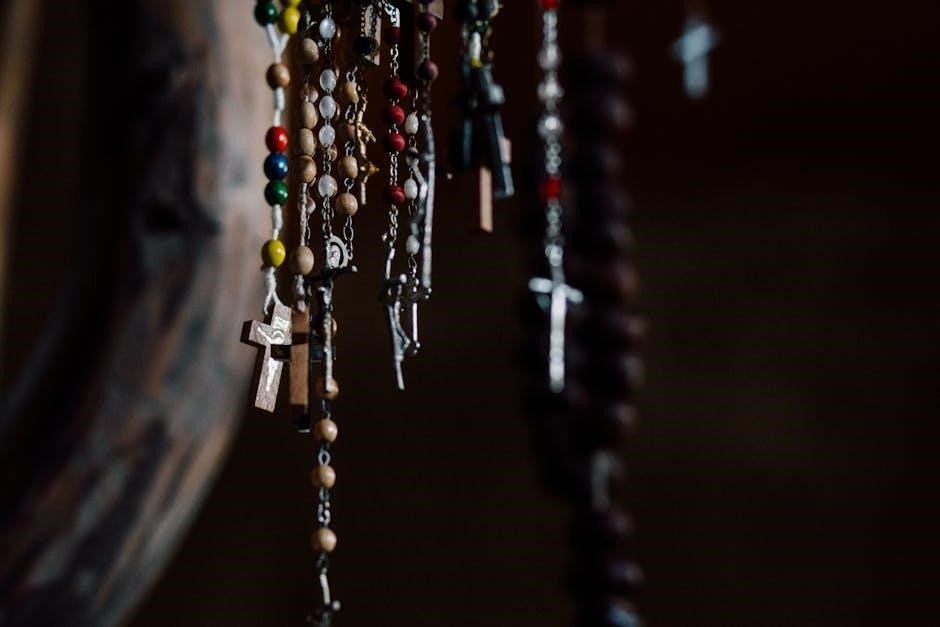
The Development of Rosary Beads

Initially‚ the faithful utilized readily available objects – pebbles‚ seeds‚ or knots tied in cords – to keep track of the 150 prayers comprising the Rosary. These early “counting beads” gradually evolved into more refined forms as the devotion gained popularity. Throughout the 16th and 17th centuries‚ artisans began crafting beads from materials like wood‚ bone‚ and ivory‚ often incorporating precious metals and gemstones for wealthier patrons.

The 19th & 20th Centuries: Renewed Emphasis

Pope Leo XIII & Rosary Confraternities

Pope Leo XIII played a pivotal role in the 19th-century revival of the Rosary‚ recognizing its power as a weapon against societal ills and a source of grace for the faithful. Throughout his pontificate (1878-1903)‚ he issued numerous encyclicals dedicated to the Rosary‚ most notably Rosarium Virginis Mariae (1897)‚ urging its widespread recitation and promoting its benefits.

He actively encouraged the establishment and growth of Rosary Confraternities‚ recognizing them as vital instruments for disseminating this devotion. These confraternities‚ often parish-based‚ fostered communal prayer and provided a structure for promoting the Rosary within local communities.

The Rosary and Marian Apparitions (Fatima)

The 20th century witnessed a significant resurgence in Rosary devotion‚ powerfully linked to the Marian apparitions at Fatima‚ Portugal‚ in 1917. Our Lady appeared to three shepherd children – Lucia‚ Jacinta‚ and Francisco – repeatedly urging them‚ and through them the world‚ to pray the Rosary as a means of obtaining peace and salvation.

The messages of Fatima emphasized the Rosary’s efficacy in converting sinners‚ preventing war‚ and achieving world peace. Our Lady specifically requested the daily recitation of the Rosary‚ highlighting its importance in the face of growing global conflicts and spiritual apathy. The children’s accounts detailed the profound impact of Rosary prayer during the apparitions.

Fatima dramatically increased the Rosary’s popularity worldwide‚ solidifying its place as a central devotion within the Catholic Church. Detailed analyses of the Fatima events and their connection to the Rosary are readily available in scholarly works and accessible resources‚ including a comprehensive history of the rosary PDF‚ offering deeper insights into this pivotal moment.

The Addition of the Mysteries of Light (2002)

In 2002‚ Pope John Paul II introduced the Luminous Mysteries to the Rosary‚ a significant addition after centuries of tradition. These five new mysteries – the Baptism of Jesus‚ the Wedding at Cana‚ the Proclamation of the Kingdom‚ the Transfiguration‚ and the Institution of the Eucharist – focus on Jesus’ public ministry‚ illuminating his divine identity and mission.

The Pope explained that these mysteries were intended to complement the existing Joyful‚ Sorrowful‚ and Glorious Mysteries‚ providing a more complete portrait of Christ and deepening the faithful’s understanding of his teachings. He believed they were particularly relevant for contemporary society‚ offering a focus on light and hope.

The Rosary Today

facilitate modern adaptation and continued devotion.

The Rosary in Contemporary Catholic Practice

Today‚ the Rosary continues to be a deeply cherished and widely practiced devotion within the Catholic Church. It serves as a powerful tool for personal prayer‚ meditation on the mysteries of Christ’s life‚ and intercession through the Blessed Virgin Mary. Families frequently pray the Rosary together‚ fostering a sense of unity and spiritual connection.

Parishes and dioceses often organize Rosary groups and events‚ encouraging communal prayer and deepening faith. The Rosary is also frequently recited during significant liturgical seasons‚ such as October (the Month of the Rosary) and May (the Month of Mary).

Digital Rosaries & Modern Adaptations

The 21st century has witnessed a fascinating intersection of ancient tradition and modern technology in the practice of the Rosary. Digital Rosaries‚ ranging from simple apps on smartphones to sophisticated electronic devices‚ offer features like automated bead counting‚ audio guidance‚ and customizable prayer schedules. These tools cater to a variety of preferences and lifestyles‚ making the Rosary more accessible to a wider audience.

Adaptations also include creative prayer formats‚ such as themed Rosaries focused on specific intentions or incorporating contemporary music. These innovations demonstrate the Rosary’s remarkable adaptability and its continued relevance in a rapidly changing world‚ ensuring its enduring spiritual power for generations to come.

Resources for Learning the Rosary (PDFs & Online Guides)

Websites like Franciscan Media offer detailed guides‚ explanations of each mystery‚ and instructions for praying the Rosary effectively. Dynamic Catholic provides interactive resources and downloadable materials‚ simplifying the learning process.

Many Catholic parishes also offer Rosary instruction and prayer groups. Printable PDFs outlining the prayers and mysteries are widely accessible‚ facilitating personal devotion. These resources cater to diverse learning styles‚ ensuring that anyone interested can embark on a meaningful Rosary journey and deepen their faith through this powerful prayer tradition.

orbit 57894 manual

Orbit 57894 Sprinkler Timer: A Comprehensive Manual Guide

This guide details the Orbit 57894 timer‚ offering easy-set logic for flexible watering programs‚ covering installation‚ programming‚ and maintenance procedures effectively.

Welcome to the Orbit 57894 Sprinkler Timer – a user-friendly solution for automated lawn and garden watering! This timer‚ brought to you by Orbit Irrigation Products‚ Inc.‚ simplifies maintaining a healthy landscape while conserving water. Designed with “easy-set logic‚” the 57894 model allows for the creation of customized watering schedules tailored to your specific needs.

Whether you’re a seasoned gardener or new to irrigation‚ this timer offers flexibility and convenience. This manual will guide you through every step‚ from initial setup and programming to advanced features and troubleshooting. It’s a powerful tool for efficient water management‚ ensuring your plants thrive without constant manual intervention. Prepare to experience effortless lawn care with the Orbit 57894!

What’s Included in the Box

Upon opening your Orbit 57894 Sprinkler Timer package‚ please verify that all components are present. You should find the Orbit 57894 Timer unit itself‚ designed for straightforward installation and operation. Included is a detailed user manual – this document! – providing step-by-step instructions for setup‚ programming‚ and troubleshooting.

Additionally‚ the box contains mounting screws and hardware necessary to securely attach the timer to a wall or hose bib. While batteries are not included‚ the timer requires AA batteries for operation. Ensure you have a fresh set readily available. Inspect all parts for any damage during shipping; contact Orbit customer support if anything is missing or defective before proceeding with installation.

Timer Overview: Parts and Functions

The Orbit 57894 timer features a user-friendly interface designed for intuitive operation. The large LCD screen clearly displays the current time‚ date‚ and programmed watering schedules. Navigation is managed through several buttons: ‘Set’ for accessing programming modes‚ ‘Menu’ for cycling through options‚ and directional arrows for adjusting values.

The timer body houses the internal electronics and battery compartment. Multiple zone outputs allow control of several valves independently. A manual override button enables immediate watering‚ bypassing programmed schedules. The timer’s housing is designed for weather resistance‚ protecting internal components. Understanding these parts and their functions is crucial for effective programming and maintenance of your sprinkler system.

Setting Up Your Orbit 57894 Timer

Proper setup involves selecting a suitable location‚ securely mounting the timer‚ and correctly connecting valves and the water supply for optimal performance.

Selecting a Mounting Location

Choosing the right location is crucial for your Orbit 57894 timer’s longevity and ease of use. Ideally‚ select a spot close to a power outlet if you’re using the optional AC adapter‚ ensuring the cord reaches comfortably. The location should also be within range of your sprinkler valves.

Protect the timer from direct sunlight and extreme weather conditions; a shaded area is preferable. Avoid locations prone to flooding or standing water. Ensure the mounting surface is stable and can support the timer’s weight‚ especially when hoses are connected. Consider accessibility for programming and manual adjustments – you’ll want to easily reach the controls. A flat‚ vertical surface‚ like a wall or fence post‚ works best for secure mounting.

Mounting the Timer to a Wall or Hose Bib

Securely mounting your Orbit 57894 timer prevents damage and ensures reliable operation. For wall mounting‚ use the provided screws to attach the mounting bracket to a solid surface. Ensure the screws are appropriate for the wall material (wood‚ brick‚ etc.).

Alternatively‚ you can mount the timer directly to a hose bib; Hand-tighten the timer onto the bib‚ avoiding excessive force that could damage the threads. A slight application of Teflon tape to the bib threads can help create a watertight seal. Verify the timer is firmly attached and doesn’t wobble. Regularly inspect the mounting to ensure it remains secure‚ especially after exposure to weather elements.

Connecting the Valve(s) to the Timer

The Orbit 57894 timer utilizes standard hose-thread connections for easy valve integration. Each zone on the timer corresponds to a specific valve controlling a section of your irrigation system. Carefully connect the valve(s) to the timer’s designated zone outlets‚ ensuring a snug‚ hand-tight fit.

Using Teflon tape on the valve threads is recommended to prevent leaks. If you’re using multiple valves‚ clearly label each one to correspond with its programmed zone. Double-check all connections before turning on the water supply. Incorrect valve connections will result in water flowing to the wrong zones‚ potentially causing inefficiencies or damage.

Connecting the Water Supply

Before connecting the water supply‚ ensure all valve connections to the Orbit 57894 timer are secure and leak-proof. Attach a garden hose to the timer’s water inlet‚ and then connect the hose to your outdoor faucet or water source. Slowly turn on the water supply‚ monitoring for any leaks at the connections.

If leaks are detected‚ immediately turn off the water and tighten the connections further‚ or reapply Teflon tape if necessary. Avoid over-tightening‚ as this can damage the threads; Once the water is flowing without leaks‚ the timer is ready for programming and operation. Proper water supply connection is crucial for reliable irrigation.

Programming the Orbit 57894 Timer

Effectively utilize the easy-set logic to establish flexible watering programs‚ defining start times‚ durations‚ and zone assignments for optimal irrigation control.

Understanding the Programming Logic

The Orbit 57894 timer employs a straightforward‚ user-friendly programming logic designed for flexible watering schedules. It operates on a program-based system‚ allowing you to create multiple independent watering programs‚ each tailored to specific zones or plant types.

Each program consists of a start time‚ watering duration‚ and the days of the week on which it will run. You can assign individual zones to each program‚ enabling customized irrigation for different areas of your yard. The timer supports multiple start times per program‚ offering further flexibility.

Understanding this structure is key to maximizing the timer’s capabilities. It’s not a complex system‚ but rather a modular approach to irrigation control‚ allowing for precise and efficient water management.

Setting the Current Time and Date

Accurate time and date settings are crucial for the Orbit 57894 timer to function correctly. Begin by pressing the “Set Clock” button. The display will flash‚ prompting you to enter the current hour. Use the “Hour” and “Minute” buttons to adjust the values‚ ensuring AM or PM is correctly selected.

Next‚ set the date using the “Month‚” “Day‚” and “Year” buttons. Cycle through the options until the correct values are displayed. Confirm each setting by pressing the “Set” or “Enter” button.

Double-check the displayed time and date for accuracy. Incorrect settings will lead to inaccurate watering schedules. Proper setup ensures your programs run when intended.

Programming Watering Start Times

To program watering start times on your Orbit 57894 timer‚ first select the desired program (A‚ B‚ or C) using the “Program” button. Press “Set Time” and the display will flash‚ indicating you can input the start time for that program. Utilize the “Hour” and “Minute” buttons to set the desired start hour and minute.

You can program multiple start times per program‚ allowing for flexible watering schedules. After setting the first start time‚ press “Set Time” again to add another. Repeat this process until all desired start times are programmed.

Confirm each start time by pressing “Enter” or “Set”.

Setting Watering Duration

After establishing the watering start times‚ you must define the duration for each watering cycle on your Orbit 57894 timer. Within the selected program‚ press the “Run Time” button. The display will begin to flash‚ signaling you to input the desired watering duration.

Use the “Hour” and “Minute” buttons to precisely set the watering time‚ ranging from one minute to several hours‚ depending on your landscaping needs. Consider factors like plant type and soil conditions when determining the appropriate duration.

Confirm the set duration by pressing “Enter” or “Set”.

Assigning Zones to Watering Programs

The Orbit 57894 timer allows for independent control of multiple watering zones‚ optimizing water usage across your landscape. To assign a zone to a specific program‚ first‚ select the desired program number using the program selection buttons.

Next‚ press the “Zone” button. The display will prompt you to enter the zone number you wish to assign to this program. Utilize the number buttons to input the corresponding zone number.

Confirm your selection by pressing “Enter” or “Set”. Repeat this process for each zone‚ assigning them to the appropriate programs based on their watering requirements.

Advanced Features and Settings

Explore enhanced functionalities like rain delay‚ manual override‚ and seasonal adjust‚ providing customized control and efficient water management for your irrigation system.

Rain Delay Functionality

The Orbit 57894 timer incorporates a convenient Rain Delay feature‚ allowing you to temporarily suspend scheduled watering programs during periods of rainfall. This prevents overwatering and conserves water resources. To activate Rain Delay‚ navigate to the appropriate setting within the timer’s programming menu. You’ll typically be prompted to specify the duration of the delay‚ often ranging from hours to several days.

During the Rain Delay period‚ all programmed watering cycles will be automatically paused. Once the delay expires‚ the timer will resume its normal watering schedule. This feature is particularly useful for responding to unexpected weather events‚ ensuring your landscape receives only the necessary amount of water. Remember to deactivate the Rain Delay manually when conditions return to normal‚ or the timer will continue to postpone watering.

Manual Watering Override

The Orbit 57894 timer provides a Manual Watering Override function‚ granting you immediate control over your irrigation system‚ independent of the programmed schedule. This is incredibly useful for spot-watering specific areas or addressing unforeseen dryness. To initiate a manual cycle‚ access the override option within the timer’s interface. You’ll then select the zone you wish to water and specify the desired duration.

The timer will immediately activate the chosen zone for the set period‚ overriding any existing programmed schedules. Once the manual cycle completes‚ the timer will automatically revert back to its regularly scheduled programming. This feature offers flexibility and responsiveness‚ allowing you to tailor watering to your landscape’s specific needs. Remember to cancel the override if needed‚ preventing unintended prolonged watering.

Seasonal Adjust Feature

The Orbit 57894 timer incorporates a Seasonal Adjust feature‚ allowing you to globally modify your watering schedules to accommodate changing weather patterns throughout the year. As temperatures rise or fall‚ your landscape’s water requirements shift. This feature enables you to increase or decrease watering durations across all zones proportionally‚ without needing to reprogram each zone individually.

Access the Seasonal Adjust setting through the timer’s menu and input a percentage adjustment – positive for increased watering during hotter months‚ and negative for reduced watering during cooler‚ wetter periods. This simplifies water conservation and ensures your landscape receives optimal hydration. Regularly reviewing and adjusting this setting will maximize efficiency and promote healthy plant growth‚ adapting to the natural seasonal changes.

Winterization and Storage

Proper winterization is crucial to protect your Orbit 57894 timer from freezing temperatures and potential damage. Before the first frost‚ disconnect the timer from the water supply and any connected valves. Thoroughly drain all water from the timer housing and valve connections to prevent ice formation‚ which can crack components.

Remove the batteries to prevent corrosion during prolonged storage. Store the timer indoors in a dry‚ frost-free location. Avoid storing it in direct sunlight or extreme temperatures. When spring arrives‚ inspect the timer for any signs of damage before reconnecting it. Following these steps ensures your timer remains functional and ready for the next watering season‚ extending its lifespan considerably.

Troubleshooting Common Issues

This section addresses typical problems like power failures‚ valve malfunctions‚ time display errors‚ and programming mistakes for the Orbit 57894 timer.

Timer Not Powering On

If your Orbit 57894 timer fails to power on‚ begin by verifying the battery installation. Ensure the batteries are fresh and correctly inserted‚ observing the proper polarity (+ and -) as indicated within the battery compartment.

Next‚ check the battery contacts for any corrosion or debris that might be hindering a solid connection. Gently clean the contacts if necessary. If using an AC adapter (if your model supports it)‚ confirm it’s securely plugged into both the timer and a functioning power outlet.

Also‚ inspect the adapter’s cord for any damage. A faulty adapter can prevent the timer from receiving power. Finally‚ if none of these steps resolve the issue‚ the timer itself may be defective‚ and contacting Orbit customer support is recommended.

Valve Not Activating

If a valve connected to your Orbit 57894 timer isn’t activating during a programmed watering cycle‚ first confirm the valve is receiving power from the timer. Check the zone wiring connections at both the timer and the valve itself‚ ensuring they are secure and free from corrosion.

Verify the valve is not manually turned off. Some valves have a manual override switch. Also‚ ensure the programmed watering duration for that specific zone isn’t set to zero.

Inspect the valve solenoid for any visible damage or obstructions. A faulty solenoid can prevent the valve from opening. If the problem persists‚ try testing the valve with a different zone on the timer to isolate whether the issue lies with the valve or the timer itself.

Incorrect Time Display

An inaccurate time display on your Orbit 57894 timer can lead to incorrect watering schedules. Begin by verifying the timer’s battery level; low batteries often cause timekeeping errors. If the batteries are fresh‚ carefully re-enter the current time and date following the programming instructions in the manual.

Ensure you’ve selected the correct AM/PM setting during time setup. Double-check that the date is also correctly entered‚ as some timers synchronize time based on date information.

If the issue continues‚ try resetting the timer to its factory defaults and then re-programming the time and date. This can resolve any internal software glitches affecting the time display.

Programming Errors

Encountering programming errors with your Orbit 57894 timer is common‚ often stemming from incorrect button presses or sequence misunderstandings. If a program isn’t running as expected‚ carefully review each step of the programming process‚ comparing it to the manual’s instructions.

Pay close attention to start times‚ durations‚ and zone assignments. A common mistake is accidentally overlapping watering schedules for different zones. Try deleting the problematic program and recreating it from scratch‚ ensuring each setting is correct.

Resetting the timer to factory defaults and re-programming everything can also resolve complex errors.

Maintenance and Care

Regular cleaning‚ battery checks‚ and winterization are crucial for extending the life of your Orbit 57894 timer‚ ensuring reliable performance year after year.

Cleaning the Timer Housing

To maintain the longevity and optimal functionality of your Orbit 57894 Sprinkler Timer‚ regular cleaning of the housing is recommended. Begin by disconnecting the timer from both the water supply and the power source – either batteries or the electrical outlet.

Use a damp cloth‚ possibly with a mild soap solution‚ to gently wipe down the exterior of the timer housing. Avoid abrasive cleaners or harsh chemicals‚ as these can damage the plastic casing or affect the electronic components.

Pay particular attention to areas where dirt and debris may accumulate‚ such as around the display screen and the valve connection points. Ensure no water enters the timer’s internal components during cleaning. After wiping‚ use a dry cloth to thoroughly dry the housing before reconnecting the timer.

Battery Replacement

The Orbit 57894 timer utilizes batteries as a power source‚ and timely replacement is crucial for uninterrupted operation. When the low battery indicator appears on the display‚ or if the timer functions erratically‚ it’s time for a change.

First‚ disconnect the timer from the water supply. Locate the battery compartment‚ typically on the back or side of the unit‚ and open it according to the manufacturer’s instructions. Remove the old batteries‚ noting their correct polarity (+ and -).

Insert new‚ alkaline batteries of the correct size and type‚ ensuring proper alignment with the polarity markings. Close the battery compartment securely. The timer should now power on and function normally. Dispose of used batteries responsibly‚ following local regulations.

Protecting from Freezing Temperatures

To ensure the longevity of your Orbit 57894 timer‚ proper winterization is essential‚ particularly in regions experiencing freezing temperatures. Water left inside the unit can expand when frozen‚ causing significant damage to internal components and rendering the timer unusable.

Before the first freeze‚ disconnect the timer from both the water supply and the valve(s). Open the manual release valve (if equipped) to drain any remaining water from the timer’s internal passages. Remove the batteries to prevent accidental operation and potential damage.

Store the timer indoors in a dry‚ frost-free location. Avoid storing it in sheds or garages that are not adequately insulated. Proper storage will safeguard your investment and ensure reliable performance next season.

Warranty Information

Orbit’s limited warranty covers defects in materials and workmanship; details are available online or by contacting customer support for specific coverage terms.

Orbit’s Limited Warranty Details

Orbit Irrigation Products‚ Inc. provides a limited warranty on the Orbit 57894 Sprinkler Timer against defects in materials and workmanship for a period of one year from the date of purchase. This warranty does not cover damage resulting from improper installation‚ misuse‚ neglect‚ accidental damage‚ or unauthorized modification.

The warranty specifically excludes damage caused by freezing temperatures‚ electrical surges‚ or the use of incompatible accessories. To obtain warranty service‚ the purchaser must provide proof of purchase and return the defective timer to Orbit or an authorized service center. Orbit‚ at its option‚ will repair or replace the defective timer free of charge.

This warranty is non-transferable and applies only to the original purchaser. For complete warranty details and limitations‚ please visit the Orbit website or contact their customer support team directly.

Contacting Orbit Customer Support

For assistance with your Orbit 57894 Sprinkler Timer‚ Orbit Irrigation Products offers multiple channels for customer support. You can reach their dedicated support team via phone during business hours‚ typically Monday through Friday. Their website‚ www.orbitonline.com‚ provides a comprehensive FAQ section‚ troubleshooting guides‚ and downloadable manuals‚ including the 57894 model’s documentation.

Additionally‚ Orbit offers email support for more complex issues‚ allowing you to submit detailed inquiries with specific details about your timer’s problem. Live chat support may also be available on their website for immediate assistance. When contacting support‚ have your timer’s model number and date of purchase readily available to expedite the process.

Orbit is committed to providing excellent customer service and resolving any issues you may encounter with their products.

a ladies guide to blowjobs

Exploring intimate connection, this guide delves into techniques for mutual pleasure, acknowledging female anatomy and dismantling societal stigmas surrounding oral sex․

Understanding Female Anatomy & Pleasure

Female pleasure is intricately linked to understanding the clitoris – a highly sensitive organ with over 8,000 nerve endings․ The vagina, while responsive, often requires direct or indirect clitoral stimulation for orgasm․

Internal structures like the G-spot can enhance arousal for some, but individual experiences vary greatly․ Recognizing these nuances empowers women to communicate preferences and explore what brings them the most satisfaction during intimate encounters․

Preparation & Setting the Mood

Creating a comfortable and sensual atmosphere is key – dim lighting, soft music, and open communication foster relaxation and enhance the overall experience․

Hygiene & Safety Considerations

Prioritizing health is paramount․ Thoroughly washing before any intimate contact minimizes risk․ Dental dams offer a barrier against STIs, promoting safer exploration․ Openly discuss sexual health history with your partner, ensuring mutual awareness and respect․ Regular check-ups are vital for maintaining well-being․ Remember, comfort and safety enhance pleasure, fostering a positive and trusting connection․ Prioritize open communication about boundaries and concerns․

Creating a Relaxing Atmosphere

Setting the mood is crucial for enjoyment․ Dim lighting, soft music, and comfortable surroundings enhance intimacy․ Consider aromatherapy or candles to create a sensual ambiance․ Communication about preferences is key – discuss what feels good and relaxing; Minimize distractions and create a private space where both partners feel safe and uninhibited․ A relaxed state fosters deeper connection and pleasure․

Techniques: A Step-by-Step Guide

Begin with gentle exploration, utilizing foreplay to build arousal․ Varying speed and pressure, alongside lubrication, enhances sensation and ensures comfort for both partners․

Initial Exploration & Foreplay

Start by creating a relaxed and sensual atmosphere․ Gentle kissing and caressing the body, focusing on erogenous zones, builds anticipation․ Use your hands to explore, lightly tracing contours and increasing arousal․ Communication is key – ask about preferences and observe non-verbal cues․

Transition to oral stimulation gradually, beginning with soft kisses and licks․ This allows for comfort and builds excitement; Remember, foreplay isn’t just preparation; it’s an integral part of the experience, enhancing overall pleasure for both individuals involved․

Varying Speed & Pressure

Experimentation is crucial! Alternate between slow, gentle strokes and faster, more intense movements․ Observe your partner’s reactions to gauge their preferences․ Light pressure can be incredibly sensitive, while firmer pressure can build intensity․

Pay attention to non-verbal cues – moans, body language, and facial expressions offer valuable feedback․ Don’t be afraid to ask directly what feels good․ Varying rhythm and depth keeps the experience engaging and maximizes pleasure for both partners․

The Use of Hands & Lubrication

Enhance the experience by incorporating your hands! Gently caress the shaft, tease the testicles, or provide rhythmic stroking alongside oral stimulation․ Lubrication is essential for comfort and reduces friction․ Water-based or silicone-based lubricants are excellent choices․

Apply liberally to ensure smooth gliding and prevent irritation․ Reapply as needed to maintain consistent moisture․ Hands and lubricant work synergistically to heighten sensation and create a more pleasurable encounter․

Advanced Techniques & Variations

Explore diverse positions like “69” for mutual enjoyment, experiment with mouth angles, and consider incorporating toys for intensified sensations and playful exploration․

The “69” Position & Mutual Pleasure

Simultaneous oral stimulation offers a uniquely reciprocal experience, fostering intense connection and shared arousal․ Communication is key – discuss comfort levels and preferred pressures․ Ensure both partners are relaxed and aligned for optimal enjoyment․ Experiment with head positioning and gentle movements to maximize sensation․ This position requires coordination and open dialogue to ensure both individuals reach peak pleasure, creating a deeply intimate and satisfying encounter․

Utilizing Different Mouth Positions

Varying your technique enhances sensation and prevents numbness․ Employing a ‘deep throat’ approach requires practice and comfort, prioritizing safety․ Alternating between using lips, tongue, and the soft palate creates diverse stimulation․ Gentle suction and circling motions can heighten pleasure․ Remember, communication is vital; adjust positions based on your partner’s feedback for a truly satisfying and explorative experience․

Incorporating Toys & Accessories

Enhance the experience with carefully chosen accessories․ Vibrators designed for oral use can add intense stimulation, while textured rings offer varied sensations․ Lubricant remains essential, even with toys, to maintain comfort and prevent friction․ Introduce these elements gradually, gauging your partner’s response․ Prioritize body-safe materials and proper hygiene for a playful and satisfying exploration of pleasure․

Communication & Consent

Open dialogue is crucial; discuss desires and boundaries․ Affirmative consent—verbal and non-verbal cues—ensures comfort and mutual enjoyment throughout the intimate encounter․

Verbal & Non-Verbal Cues

Clearly expressing preferences is paramount․ Use “safe words” or phrases to halt or modify activity․ Pay attention to body language – relaxed posture, moans, or leaning in indicate pleasure, while tension or withdrawal signal discomfort․
Non-verbal cues, like gentle guiding or mirroring actions, enhance connection․ Regularly check in, asking “Does this feel good?” or “Are you enjoying this?” fosters trust and ensures a pleasurable experience for both partners, prioritizing enthusiastic consent․

Ensuring Comfort & Boundaries

Prioritize your well-being; comfort is non-negotiable․ Establish clear boundaries before intimacy begins, discussing what feels good and what doesn’t․ It’s okay to say “no” at any time, even mid-act, without explanation․ Respect your partner’s boundaries as well․
Open communication builds trust and allows for a safe, enjoyable experience․ Remember, enthusiastic consent is essential, and boundaries can evolve․

Addressing Common Concerns

Navigating potential discomforts like dryness or sensitivity is key; lubrication and open communication are vital for a pleasurable experience, easing anxieties․

Dryness & Lubrication Solutions

Experiencing dryness during oral sex is common, often stemming from insufficient arousal or hormonal factors․ Prioritizing extended foreplay can naturally increase lubrication․ However, high-quality lubricants are invaluable! Water-based options are generally recommended for their compatibility and ease of cleanup․ Silicone-based lubricants offer longer-lasting glide, while oil-based varieties should be avoided with condoms․ Experiment to discover what feels most comfortable and enhances pleasure for both partners, ensuring a smooth and enjoyable experience․

Sensitivity & Pain Management

Navigating sensitivity is crucial; open communication is key! Start gently, gradually increasing pressure as comfort allows․ If discomfort arises, immediately slow down or pause․ Utilizing fingers alongside oral stimulation can help gauge pressure tolerance․ Remember, the clitoris is highly sensitive – a light touch is often preferred․ Lubrication significantly reduces friction and potential pain․ Prioritize relaxation and a comfortable position for optimal enjoyment and minimize any discomfort experienced․

Overcoming Inhibition & Anxiety

Addressing anxieties requires self-compassion and open dialogue with your partner․ Understand that feeling hesitant is normal․ Start with gentle exploration and focus on sensations, not performance․ Creating a safe, judgment-free environment fosters relaxation․ Mindfulness techniques can help stay present and reduce overthinking․ Remember, pleasure is the goal, and it’s okay to set boundaries and communicate needs clearly to build confidence․

Male vs․ Female Perspectives

Understanding differing expectations is key; women can proactively communicate desires and take control, fostering empowerment and mutual satisfaction during intimate encounters․

Understanding Male Expectations

Many men appreciate enthusiastic participation and a willingness to explore․ While expectations vary greatly, open communication about preferences is crucial․ Some may enjoy specific techniques or a particular pace, but assuming is detrimental․ Recognizing that vulnerability exists allows for a safe space to discuss desires․

Focusing on his enjoyment shouldn’t overshadow your own comfort and pleasure; it’s about a balanced, mutually satisfying experience․

Female Empowerment & Taking Control

Oral sex is an opportunity for women to dictate the pace and explore their own agency․ Don’t hesitate to guide, direct, and communicate your boundaries clearly․ Taking control doesn’t mean abandoning his pleasure, but ensuring yours is prioritized․

Experiment with different techniques and confidently express what feels good, fostering a dynamic where your desires are central․

Post-Oral Sex Care

Hydration and gentle cleansing are key․ Nurture emotional closeness through cuddling and conversation, solidifying the intimate connection you’ve shared․

Hygiene & Refreshment

Following intimate activity, prioritize gentle hygiene․ Warm water is preferable to scented soaps, preventing irritation․ Both partners should cleanse thoroughly․ Staying hydrated is crucial – drink plenty of water to replenish fluids․ A refreshing drink or light snack can also contribute to overall well-being and a comfortable post-intimacy experience․ Consider a quick shower together for enhanced bonding․

Emotional Connection & Aftercare

Beyond the physical, nurture the emotional bond․ Cuddling, affectionate touch, and sincere conversation deepen intimacy․ Share positive affirmations and express gratitude for the shared experience․ Create a safe space for open communication about feelings and desires․ Aftercare isn’t just about physical comfort; it’s about reinforcing emotional closeness and mutual respect․

Debunking Myths & Misconceptions

Challenging outdated beliefs, we address societal stigmas and promote healthy sexual attitudes, fostering open communication and dismantling harmful misconceptions about oral sex․

Addressing Societal Stigmas

Historically, societal norms have often placed undue shame and judgment on oral sex, particularly for women․ These stigmas stem from patriarchal views and misconceptions about female sexuality, creating unnecessary inhibition․ It’s crucial to recognize that oral sex is a natural and pleasurable act, deserving of acceptance and open discussion․ Challenging these ingrained biases empowers individuals to explore their desires without guilt or fear, fostering a healthier and more equitable sexual landscape․

Promoting Healthy Sexual Attitudes

Cultivating a positive mindset towards sexuality is paramount․ Healthy attitudes embrace open communication, consent, and mutual respect․ Prioritize pleasure and self-discovery, rejecting societal pressures and unrealistic expectations․ Education about anatomy and sexual response empowers informed choices․ Normalizing discussions about desires and boundaries fosters intimacy and strengthens relationships, leading to fulfilling and enjoyable sexual experiences for all involved․

Resources & Further Learning

Explore reputable books and online communities dedicated to sexual health, offering comprehensive information and support for continued learning and exploration․

Books & Articles on Sexual Health

Delve into resources like “The Guide to Getting It On” by Paul Joannides, offering comprehensive sexual education․ Explore articles from reputable sources such as Scarleteen and Planned Parenthood, providing accurate information on anatomy, pleasure, and safe practices․ Seek out feminist perspectives on sexuality to empower informed decision-making and challenge societal norms․ Remember to prioritize credible sources and evidence-based information for a fulfilling and healthy sexual life․

Online Communities & Support Groups

Connect with others through platforms like Reddit’s r/sex or Scarleteen’s forums for open discussions and shared experiences․ These spaces offer anonymity and support for exploring questions and concerns․ Remember to prioritize respectful interactions and verify information cautiously․ Online groups can foster a sense of community and normalize conversations around sexual health and pleasure, promoting empowerment and self-discovery․

The Role of Lubricant

Lubricant enhances comfort and reduces friction, crucial for pleasurable oral sex․ Water-based options are generally recommended, prioritizing sensitivity and compatibility with bodies․

Types of Lubricants Available

A diverse range of lubricants caters to individual preferences and sensitivities․ Water-based lubricants are most popular, being body-safe, easy to clean, and compatible with all sex toys․ Silicone-based options offer longer-lasting lubrication, ideal for extended play, but require specific cleaning․ Oil-based lubricants, while moisturizing, aren’t condom-safe and can stain fabrics․ Hybrid lubricants combine benefits, and flavored options add a playful element․ Consider ingredients carefully, avoiding those with potential irritants like parabens or glycerin, especially for sensitive tissues․

Choosing the Right Lubricant for Sensitivity

Prioritizing comfort is key; select lubricants formulated for sensitive skin․ Hypoallergenic, fragrance-free, and paraben-free options minimize irritation․ Water-based lubricants are generally gentler, but may require reapplication․ Silicone lubricants provide a smoother glide, potentially reducing friction, but test a small area first․ Avoid oil-based lubricants if prone to yeast infections․ Always patch-test new lubricants to ensure compatibility and prevent adverse reactions, enhancing pleasure and minimizing discomfort during intimate encounters․

Understanding Female Sexual Response

Female arousal involves complex physiological changes, varying individually; clitoral stimulation is often central, alongside psychological factors, influencing orgasm and overall satisfaction․

Stages of Arousal & Orgasm

The arousal process typically begins with initial excitement, marked by increased blood flow to the genitals, leading to lubrication and clitoral swelling․ Plateau follows, intensifying these sensations, with heightened sensitivity․ Orgasm itself is a peak experience, characterized by rhythmic muscle contractions and intense pleasure․ Resolution then occurs, as the body returns to its pre-aroused state, though multiple orgasms are possible․ Understanding these stages empowers exploration and enhances intimacy, recognizing individual variations in timing and intensity․

Individual Differences in Pleasure

Pleasure is subjective; what feels good varies greatly between individuals․ Factors like anatomy, past experiences, and emotional state all play a role․ Some women prefer direct clitoral stimulation, while others enjoy indirect approaches; Sensitivity levels differ, impacting preferred pressure and speed․ Open communication is key to discovering unique preferences and ensuring mutual satisfaction, embracing experimentation and self-discovery․

Communication about Preferences

Honest dialogue is crucial․ Clearly express likes, dislikes, and boundaries, fostering a safe space for vulnerability and ensuring a pleasurable experience for both partners․

Discussing Likes & Dislikes

Openly communicating your preferences is paramount for satisfying oral sex․ Don’t hesitate to articulate what feels good – speed, pressure, specific techniques, or areas of focus․ Similarly, clearly express anything that causes discomfort or isn’t enjoyable․ This creates a trusting environment where experimentation flourishes, and both partners feel empowered to contribute to a mutually pleasurable experience․ Remember, vocalizing desires enhances intimacy and ensures everyone’s needs are met․

Creating a Safe Space for Honesty

Establishing trust is crucial for open sexual communication․ A safe space means feeling comfortable expressing desires and boundaries without judgment or fear of rejection․ Encourage vulnerability by actively listening and validating your partner’s feelings․ Reassure them that honesty enhances intimacy, leading to a more fulfilling experience for both of you․ Prioritize emotional safety alongside physical pleasure․

vectors worksheet with answers pdf

Vectors Worksheet with Answers PDF: A Comprehensive Plan

Vectors worksheets‚ complete with detailed answer keys‚ are invaluable resources for students mastering physics and mathematics. These PDFs offer targeted practice‚
ranging from basic component calculations to complex problem-solving scenarios‚ ensuring a solid grasp of vector concepts and applications.

Vectors represent more than just magnitude; they embody direction‚ a crucial distinction from scalar quantities. Understanding vectors is fundamental in physics‚ particularly when dealing with displacement‚ velocity‚ and force. A vectors worksheet with answers PDF serves as an excellent starting point for students to build this foundational knowledge. These resources typically begin with defining what vectors are – quantities possessing both magnitude and direction – and then progress to illustrating how they differ from scalars‚ which are defined solely by magnitude;

The worksheets often include visual representations‚ aiding comprehension of vector concepts. They progressively introduce mathematical operations involving vectors‚ such as addition‚ subtraction‚ and scalar multiplication. The inclusion of answer keys is paramount‚ allowing students to self-assess their understanding and identify areas needing further study. Mastering vectors unlocks a deeper understanding of numerous scientific and engineering principles.

What are Vectors? ⏤ Definition and Basic Concepts

Vectors are mathematical objects possessing both magnitude (size) and direction. Unlike scalars‚ which are fully described by a single number (like temperature or mass)‚ vectors require both pieces of information for complete definition. A vectors worksheet with answers PDF effectively illustrates this core concept. These worksheets typically define a vector as an arrow‚ where the length represents the magnitude and the arrowhead indicates the direction.

Basic concepts explored include initial and terminal points‚ representing the starting and ending points of the vector‚ respectively. Worksheets often emphasize that vectors are not tied to a specific location; they represent a displacement from one point to another. Understanding these fundamental definitions is crucial before tackling vector operations. The provided answer keys allow students to verify their understanding of these basic principles and build a strong foundation for more complex problems.

Scalar Quantities vs. Vector Quantities

A key distinction in understanding vectors lies in differentiating them from scalar quantities. Scalar quantities are fully defined by magnitude alone – examples include speed‚ temperature‚ and mass. A vectors worksheet with answers PDF often begins by highlighting this contrast. Vector quantities‚ however‚ require both magnitude and direction; velocity‚ force‚ and displacement are prime examples.

Worksheets frequently present exercises requiring students to identify whether given quantities are scalar or vector. This reinforces the understanding that simply knowing “how much” isn’t enough for vectors – you must also know “which way.” The answer keys provide immediate feedback‚ solidifying this crucial distinction. Mastering this difference is fundamental‚ as vector operations are meaningless without considering directional components. Recognizing this difference is the first step towards successfully solving vector problems.

Vector Representation

Vectors are mathematically represented in several ways‚ and a comprehensive vectors worksheet with answers PDF will cover these methods. Commonly‚ vectors are denoted by a letter with an arrow above it (e.g.‚ →v )‚ indicating both magnitude and direction. Alternatively‚ boldface letters (v) are used. Worksheets often include exercises translating between these notations.

Understanding these representations is crucial for performing vector operations. The PDF resources typically demonstrate how to represent vectors graphically as directed line segments – the length representing magnitude and the arrow indicating direction. Furthermore‚ they introduce component form (discussed later)‚ a vital algebraic representation. Answer keys provide visual confirmations of correct graphical representations and ensure accurate algebraic notation. Proficiency in vector representation is foundational for all subsequent vector calculations and problem-solving.

Graphical Representation of Vectors

A vectors worksheet with answers PDF heavily emphasizes graphical representation‚ as it builds initial intuition. Vectors are visually depicted as arrows‚ where the arrow’s length corresponds to the vector’s magnitude and its direction indicates the vector’s line of action. Worksheets provide practice drawing vectors to scale‚ using a specified scale factor (e.g.‚ 1 cm = 5 m/s).

These exercises often involve plotting vectors on coordinate planes‚ reinforcing understanding of quadrants and angles. The answer keys include accurately drawn vectors for comparison‚ allowing students to self-assess their scaling and directional accuracy. Furthermore‚ graphical methods are used to illustrate vector addition and subtraction (head-to-tail and parallelogram methods)‚ providing a visual understanding before introducing algebraic techniques. Mastering this visual aspect is key to grasping vector concepts before tackling more complex calculations.

Component Form of Vectors (i‚ j notation)

Vectors worksheet PDFs transition from graphical methods to the algebraic representation using i and j notation. This involves resolving vectors into their horizontal (x) and vertical (y) components. Worksheets present vectors and require students to express them in the form v = ai + bj‚ where ‘a’ is the x-component and ‘b’ is the y-component.

Problems often involve finding components given the magnitude and direction (angle)‚ utilizing trigonometric functions (sine and cosine). The answer keys provide the correct component values‚ enabling students to verify their calculations. Conversely‚ worksheets also ask students to determine magnitude and direction from given components. This reinforces the relationship between component form‚ magnitude‚ and direction‚ solidifying a crucial skill for advanced vector operations and physics applications.

Vector Operations

Vectors worksheet PDFs dedicate significant practice to mastering fundamental vector operations. These include addition‚ subtraction‚ and scalar multiplication‚ often presented with accompanying answer keys for self-assessment. Worksheets frequently begin with simple two-dimensional vector problems‚ gradually increasing complexity to include multiple vectors and varied orientations.

Students learn to perform these operations both graphically (head-to-tail and parallelogram methods) and algebraically‚ using component form. Scalar multiplication problems test understanding of how changing a vector’s magnitude affects its components. The provided solutions demonstrate step-by-step calculations‚ clarifying common errors. Advanced worksheets may incorporate vector operations within physics contexts‚ such as calculating resultant forces or velocities‚ bridging mathematical concepts to real-world applications.

Vector Addition: Head-to-Tail Method

Vectors worksheet PDFs extensively utilize the head-to-tail method for visualizing and solving vector addition problems. This graphical technique involves placing the tail of the second vector at the head of the first‚ continuing this process for all vectors. The resultant vector is then drawn from the tail of the first vector to the head of the last.

Worksheets provide diagrams for students to practice this method‚ often requiring them to accurately measure angles and magnitudes to determine the resultant. Answer keys include completed diagrams and calculated resultant vectors‚ allowing for self-checking. These exercises build a strong intuitive understanding of vector addition‚ complementing algebraic approaches. Some worksheets incorporate component decomposition alongside the graphical method‚ reinforcing the connection between visual and analytical techniques.

Vector Addition: Parallelogram Method

Vectors worksheet PDFs frequently feature the parallelogram method as an alternative graphical approach to vector addition. This technique involves constructing a parallelogram with the two vectors as adjacent sides. The diagonal of the parallelogram‚ extending from the common origin of the vectors‚ represents the resultant vector.

Worksheets present scenarios where students must accurately draw parallelograms and measure the resultant vector’s magnitude and direction. Detailed answer keys provide pre-drawn diagrams and calculated results for verification. This method emphasizes the geometric relationship between vectors and their sum‚ offering a different perspective than the head-to-tail approach. Many worksheets include problems requiring both graphical solutions using the parallelogram method and algebraic calculations for comparison‚ solidifying comprehension.

Scalar Multiplication of Vectors

Vectors worksheet PDFs dedicate significant practice to scalar multiplication‚ a fundamental vector operation. This involves multiplying a vector by a scalar (a real number)‚ resulting in a new vector with a modified magnitude but potentially unchanged direction (or reversed if the scalar is negative). Worksheets present problems requiring students to calculate the new vector components after scalar multiplication.

Answer keys provide step-by-step solutions‚ demonstrating how to correctly apply the scalar to each component of the vector. These exercises reinforce the understanding that scalar multiplication scales the vector’s length. More advanced worksheets incorporate scalar multiplication within larger vector calculations‚ such as combined addition and subtraction problems. Mastery of this concept is crucial for understanding vector transformations and their applications in physics and engineering.

Vector Subtraction

Vector subtraction is a core skill emphasized in vectors worksheet PDFs. It’s typically presented as adding the negative of a vector – effectively reversing its direction and then performing vector addition. Worksheets provide numerous problems requiring students to subtract vectors expressed in component form or graphically.

Detailed answer keys demonstrate both methods‚ showing how to subtract corresponding components or construct the resultant vector using the head-to-tail method with the negative vector. These resources often include visual aids to clarify the process. More complex worksheets integrate vector subtraction into multi-step problems involving displacement‚ velocity‚ and force calculations. Understanding vector subtraction is vital for determining relative motion and net forces‚ solidifying a student’s grasp of vector operations.

Vector Magnitude and Direction

Vectors worksheet PDFs heavily emphasize calculating both magnitude and direction‚ as these fully define a vector. Magnitude‚ representing the vector’s length‚ is commonly found using the Pythagorean theorem when vectors are in component form – √(x² + y²). Answer keys meticulously show each step of this calculation.

Determining direction often involves using trigonometric functions like arctangent (tan⁻¹) to find the angle relative to a reference axis. Worksheets present vectors in different quadrants‚ requiring students to adjust the angle accordingly. Detailed solutions demonstrate how to correctly apply these functions and interpret the resulting angles in degrees or radians. Mastery of magnitude and direction is crucial for accurately representing and interpreting vector quantities in physics and engineering applications.

Calculating the Magnitude of a Vector

Vectors worksheet PDFs consistently feature problems focused on calculating vector magnitude‚ a fundamental skill in vector analysis. These worksheets present vectors in both component form (⟨x‚ y⟩) and graphical representations. The core method involves applying the Pythagorean theorem: ||v|| = √(x² + y²)‚ where ||v|| represents the magnitude.

Answer keys provide step-by-step solutions‚ illustrating how to correctly substitute component values and perform the calculation. Many worksheets include vectors in three dimensions‚ extending the formula to ||v|| = √(x² + y² + z²). Students practice finding magnitudes of vectors resulting from addition‚ subtraction‚ and scalar multiplication. Understanding magnitude is essential for interpreting the ‘size’ or strength of a vector quantity‚ like velocity or force‚ within physical contexts.

Determining the Direction of a Vector

Vectors worksheet PDFs dedicate significant practice to determining vector direction‚ often expressed as an angle relative to a reference axis (typically the positive x-axis). The primary tool used is the arctangent function (tan⁻¹)‚ calculated as θ = tan⁻¹(y/x)‚ where θ is the angle‚ y is the vector’s y-component‚ and x is the vector’s x-component.

Answer keys meticulously detail quadrant considerations‚ as the arctangent function yields angles only within -90° to +90°. Worksheets guide students to adjust the angle based on the vector’s quadrant to obtain the correct bearing. Some problems present vectors in three dimensions‚ requiring more complex angular calculations. Mastering direction is crucial for fully defining a vector and accurately predicting its effect in physical scenarios‚ like projectile motion or force resolution.

Vector Components and Resolution

Vectors worksheet PDFs heavily emphasize vector decomposition – resolving a vector into its perpendicular x and y components. This is fundamental for simplifying complex problems. Students learn to use trigonometric functions (sine and cosine) to calculate these components: x = |v|cos(θ) and y = |v|sin(θ)‚ where |v| represents the vector’s magnitude and θ is the angle it makes with the x-axis.

Answer keys provide step-by-step solutions‚ demonstrating how to correctly apply these formulas and handle different angle measurements. Worksheets often include diagrams to visually reinforce the concept of resolving vectors. Understanding components allows for easier vector addition‚ subtraction‚ and analysis of forces or velocities. This skill is essential for success in physics and engineering applications‚ as real-world forces rarely act along simple axes.

Finding X and Y Components of a Vector

Vectors worksheet PDFs dedicate significant practice to determining the x and y components of vectors‚ a cornerstone of vector analysis. These exercises typically present vectors with given magnitudes and angles‚ requiring students to apply trigonometric functions. The x-component is calculated using cosine (adjacent/hypotenuse)‚ while the y-component utilizes sine (opposite/hypotenuse).

Detailed answer keys demonstrate the correct application of these functions‚ often including unit vectors (i and j) to represent the components. Worksheets progressively increase in difficulty‚ introducing vectors in different quadrants‚ demanding careful attention to angle signs. Mastering this skill is crucial for subsequent vector operations like addition and subtraction. Accurate component calculation forms the basis for solving complex physics problems involving forces‚ velocities‚ and displacements.

Using Components for Vector Addition

Vectors worksheet PDFs heavily emphasize vector addition using the component method‚ a more precise alternative to graphical techniques. Students decompose each vector into its x and y components‚ then add the corresponding components separately. This results in a resultant vector’s x and y components‚ which are then used to find the magnitude and direction of the resultant.

Answer keys provide step-by-step solutions‚ showcasing the correct component addition and the subsequent use of the Pythagorean theorem to calculate the magnitude. Trigonometric functions (arctan) are then applied to determine the direction. Worksheets often include multiple vectors‚ building complexity. This method minimizes errors inherent in graphical approaches and is essential for solving real-world physics problems involving forces and velocities.

Applications of Vectors

Vectors worksheet PDFs frequently demonstrate the practical relevance of vectors beyond abstract mathematical exercises. They illustrate how vectors are fundamental in physics‚ particularly in describing displacement‚ velocity‚ acceleration‚ and force. Real-world examples‚ often included in problem sets‚ showcase applications like calculating the resultant force on an object or determining the velocity of an airplane affected by wind.

These worksheets bridge the gap between theory and practice‚ showing students how vector addition and resolution are used to analyze motion and interactions. Answer keys not only provide numerical solutions but also contextualize them within the physical scenarios presented. This reinforces understanding and prepares students for more advanced applications in engineering and other scientific fields.

Vectors in Physics: Displacement‚ Velocity‚ and Force

Vectors worksheet PDFs heavily emphasize the application of vectors within core physics concepts. Displacement‚ being a change in position‚ is inherently a vector quantity‚ demanding both magnitude and direction for complete description. Velocity‚ the rate of change of displacement‚ similarly relies on vector representation to accurately portray speed and direction of motion. Force‚ crucial in understanding interactions‚ is also a vector‚ requiring both strength and direction to define its effect.

Worksheets often present problems requiring students to decompose forces into components‚ calculate resultant velocities‚ or determine displacement vectors. The provided answer keys are vital for verifying calculations and understanding the correct application of vector principles to these fundamental physics concepts‚ solidifying a strong foundation for further study.

Real-World Examples of Vector Applications

Vectors worksheet PDFs frequently bridge the gap between theoretical understanding and practical application. Consider navigation: pilots and sailors utilize vectors to calculate headings and account for wind drift‚ ensuring accurate course corrections. In engineering‚ vectors are essential for analyzing structural forces on bridges and buildings‚ guaranteeing stability and safety. Even video game development relies heavily on vector mathematics for character movement‚ physics simulations‚ and realistic graphics.

These worksheets often present scenarios mirroring these real-world situations‚ prompting students to apply vector principles to solve practical problems. The accompanying answer keys allow for self-assessment and reinforce the relevance of vector concepts beyond the classroom‚ demonstrating their pervasive influence in diverse fields.

Worksheet Problems and Solutions

Vectors worksheet PDFs excel by providing a diverse range of problems‚ progressively increasing in complexity. Initial exercises often focus on finding vector components given magnitude and direction‚ or vice versa. Subsequent problems build upon this foundation‚ incorporating vector addition‚ subtraction‚ and scalar multiplication. More advanced worksheets present real-world scenarios‚ like calculating resultant forces or determining velocities after impacts.

Crucially‚ these PDFs include detailed‚ step-by-step solutions. These aren’t merely answers; they demonstrate the correct methodology‚ clarifying common pitfalls and reinforcing problem-solving strategies. Students can compare their work‚ identify errors‚ and deepen their understanding. The availability of complete solutions transforms the worksheet from a test into a powerful learning tool.

Example Problem 1: Vector Addition with Given Components

Let’s consider two vectors: A = (4‚ -2) and B = (-1‚ 5). To find the resultant vector R = A + B‚ we add the corresponding components. This means Rx = Ax + Bx = 4 + (-1) = 3‚ and Ry = Ay + By = -2 + 5 = 3. Therefore‚ the resultant vector R is (3‚ 3).

Worksheet solutions typically extend this by calculating the magnitude of R using the Pythagorean theorem: |R| = √(32 + 32) = √18 ≈ 4.24. The direction (θ) is found using the arctangent function: θ = tan-1(Ry/Rx) = tan-1(3/3) = 45°. Thus‚ the resultant vector has a magnitude of approximately 4;24 units at an angle of 45°.

Example Problem 2: Finding Magnitude and Direction

Suppose a vector V is defined by its components: Vx = -5 and Vy = 12. A typical worksheet problem asks to determine both the magnitude and direction of this vector. The magnitude‚ |V|‚ is calculated using the Pythagorean theorem: |V| = √((-5)2 + 122) = √(25 + 144) = √169 = 13.

To find the direction (θ)‚ we use the arctangent function. However‚ we must consider the quadrant in which the vector lies. Since Vx is negative and Vy is positive‚ the vector is in the second quadrant. Therefore‚ θ = tan-1(Vy/Vx) + 180° = tan-1(12/-5) + 180° ≈ -67.38° + 180° = 112.62°. Thus‚ the vector has a magnitude of 13 units and a direction of approximately 112.62°.

Answer Key for Common Vector Worksheet Problems

A comprehensive answer key is crucial for effective learning with vectors worksheets. For instance‚ if a problem asks for the magnitude of the vector <1‚ 5>‚ the answer is √26‚ derived from √(12 + 52). Determining the direction of <3√2‚ 3√2> yields 3π/4‚ calculated using the arctangent function and considering the vector’s quadrant.

Describing the graph of f(x) = x‚ x2 correctly identifies it as a straight line. Performing the vector operation 9‚ 5 requires understanding vector addition rules. Worksheet solutions should clearly demonstrate each step‚ including component-wise calculations and trigonometric function applications. Providing detailed solutions fosters independent learning and reinforces conceptual understanding‚ allowing students to verify their work and identify areas needing further review.

Resources for Further Learning

Beyond worksheets‚ numerous online tools enhance vector comprehension. Online vector calculators simplify complex calculations‚ verifying solutions and aiding visualization. Websites like Khan Academy offer free video tutorials and practice exercises‚ covering vector concepts from basic definitions to advanced applications in physics and engineering.

Recommended textbooks include “Physics for Scientists and Engineers” by Serway and Jewett‚ providing a rigorous mathematical treatment of vectors. For a more accessible approach‚ “University Physics with Modern Physics” by Young and Freedman is excellent. Kristeligt Dagblad’s digital platform‚ including their Wordle game‚ demonstrates engaging learning environments. Exploring these resources complements worksheet practice‚ fostering a deeper and more versatile understanding of vector principles and their real-world relevance.

Online Vector Calculators

Numerous online vector calculators serve as powerful supplementary tools for students working through worksheets. These calculators efficiently perform vector addition‚ subtraction‚ scalar multiplication‚ dot products‚ and cross products‚ instantly verifying hand-calculated results. Websites offering these tools include Vector Calculator (vectorcalculator.com) and Symbolab‚ providing step-by-step solutions alongside the final answer.

These resources are particularly helpful when tackling complex problems involving multiple vectors or when checking the accuracy of component-based calculations. While not a replacement for understanding the underlying principles‚ they offer a valuable means of self-assessment and error detection. Remember that Kristeligt Dagblad’s Wordle‚ though a different skill set‚ highlights the benefits of interactive learning. Utilizing these calculators alongside practice worksheets accelerates learning and builds confidence.

Recommended Textbooks and Websites

For a comprehensive understanding of vectors‚ several textbooks are highly recommended. “Physics for Scientists and Engineers” by Serway and Jewett provides a thorough treatment of vector mechanics‚ while “University Physics with Modern Physics” by Young and Freedman offers detailed explanations and numerous practice problems. These texts often include worked examples mirroring worksheet exercises.

Online‚ Khan Academy’s physics section delivers free video tutorials and practice exercises covering vector concepts. Hyperphysics (hyperphysics.phy-astr.gsu.edu) is another excellent resource‚ offering concise explanations and interactive diagrams. Supplementing worksheet practice with these resources‚ similar to engaging with Kristeligt Dagblad’s Wordle for mental agility‚ fosters a deeper understanding. Remember to cross-reference information and utilize multiple sources for a well-rounded learning experience‚ ensuring mastery of vector principles.