
A blanket ladder is a stylish and practical storage solution for organizing throws and blankets. Easy to build‚ it enhances home decor with a rustic charm.
What is a Blanket Ladder?
A blanket ladder is a space-saving storage solution designed to hold blankets‚ throws‚ and linens. Typically made of wood‚ it features a leaning ladder-like structure with horizontal rungs. It combines functionality with decorative appeal‚ adding rustic charm to any room while keeping textiles organized and easily accessible.
Why Use a Blanket Ladder?
A blanket ladder offers a practical and stylish way to store blankets‚ keeping them organized and within reach. It saves space‚ adds rustic charm‚ and complements various home decor styles. DIY-friendly‚ it’s an affordable solution that enhances functionality while serving as a decorative element in any room.
Benefits of Using a Blanket Ladder Plan
Using a blanket ladder plan offers a space-saving‚ cost-effective solution for storing blankets. It keeps throws organized‚ adds rustic charm‚ and complements home decor. DIY-friendly plans allow customization‚ ensuring a perfect fit for any room. Eco-friendly and durable‚ it’s a practical way to enhance functionality while maintaining a stylish appearance.

Materials and Tools Required
Essential materials include 2×4 lumber‚ screws‚ and wood glue. Tools needed are a saw‚ drill‚ measuring tape‚ and sandpaper for smooth assembly and finishing.
Lumber Needed for the Project

Two 8-foot long 2×4 boards are ideal for the sides and rungs. Cut them into 6-foot side pieces and 18-inch rungs. Sand all edges for a smooth finish before assembly.
Hardware and Fasteners
Use 1-inch or 2-inch wood screws for securing the frame and rungs. Wood glue adds extra stability. Drill pilot holes to prevent splitting. Decorative screws or bolts can enhance the rustic look of your blanket ladder.
Essential Tools for Assembly
A power drill‚ hand saw‚ and measuring tape are crucial. Use a square for alignment and clamps to hold pieces steady. Sandpaper smooths rough edges‚ while a pencil marks cuts. Safety glasses are recommended for protecting your eyes during the assembly process.
Step-by-Step Construction Guide
Start by measuring and cutting lumber to size. Assemble the frame using screws‚ then attach rungs evenly. Secure side supports for stability and sand for a smooth finish.
Cutting the Lumber to Size
Begin by measuring and cutting the lumber according to your plan. Use a saw to cut the 2x4s into the required lengths for the sides‚ rungs‚ and supports. Ensure precise cuts for a snug fit. Sand edges for smoothness and safety before assembling.
Assembling the Ladder Frame
Begin by laying the side pieces parallel on a workbench. Attach the rungs between them using screws‚ ensuring even spacing for stability. Drill pilot holes to prevent splitting the wood. Use a carpenter’s square to ensure the frame is square and sturdy. Tighten all joints securely for a stable structure.
Attaching the Rungs and Supports
Align the rungs evenly between the side frames and secure them with screws. Apply wood glue to the joints for added strength. Ensure each rung fits snugly and the spacing is consistent. Use clamps to hold the rungs in place while tightening. Allow the glue to dry completely before use.

Customization and Design Options
Personalize your blanket ladder with paint‚ stain‚ or decorative details. Choose finishes that complement your home decor‚ from rustic to modern styles‚ for a unique touch.
Painting and Staining Techniques
Enhance your blanket ladder with a personalized finish. Use paint or stain to match your home decor‚ opting for rustic distressing or sleek‚ modern tones. Sand surfaces beforehand for smooth application and long-lasting results. This step ensures the ladder blends seamlessly with your interior design while adding a touch of elegance or charm.
Adding Decorative Details
Elevate your blanket ladder’s style with decorative touches. Consider adding metal hardware for an industrial look or carved details for rustic charm. You can also incorporate decorative trim‚ knobs‚ or even hanging lights for a unique flair. These details enhance the ladder’s aesthetic appeal while maintaining its functionality and cozy charm.
Personalizing the Design
Personalize your blanket ladder by adjusting its size‚ style‚ and finish. Choose from various wood finishes or paint colors to match your home decor. Add embellishments like intricate carvings or metal accents for a unique touch. This customization ensures your ladder reflects your personal taste and complements your space perfectly.

Styling and Placement Tips
Place your blanket ladder in a corner or against a wall to maximize space. Choose a location near a seating area for easy access to throws. Ensure the ladder is secure to prevent tipping and complement the room’s decor with its design.
Choosing the Right Location
Opt for a spot near seating areas or fireplaces to keep blankets within easy reach. Corners or walls are ideal for space-saving placement. Ensure the ladder complements the room’s aesthetic by aligning its style with the surrounding decor‚ whether modern‚ rustic‚ or farmhouse-inspired.
Coordinating with Home Decor
Ensure your blanket ladder matches your home’s aesthetic by choosing materials and finishes that complement existing furniture. Wood tones‚ metal accents‚ or painted details can blend seamlessly with modern‚ rustic‚ or farmhouse styles. Add decorative touches like carvings or hardware to enhance its visual appeal and create a cohesive look.
Accessorizing the Blanket Ladder
Add a personal touch by accessorizing your blanket ladder with woven baskets‚ greenery‚ or decorative items. Hang small plants‚ drape ribbons‚ or attach photo frames for a unique look. These accents enhance its functionality while blending seamlessly with your home decor‚ creating a cozy and inviting atmosphere.

Measuring and Spacing
Properly measure your space to ensure the ladder fits seamlessly. Consider the height‚ width‚ and depth to maintain stability and visual balance in the room.
Calculating the Ideal Height
To determine the perfect height for your blanket ladder‚ consider the ceiling height and the size of your blankets. Aim for a ladder that leaves about 6-8 inches of space at the top. Ensure the lowest rung is at least 12 inches from the floor for easy accessibility. This balance creates a functional and visually appealing design while keeping blankets within easy reach. Personalize the height to fit your space and style preferences for a seamless integration into your home decor.
Determining the Width and Depth
The width of your blanket ladder should accommodate the size of your largest blanket‚ while the depth ensures stability. A standard width ranges from 18 to 24 inches‚ with a depth of 4 to 6 inches. Consider the space where it will be placed and how many blankets you plan to store. Adjustments can be made for a custom fit‚ ensuring both functionality and aesthetic appeal in your home decor.
Ensuring Proper Alignment

Proper alignment is crucial for stability and safety. Use a carpenter’s square to ensure all corners are flush and even. Clamp pieces together before securing them to maintain precise alignment during assembly. Double-check the frame’s levelness before attaching rungs and supports.
After assembling‚ verify that the ladder stands straight and level. Adjustments can be made by slightly shifting rungs or supports. Proper alignment ensures the ladder remains stable and visually appealing‚ preventing it from leaning or wobbling under the weight of blankets.
Safety Considerations
Always secure the ladder to the wall to prevent tipping. Ensure stability by using sturdy materials and proper assembly techniques. Regularly inspect for damage or wear.
Securing the Ladder to the Wall
To prevent tipping‚ install anti-tip brackets or straps. Ensure the ladder is level and use wall anchors like molly bolts. Check weight capacity and refer to plans for specific hardware recommendations. This ensures a stable and safe blanket ladder installation.
Preventing Accidental Tipping
Ensure the ladder is stable by using anti-tip brackets or securing it to the wall. Place it on a level surface and distribute weight evenly. Adding non-slip pads to the feet can enhance stability‚ reducing the risk of accidents and ensuring safe use of your blanket ladder.
Ensuring Stability
For a stable blanket ladder‚ use wide‚ sturdy feet and ensure even weight distribution. Construct the frame with durable materials and secure joints. Consider adding a lower crossbar for extra support. Placing the ladder on a firm‚ level surface and anchoring it if needed will prevent wobbling and ensure long-term reliability.

Budget and Cost Efficiency
Building a blanket ladder is an affordable project using basic materials like 2x4s. Simple designs reduce costs‚ making it a budget-friendly storage solution for any home.
Estimating Material Costs
Material costs for a blanket ladder are minimal‚ primarily involving lumber like 2x4s‚ screws‚ and wood glue. Depending on the design‚ costs typically range between $20 to $50‚ making it a budget-friendly project. Tools like saws and drills are often already owned‚ reducing additional expenses.
This affordability ensures the project remains cost-effective while providing a functional and stylish storage solution.
Reducing Expenses
To reduce expenses‚ opt for affordable lumber like untreated pine or reclaimed wood. Minimize cuts by using pre-cut boards when possible. Avoid intricate designs or extra features. Shop for materials during sales or use coupons. Repurpose tools and supplies you already own to further lower costs.
This ensures the project remains budget-friendly.
Comparing DIY vs. Store-Bought
DIY blanket ladders offer cost savings and customization‚ allowing you to choose materials and designs that fit your space. Store-bought options provide convenience and a professional finish but are often more expensive. DIY projects‚ like those using 2x4s‚ can be completed with basic tools‚ making them a budget-friendly choice for homeowners.
Alternative Uses for a Blanket Ladder
A blanket ladder’s versatility extends beyond storing blankets. It can serve as a bookshelf‚ display plants‚ or even store linens‚ adding functionality to any room decor.
Using as a Bookshelf
Transform your blanket ladder into a functional bookshelf by arranging books‚ magazines‚ or decorative items on its rungs; This creative repurposing adds storage and style‚ complementing any room’s decor while keeping items within easy reach.
Displaying Plants
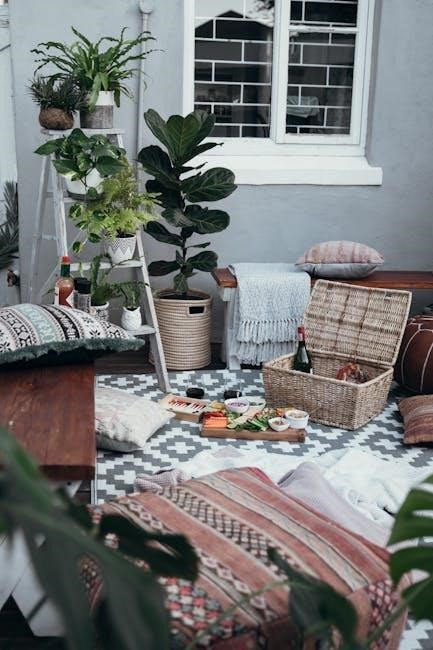
A blanket ladder can elegantly showcase plants‚ adding a natural touch to any room. Place small planters or greenery on the rungs for a space-saving display. This versatile solution complements various decor styles‚ from farmhouse to industrial‚ and pairs well with decorative lights or trailing vines for added charm.
Storing Linens or Towels
A blanket ladder offers a practical way to store linens or towels‚ keeping them organized and easily accessible. Its vertical design saves space while adding a decorative element to bathrooms or bedrooms. The rungs provide ample storage for folded items‚ maintaining a tidy and stylish appearance in any room.
With these blanket ladder plans‚ you can create a functional and stylish storage solution. It’s a great DIY project that enhances your home’s aesthetic and organization.
Final Tips for Success
Measure accurately‚ use high-quality materials‚ and secure the ladder to the wall for stability. Consider adding a finish like paint or stain for protection and style; Start with a simple design and gradually customize based on your skill level and decor preferences for the best results.
Maintenance and Care
Regularly clean the ladder with a soft cloth to remove dust. Inspect for wear or damage and refinish if needed. Keep the area around it clear to prevent clutter. Ensure the ladder remains securely attached to the wall for stability and safety over time.
Enjoying Your New Blanket Ladder
Once your blanket ladder is complete‚ take pride in its rustic charm and functionality. Display your favorite throws or quilts to add warmth and style to any room. Its presence not only organizes your space but also serves as a decorative centerpiece‚ enhancing your home’s aesthetic with a personal touch.