ilife robot vacuum manual

Welcome to the official guide for iLife robot vacuums! This manual provides essential information for models like A10, V8 Pro, and V5s Pro, ensuring optimal performance and longevity.

Welcome and Safety Precautions

Welcome to the iLife Robot Vacuum Manual! This guide is designed to help you get the most out of your device while ensuring safe and efficient operation. Before using your robot vacuum, please read this section carefully to understand important safety precautions. Proper installation and maintenance are crucial for optimal performance. Avoid using damaged power cords, keep the robot away from children and pets, and ensure it is not exposed to water. Regularly clean and maintain components like filters and brushes for extended longevity. Always refer to this manual for model-specific instructions and troubleshooting tips. Your safety and satisfaction are our top priorities.

Key Features and Benefits

iLife robot vacuums are equipped with advanced features for efficient cleaning. Models like the A10 and V8 Pro offer LiDAR navigation for precise mapping and improved obstacle avoidance. They feature strong suction power, large dustbins, and long-lasting batteries for extended cleaning sessions. Many models support app control, allowing you to schedule cleanings and customize settings remotely. Additionally, some models include mopping functionality, making them versatile for different floor types. These features ensure a thorough and convenient cleaning experience, making iLife vacuums a great choice for modern homes. They combine innovation and practicality to deliver exceptional results.

Installation and Setup

Proper installation ensures seamless operation. Start by unboxing and charging your iLife robot vacuum. Follow the manual to install the dustbin and filters correctly before first use.

Unboxing and Initial Preparation

Upon unboxing your iLife robot vacuum, ensure all components are included, such as the robot, charging dock, side brushes, and user manual. Before first use, fully charge the device using the provided adapter. Install the side brushes by snapping them into place at the bottom. Remove any packaging materials and ensure the dustbin and filters are properly installed. Place the charging dock on a flat, stable surface, ensuring adequate space around it. Refer to the manual for specific model instructions to prepare your robot for its first cleaning cycle.

Charging the Robot Vacuum

To charge your iLife robot vacuum, place it on the charging dock, ensuring proper alignment with the charging contacts. Use the original power adapter for reliable charging. The robot may automatically return to the dock when its battery is low. Allow 4-5 hours for a full charge. Avoid blocking the charging dock with obstacles. If the robot doesn’t charge, check for dust or debris on the contacts. For optimal performance, charge the robot regularly and avoid letting the battery completely drain. Always follow the manual’s charging guidelines for your specific model.

Installing the Dustbin and Filters

To install the dustbin and filters on your iLife robot vacuum, first align the dustbin with the designated slot on the robot. Secure it firmly to ensure proper fitment. Next, place the pre-filter and HEPA filter into the dustbin, making sure they are dry and free from debris. Regularly clean or replace the filters every 1-2 months, depending on usage. Always refer to your specific model’s manual for exact installation steps. Proper installation ensures efficient cleaning performance and maintains the robot’s suction power. Clean the dustbin after each use for optimal results.

Model-Specific Instructions

This section provides detailed operating guides tailored to specific iLife models, such as the A10, V8 Pro, and V5s Pro, highlighting unique features and navigation systems.

Operating the iLife A10 Robot Vacuum

The iLife A10 Robot Vacuum features advanced LiDAR navigation for precise mapping and efficient cleaning. Start by charging the unit fully and ensuring the dustbin and filters are properly installed. Use the remote control or app to initiate cleaning cycles, schedule sessions, or adjust suction power. The A10 supports voice control via smart home systems. Regularly empty the 600ml dustbin and clean filters for optimal performance. Check for debris in brushes and wheels to maintain smooth operation. This model excels in mapping accuracy and quiet operation, making it ideal for seamless home cleaning experiences.

Understanding the iLife V8 Pro User Manual

The iLife V8 Pro user manual guides you through setup, operation, and maintenance. It details initial preparations, such as charging and installing the dustbin and filters. The manual explains how to use the remote control for scheduling cleanings and adjusting suction power. Regular maintenance tips, like cleaning filters every 15-30 days and checking for debris in side wheels, are emphasized. Troubleshooting sections address common issues like low battery or navigation problems. Reading the manual ensures you maximize the V8 Pro’s performance and longevity, making it a valuable resource for optimal cleaning results.

Maintenance and Cleaning

Regularly clean the dustbin, filters, and side brushes to ensure optimal performance. Check and clear debris from wheels and sensors. Empty the dustbin after each use.

Cleaning the Dustbin and Filters

To maintain your iLife robot vacuum’s efficiency, regularly clean the dustbin and filters. Empty the dustbin after each use and wash it with mild detergent. Allow it to dry completely before reinstalling. For filters, clean them every 15-30 days using a soft brush or cloth. Replace filters every 6 months or when visibly worn. This ensures optimal suction power and prevents dust buildup. Proper maintenance extends the lifespan of your device and keeps your home clean effectively.

Maintaining the Side Brushes and Wheels

Regularly inspect and clean the side brushes to ensure optimal performance. Remove any tangled hair or debris using a cleaning tool or soft brush. For the wheels, check for blockages and wipe them clean with a damp cloth. This prevents navigation issues and ensures smooth movement. Replace worn-out brushes or wheels as needed. Proper maintenance extends the lifespan of your robot and improves cleaning efficiency.

Troubleshooting Common Issues

Address common problems like battery drain or navigation issues by checking for software updates and ensuring wheels are free from obstructions. Regular cleaning improves functionality.

Resolving Battery and Charging Problems

If your iLife robot vacuum isn’t charging, ensure the dock’s power cord is securely connected. Check for dust or debris blocking charging contacts. Replace the battery if it’s old. Update firmware via the app for improved performance. Avoid using damaged cords and charge the robot on a flat surface. For persistent issues, contact iLife customer service. Regular maintenance ensures optimal battery health and extends the product’s lifespan. Always refer to the user manual for specific troubleshooting steps.

Fixing Navigation and Mapping Issues

If your iLife robot vacuum struggles with navigation or mapping, reset it by turning it off and on. Ensure all sensors are clean and free from dust. Update the robot’s firmware via the iLife app for improved performance. Avoid physical obstructions and ensure the robot has a clear path. If issues persist, perform a factory reset or contact customer support. Regularly cleaning sensors and updating software can prevent navigation problems. Refer to the user manual for detailed troubleshooting steps to restore optimal functionality.

Downloading and Using the iLife App

Download the iLife app from the App Store or Google Play. Install and pair it with your robot vacuum to schedule cleanings, adjust settings, and monitor activity remotely.

App Features for Enhanced Cleaning

The iLife app offers advanced features to enhance your cleaning experience. Schedule cleanings, adjust suction power, and monitor cleaning progress remotely. Receive notifications for maintenance alerts and error messages. Custom cleaning modes, such as spot cleaning and silent mode, allow personalized settings. Voice control integration with smart assistants like Alexa and Google Assistant adds convenience. Some models also support advanced mapping technology for optimized cleaning paths. These features ensure efficient, tailored cleaning solutions for your home.

Customer Service and Support

Visit www.iliferobot.com or call 1-800-631-9676 for assistance. Our team is ready to help with any questions or issues, ensuring your iLife robot vacuum experience is seamless.

Contacting iLife Customer Service

For any inquiries or issues, contact iLife customer service at www.iliferobot.com or call their toll-free number: 1-800-631-9676. You can also reach them via email or live chat on their website. Their dedicated team is available to assist with troubleshooting, maintenance, or any questions about your robot vacuum. Ensure to have your model number ready for faster support. Visit their site for comprehensive resources, including manuals, FAQs, and repair options, to keep your iLife robot functioning optimally.

By following this manual, you’ll ensure your iLife robot vacuum performs optimally. Regular maintenance and proper usage will extend its lifespan and cleaning efficiency.

Maximizing Performance and Longevity

To maximize your iLife robot vacuum’s performance and longevity, regular maintenance is essential. Clean the dustbin and filters every 15-30 days and replace them as needed. Ensure side brushes and wheels are free from debris. Charge the battery according to the manual to prevent degradation. Use the iLife app for scheduling and updates. Proper installation of components and adherence to safety guidelines will ensure efficient cleaning and extend the lifespan of your device. Regular checks and timely replacements are key to optimal functionality.

onan 4000 generator service manual pdf free download

The Onan 4000 Generator Service Manual is a vital resource for RV owners, offering detailed guidance on maintenance, troubleshooting, and safety procedures to ensure optimal performance.

Overview of the Onan 4000 Generator and Its Importance in RVs

The Onan 4000 Generator is a reliable power solution designed for recreational vehicles, providing consistent energy for essential systems and appliances. Its compact design and robust performance make it a critical component for RV owners who require uninterrupted power during trips. The generator’s durability and efficiency ensure it meets the unique demands of mobile living, making it an indispensable asset for off-grid adventures and everyday RV use.

Why You Need the Service Manual for Proper Maintenance

The Onan 4000 Generator Service Manual is essential for ensuring proper maintenance and troubleshooting. It provides detailed instructions for routine checks, oil changes, and filter replacements, which are crucial for extending the generator’s lifespan. Without the manual, diagnosing issues like voltage regulator problems or startup failures becomes challenging. Regular reference to the manual helps prevent breakdowns and ensures safe, efficient operation, making it a must-have for all RV owners relying on this generator.

Key Features and Specifications of the Onan 4000 Generator

The Onan 4000 Generator is a reliable, fuel-efficient power source designed for RVs, featuring a robust design, voltage regulator, and control box for stable energy output, ensuring consistent performance in various conditions.

Understanding the Voltage Regulator and Its Role

The voltage regulator is a critical component in the Onan 4000 Generator, ensuring stable power output by controlling the electrical flow. Located in the control box, it is typically a tan-colored unit with a 12-pin connector. If the generator fails to start or produces inconsistent power, the voltage regulator is often the culprit. Troubleshooting this component is essential for maintaining reliable energy supply, especially in RV applications. Regular inspection and replacement, as outlined in the service manual, are vital for optimal performance.

Exploring the Control Box and Its Components

The control box is the central hub of the Onan 4000 Generator, housing essential components like the voltage regulator, circuit breakers, and connectors. It regulates power distribution and protects the system from overloads. The voltage regulator, often tan-colored with a 12-pin connector, ensures stable output. Proper inspection and maintenance of these components, as detailed in the service manual, are crucial for reliable operation. Always consult the manual for diagrams and maintenance guidelines to avoid damage or malfunction.

Maintenance Schedule and Routine Checks

Regularly follow the manufacturer’s maintenance schedule, including oil changes and filter replacements. Check connections, breakers, and fuses to ensure proper function and safety.

Step-by-Step Guide to Performing Regular Maintenance

Begin by reviewing the maintenance schedule in your Onan 4000 manual. Check oil levels and filters, replacing them as needed. Inspect the voltage regulator and control box connections for wear or damage. Ensure all breakers and fuses are functioning correctly. Clean or replace air filters to maintain proper airflow. Test the generator under load to ensure smooth operation. Always refer to the manual for specific procedures and safety guidelines to prevent damage or injury.

Importance of Oil Changes and Filter Replacements

Importance of Oil Changes and Filter Replacements

Regular oil changes and filter replacements are critical for the longevity and efficiency of your Onan 4000 generator. Clean oil lubricates moving parts, prevents overheating, and reduces wear. Dirty filters restrict airflow, decreasing performance and potentially causing damage. Follow the manual’s guidelines for the correct oil type and filter specifications. Neglecting these maintenance steps can lead to premature wear, reduced power output, and even engine failure, emphasizing the need for consistent upkeep.

Troubleshooting Common Issues

Troubleshooting common issues with your Onan 4000 generator involves identifying symptoms like no-start conditions or low voltage output. Check connections, breakers, and the voltage regulator. Ensure proper fuel flow and inspect for worn or damaged components. Referencing the service manual’s diagnostic guides can help pinpoint root causes efficiently, ensuring quick resolution and minimizing downtime.

Diagnosing Why Your Generator Won’t Start

If your Onan 4000 generator fails to start, begin by inspecting the voltage regulator and spark plugs, as these are common issue areas. Check for loose connections, blown fuses, or tripped breakers. Ensure the fuel system is functioning properly, with no blockages or leaks. Verify the air filter is clean and unobstructed. Consult the service manual for detailed diagnostic steps, including testing the ignition coil and ensuring proper compression. Always follow safety guidelines when performing these checks.

Identifying and Fixing Voltage Regulator Problems

The voltage regulator, located in the control box, is a common source of issues. Check for faulty connections, corrosion, or damaged pins on the 12-pin connector. Use a multimeter to test voltage output and ensure it matches specifications. If malfunctioning, replace the regulator with a compatible aftermarket part; Always unplug the connector before servicing. A clean, tight connection and proper grounding are essential for optimal performance. Consult the manual for precise repair guidelines.

Downloading the Onan 4000 Service Manual PDF

The Onan 4000 Service Manual PDF is readily available online. Visit trusted sources like official Onan websites, authorized dealers, or forums for a free download.

Where to Find Reliable Sources for the Manual

To download the Onan 4000 Service Manual PDF, visit the official Onan website or authorized RV parts dealers. Forums and RV communities often share trusted links. Ensure the source is reputable to avoid outdated or incorrect versions. Verify the manual matches your generator’s model number for accuracy. Reliable sources include official Onan distributors and well-known RV service platforms. Always cross-check the manual’s content with your specific generator model.

Ensuring You Have the Correct Model-Specific Manual

Always verify the manual matches your generator’s exact model by checking the serial number or model code on the unit or in your RV’s documentation. Generic manuals may not cover specific features or repair procedures for your Onan 4000; Cross-reference the manual’s content with your generator’s specifications to ensure accuracy. Using the wrong manual can lead to incorrect repairs or safety hazards, so double-check the source and model compatibility before downloading or using the manual.

Safety Precautions When Servicing Your Generator

Always turn off the generator and disconnect power before servicing. Allow it to cool, ensure good ventilation, and follow all safety guidelines in the manual.

Essential Safety Measures to Avoid Injury

Always turn off the generator and disconnect power before servicing. Allow the unit to cool down completely to prevent burns. Ensure good ventilation to avoid inhaling harmful fumes. Wear protective gear, including gloves and safety glasses. Never bypass safety features or attempt repairs without proper tools. Keep loose clothing and long hair tied back. Ensure the work area is clear of flammable materials. Follow all safety guidelines outlined in the service manual to avoid accidents.

Understanding Hazardous Situations During Maintenance

Maintenance of the Onan 4000 generator involves potential hazards such as electrical shocks, fuel leaks, and carbon monoxide exposure. Always disconnect the battery and ensure the generator is cool before servicing. Proper ventilation is crucial to prevent inhaling harmful fumes. Be cautious of sharp edges and moving parts. Never work near open flames or sparks, as fuel vapors can ignite. Familiarize yourself with emergency shutdown procedures to handle unexpected situations safely.

Advanced Diagnostic Techniques

The service manual provides advanced methods for diagnosing complex issues, such as internal component failures and system malfunctions, ensuring precise troubleshooting and effective repairs.

Using the AGS (Auto Generator Start) Feature Effectively

The AGS (Auto Generator Start) feature automatically activates your generator based on specific conditions, such as low battery voltage or high power demand. This convenient system ensures seamless power supply, especially in RVs, by eliminating manual intervention. To use AGS effectively, consult the service manual for configuration guidance and troubleshooting tips to maximize its functionality and reliability, ensuring your generator operates efficiently in various scenarios. Always follow safety protocols when adjusting settings.

Interpreting Error Codes and Alarms

The Onan 4000 Generator Service Manual provides detailed explanations of error codes and alarms, helping you identify and address issues promptly. Each code corresponds to specific problems, such as voltage regulator malfunctions or sensor issues. Refer to the manual’s troubleshooting section for step-by-step solutions. Understanding these codes ensures proper diagnostics, preventing minor issues from escalating into major repairs. Always follow the manual’s guidance to resolve errors safely and efficiently.

Repair Tips and Tricks

Always check the voltage regulator first for common issues. Consider aftermarket replacements for faulty parts. Use the AGS feature to automate diagnostics for faster troubleshooting and repair solutions.

Aftermarket Replacements for Common Parts

Aftermarket replacements for the Onan 4000 generator can be cost-effective and reliable. Voltage regulators, spark plugs, and air filters are commonly replaced parts. Ensure compatibility with your specific model. Consult the service manual for part numbers and installation guidelines. Reputable suppliers offer high-quality alternatives that meet or exceed original specifications, ensuring optimal performance and longevity of your generator. Always verify compatibility before purchasing to avoid installation issues.

Optimizing Performance for Long-Term Use

Regular maintenance is key to optimizing your Onan 4000 generator’s performance. Follow the service manual’s schedule for oil changes and filter replacements to ensure efficiency. Proper load management and avoiding overload can extend lifespan. Use the AGS feature to automate start/stop functions, reducing wear. Check connections and ensure ventilation for reliable operation. Addressing issues early prevents costly repairs, ensuring smooth power delivery for years of dependable service.

The Onan 4000 generator service manual is essential for proper maintenance, ensuring safety, and troubleshooting. Regularly referencing it guarantees optimal performance and extends the generator’s longevity effectively.

Final Thoughts on Proper Maintenance and Usage

Proper maintenance and usage of the Onan 4000 generator are crucial for reliability and longevity. Regular oil changes, filter replacements, and voltage regulator checks ensure smooth operation. Always follow the service manual’s guidelines to prevent issues. Addressing problems promptly and using genuine parts can avoid costly repairs. Safe practices during servicing are essential to prevent injuries and maintain your generator’s efficiency over time.

Encouragement to Regularly Reference the Service Manual

Regularly referencing the Onan 4000 service manual ensures safe and effective maintenance. It provides detailed instructions, troubleshooting tips, and specifications tailored to your generator model. By following the manual, you can prevent costly repairs, optimize performance, and extend the lifespan of your generator. Familiarize yourself with its contents to understand your unit’s unique needs and maintain peak functionality. It’s a vital resource for any RV owner aiming to keep their generator in top condition.

hakko fx 888d manual

The Hakko FX-888D is a high-performance soldering station designed for precision and reliability. It features a digital interface, excellent thermal recovery, and a password function for settings security. The station includes an instruction manual available in multiple languages and formats, ensuring easy operation for users worldwide.

Overview of the Hakko FX-888D Manual

The Hakko FX-888D manual is a comprehensive guide designed to help users understand and operate the soldering station effectively. It covers essential topics such as safety precautions, unpacking, setup, temperature calibration, and maintenance. The manual also provides detailed instructions for troubleshooting common issues and ensuring optimal performance. Available in multiple languages, including English, Chinese, and Spanish, it caters to a global audience. Additionally, the manual emphasizes the importance of proper handling and storage to extend the product’s lifespan. Users are advised to read it thoroughly before operating the device to ensure safe and efficient use. Regular updates and digital versions are accessible online for convenience.

Key Features and Benefits of the Hakko FX-888D

The Hakko FX-888D offers advanced features like a digital display for precise temperature control, excellent thermal recovery for consistent soldering, and a password function to secure settings. It includes interchangeable T18 series tips, available in various shapes, ensuring versatility for different projects. The station’s design focuses on user safety, with warnings against exceeding 400°C to prevent damage. Its compact and durable build, along with an ergonomic soldering iron, enhances comfort during extended use. Regular software updates and a comprehensive manual further support its reliability and performance, making it a top choice for professionals and hobbyists alike.

Setting Up the Hakko FX-888D

Setting up the Hakko FX-888D involves unpacking, inventorying components like the station and soldering iron, and connecting power. Ensure all items are included for optimal operation.

Unpacking and Inventory of Components

When unpacking the Hakko FX-888D, carefully inspect all components to ensure nothing is damaged or missing. The package includes the FX-888D soldering station, FX-8801 soldering iron, iron holder, and an instruction manual. A British power cord is also provided. Additional items like soldering tips (T18 Series) and cleaning tools may be purchased separately; The FX-888D station supports various tip shapes, such as BC and C, for different soldering tasks. Always verify the packing list against the actual contents to confirm completeness. Before first use, calibrate the station as per the manual for optimal performance.

Connecting the Soldering Station and Initial Setup

Begin by connecting the Hakko FX-888D soldering station to a power source using the provided British power cord. Ensure the outlet matches the station’s voltage requirements. Next, place the soldering iron into the iron receptacle and connect it securely. Refer to the instruction manual for proper alignment and insertion. Once connected, power on the station and allow it to heat up. Set the desired temperature using the digital interface, ensuring it does not exceed 400°C (752°F) as specified in the manual. Calibrate the station if necessary for accuracy. Finally, ensure all components are properly secured before starting your soldering work.

Operating the Hakko FX-888D

The Hakko FX-888D offers a digital interface for precise temperature control, a password lock for settings, and excellent thermal recovery, ensuring efficient soldering with advanced features.

Understanding the Digital Interface and Controls

The Hakko FX-888D features a user-friendly digital interface with a clear display for temperature settings and mode selection. The controls include intuitive buttons for adjusting temperature, activating preset modes, and locking settings with a password. The digital display ensures accurate temperature monitoring, while the interface provides real-time feedback for precise control. The station also includes a preset mode for storing frequently used temperature settings, enhancing efficiency. Safety features, such as automatic shutdown and temperature limits, protect both the user and the equipment. The interface is designed for ease of use, making it accessible for professionals and hobbyists alike.

Adjusting Temperature Settings and Calibration

The Hakko FX-888D allows precise temperature adjustment, with a range of 200°C to 400°C (392°F to 752°F). Calibration is essential for accuracy and can be performed using the Hakko FG-100 or FG-101 thermometers. To adjust the temperature, press the up or down buttons on the control panel until the desired setting is reached. Calibration ensures the displayed temperature matches the actual tip temperature. Regular calibration is recommended to maintain optimal performance. The station also features a temperature lock function to prevent accidental changes during operation. Always refer to the manual for detailed calibration procedures to ensure accuracy and safety. Proper calibration extends the life of the soldering tip and ensures consistent soldering results. The FX-888D’s digital interface makes temperature adjustment and calibration straightforward, even for inexperienced users.

Maintenance and Upkeep

Regular cleaning of the soldering tip prevents oxidation and ensures optimal performance. Replace tips as needed and store the station in a cool, dry place to maintain functionality.

Cleaning and Replacing Soldering Tips

Cleaning the soldering tips regularly is essential for maintaining performance. Use a damp sponge or brass wool to remove oxidation and debris. For replacing tips, follow the manual’s instructions to ensure compatibility and proper installation. Always turn off the station before performing maintenance. Regular tip care extends the life of your Hakko FX-888D and ensures consistent soldering results. Proper storage in a cool, dry place prevents rust and damage; Refer to the manual for detailed steps and recommendations on tip maintenance.

Regular Maintenance Procedures for Optimal Performance

Regular maintenance ensures the Hakko FX-888D operates efficiently. Clean the soldering iron tip with a damp sponge or brass wool to remove oxidation. Check and replace worn-out tips as needed. Calibrate the temperature periodically using a thermometer like the HAKKO FG-100 or FG-101. Store the station in a cool, dry place to prevent rust. Avoid exposing the unit to extreme temperatures or moisture. Refer to the manual for detailed maintenance schedules and procedures to extend the product’s lifespan and maintain precision soldering performance.

Safety Precautions and Guidelines

Avoid touching the soldering iron tip or metal parts near it. Keep the station out of children’s reach and ensure the temperature does not exceed 400°C (752°F) for safety.

Important Safety Information from the Manual

Always read the manual before using the Hakko FX-888D to ensure safe operation. Avoid touching the soldering iron tip or metal parts near it, as they can cause burns. Keep the soldering station out of reach of children and ensure the workspace is well-ventilated. Do not set the temperature above 400°C (752°F) to prevent damage or hazards. Regularly inspect the power cord and plug for damage. Never leave the soldering iron unattended while it is heated. Follow all safety guidelines to maintain optimal performance and prevent accidents.

Proper Handling and Storage of the Soldering Station

Proper handling and storage of the Hakko FX-888D ensure longevity and safety. Store the soldering station in a dry, cool place away from direct sunlight. Avoid exposing it to moisture or extreme temperatures. After use, allow the soldering iron to cool completely before storing. Regularly clean the station and iron to prevent oxidation. Use the provided iron holder to store the soldering iron safely. Keep the power cord neatly wound to avoid tangling or damage. Always refer to the manual for specific storage instructions to maintain the product’s performance and prevent potential hazards.

Troubleshooting Common Issues

Address temperature inaccuracies, tip wear, or station malfunctions by referencing the manual. Ensure proper calibration, clean tips, and check for software updates to maintain optimal performance.

Resolving Temperature Accuracy Problems

To address temperature accuracy issues with the Hakko FX-888D, ensure proper calibration using the Hakko FG-100 or FG-101 thermometer. Refer to the manual for detailed calibration steps. Avoid exceeding the maximum temperature of 400°C, as this can damage the unit. Regularly clean the thermocouple and ensure the soldering tip is securely seated. If inaccuracies persist, check for firmware updates or contact Hakko support. Proper maintenance and adherence to the manual’s guidelines will help maintain precise temperature control and extend the station’s lifespan.

Addressing Common Errors and Malfunctions

Common errors with the Hakko FX-888D often relate to power issues, temperature fluctuations, or soldering tip malfunctions. If the station does not power on, check the power cord and connections. For temperature-related errors, ensure the thermocouple is clean and properly seated. If the soldering iron fails to heat, inspect the tip for damage or oxidation. Refer to the manual for specific error codes and solutions. Regular maintenance, such as cleaning the tip and checking connections, can prevent many issues. Always follow the manual’s troubleshooting guide to restore optimal functionality and extend the station’s lifespan.

Final Tips for Using the Hakko FX-888D Effectively

For optimal performance, always refer to the Hakko FX-888D manual for guidance. Use the digital interface to monitor temperature accurately and adjust settings as needed. Regularly clean and maintain the soldering iron to ensure consistent results. Store the station in a dry, cool environment to prevent damage. Avoid setting temperatures above 400°C to prolong tip life. Utilize the password function to lock settings and prevent accidental changes. Finally, calibrate the station periodically to maintain precision and reliability in your soldering tasks.

Importance of Referencing the Manual for Continued Use

Referencing the Hakko FX-888D manual is essential for safe and effective operation. It provides detailed instructions for setup, temperature calibration, and maintenance, ensuring optimal performance. The manual also highlights safety precautions to avoid damage or injury. Regularly reviewing the guide helps troubleshoot common issues and extends the lifespan of the station. By following the manual’s guidelines, users can unlock the full potential of the FX-888D, ensuring precise soldering and reliability in every project. Keeping the manual accessible guarantees continued success and adherence to best practices for soldering tasks.

car dvr 1080p manual

Welcome to the Car DVR 1080p Manual! This guide provides detailed instructions for installing, operating, and troubleshooting your device․ Reading it carefully will help you understand all features and functions, ensuring optimal use of your DVR․ Keep this manual for future reference to get the most out of your Car DVR 1080p․

1․1 Overview of the Car DVR 1080p

The Car DVR 1080p is a high-definition digital video recorder designed for vehicle use․ It offers crisp 1080p video recording, G-Sensor for emergency situations, parking mode for 24/7 monitoring, and HDMI output for playback․ This device is a must-have for drivers seeking reliable, high-quality video capture and enhanced safety features․

1․2 Importance of Reading the Manual

Reading this manual is crucial to understanding the Car DVR 1080p’s features, proper installation, and troubleshooting․ It provides detailed guidance on optimizing video quality, using parking mode, and resolving technical issues, ensuring you get the most out of your device while staying informed about its capabilities and limitations․

Key Features of the Car DVR 1080p

The Car DVR 1080p offers high-definition video recording, G-Sensor for emergency situations, parking mode with motion detection, and HDMI output for easy playback․ It ensures crisp video quality, reliable performance, and advanced safety features for drivers․

2․1 High-Definition Video Recording

The Car DVR 1080p captures crystal-clear footage at 1920×1080 resolution, ensuring detailed video quality day and night․ Its advanced sensor enhances low-light performance, while the wide-angle lens provides a broader field of view, making it ideal for capturing every detail on the road for evidence or memory․

2․2 G-Sensor and Emergency Recording

The Car DVR 1080p features a built-in G-Sensor that detects sudden impacts or sharp movements, automatically triggering emergency recording․ This function locks the current video file to prevent overwriting, ensuring crucial evidence is preserved․ It enhances safety and provides peace of mind while driving or in parking mode․

2․3 Parking Mode and Motion Detection

The Car DVR 1080p offers Parking Mode, which monitors your vehicle when stationary․ Motion Detection activates recording when movement is detected, providing 24/7 surveillance․ This feature ensures your car is protected even when parked, offering peace of mind and preserving potential evidence of incidents․

2․4 HDMI Output and Audio Recording

The Car DVR 1080p features an HDMI output, enabling high-quality video playback on larger screens․ It also supports audio recording, capturing clear sound alongside video․ This ensures comprehensive evidence capture and enhances your ability to review incidents in detail, making the DVR a reliable choice for drivers seeking enhanced functionality․

Technical Specifications

The Car DVR 1080p supports HD video recording, compatible with Micro SD cards up to 32GB․ It operates on 5V power and includes HDMI output for video playback․ This section provides detailed specs for optimal performance and connectivity․

3․1 Resolution and Frame Rate

The Car DVR 1080p records at a high-definition resolution of 1920×1080 pixels, ensuring clear and detailed video capture․ It supports a smooth frame rate of 30fps, providing seamless motion recording․ This combination enhances video quality, making it ideal for capturing both daytime and nighttime driving scenes with precision and clarity;

3․2 Storage Capacity and Memory Card Requirements

The Car DVR 1080p supports Micro SD cards with storage capacities up to 32GB (not included)․ For optimal performance, use a Class 10 or higher memory card․ This ensures smooth video recording and playback․ Please format the card before use for compatibility and reliability in capturing high-quality footage․

3․3 Power Requirements and Connectivity Options

The Car DVR 1080p requires a 5V power input, typically provided via a USB cable connected to a cigarette lighter adapter․ It supports HDMI output for video playback and may include additional ports for external connections․ Ensure proper power supply and use compatible cables for reliable performance and connectivity․

Installation and Setup

Mount the DVR securely in your vehicle, typically on the windshield using a suction cup․ Connect the power cable to a USB adapter or cigarette lighter․ Insert a memory card and follow on-screen prompts for initial setup and configuration․

4․1 Mounting the DVR in Your Vehicle

To mount the DVR, attach the suction cup to the windshield․ Ensure a secure hold by cleaning the surface first․ Adjust the angle for optimal view․ Tighten the mount firmly to prevent any movement while driving․ Use the provided adhesive for alternative mounting options if needed․

4․2 Connecting Cables and Power Supply

Insert the Micro SD card into the DVR․ Connect the USB cable to the DVR and plug the other end into your car’s USB port or cigarette lighter adapter․ Ensure the DVR is securely connected to a power source to maintain continuous recording while driving․ This setup ensures reliable power supply for optimal performance․

4․3 Initial Configuration and Settings

Access the settings menu to configure your DVR․ Set the correct date, time, and video quality preferences․ Enable features like G-sensor for emergency recording and motion detection for parking mode․ Adjust sensitivity settings according to your needs․ Save your configuration to ensure all settings are applied correctly for optimal performance․

Operating the Car DVR

Start the DVR by turning on your vehicle․ It will automatically begin recording․ Use the SOS button for emergencies and enable parking mode for 24/7 monitoring․

5․1 Recording Videos While Driving

Start recording by turning on your vehicle, as the DVR powers up automatically․ The device begins capturing video immediately, storing footage on the memory card․ Use the SOS button to save emergency clips manually․ Enable loop recording to overwrite old files when storage is full, ensuring continuous recording while driving․

5․2 Using Parking Mode for 24/7 Monitoring

Enable Parking Mode to monitor your vehicle even when stationary․ The DVR detects motion or impacts, automatically recording and saving clips․ This feature provides 24/7 surveillance, ensuring your car’s safety․ The device switches to low-power mode to conserve battery life while maintaining continuous protection and peace of mind․

5․3 Emergency Recording and SOS Function

The SOS function triggers emergency recording during sudden impacts, capturing crucial evidence․ The DVR’s G-Sensor detects collisions, automatically saving and locking the footage․ This feature enhances safety and provides reliable evidence in case of accidents, ensuring your security on the road․

User Manual Details

This section explains how to navigate and understand your DVR’s interface, customize settings, and access advanced features for enhanced functionality and personalized use․

6․1 Understanding the User Interface

The DVR’s user interface is designed for simplicity and ease of use․ Icons represent key functions like video recording, settings, and playback․ The touchscreen or button controls allow easy navigation through menus, enabling quick access to features such as video review, settings adjustment, and system information․

6․2 Navigating the Menu and Customizing Settings

Use the buttons or touchscreen to navigate through the menu․ Access settings like video resolution, G-Sensor sensitivity, and parking mode․ Customize preferences such as audio recording and loop recording․ Save your configurations to optimize performance․ Refer to the manual for detailed steps on adjusting settings to suit your needs․

6․3 Updating Firmware and Software

Regularly update your Car DVR 1080p’s firmware and software for improved performance and security․ Download updates from the official website, then transfer the files to your device using a micro SD card․ Follow the on-screen instructions to complete the update process․ Ensure your device is fully charged before starting the update․

Tips for Optimal Use

For best results, clean the lens regularly, adjust settings for lighting conditions, and use a high-endurance memory card․ Ensure proper installation and update firmware periodically for optimal performance․

7․1 Ensuring High-Quality Video Recording

Ensure high-quality video by cleaning the lens regularly, adjusting resolution settings, and using a high-endurance memory card․ Properly position the camera for optimal view, avoid direct sunlight glare, and update firmware for improved performance and clarity in recordings․

7․2 Managing Storage and Avoiding Loop Recording Issues

Use a high-quality micro SD card (up to 32GB) and format it regularly to prevent errors․ Enable loop recording to overwrite old files when storage is full․ Adjust settings to balance video quality and storage capacity․ Check available space periodically to avoid interrupted recordings․

7․3 Using HDMI Output for Video Playback

Connect your DVR to a TV or monitor using an HDMI cable for high-quality video playback․ Navigate to the HDMI settings in the menu and select the appropriate output resolution․ This feature allows you to review footage conveniently and share it when needed․ Ensure the cable is securely connected for a stable signal․

Troubleshooting Common Issues

Resolve connectivity problems by checking cable connections and ensuring proper power supply․ Address video quality issues by adjusting settings or formatting the memory card․ Consult the manual for detailed solutions․

8․1 Resolving Connectivity Problems

To resolve connectivity issues, ensure all cables are securely connected and the power supply is stable․ Restart the DVR and check for firmware updates․ If problems persist, format the memory card or consult the manual for further troubleshooting steps to restore functionality․

8․2 Fixing Video Quality and Audio Issues

To improve video quality, ensure proper lighting conditions and clean the lens․ Adjust resolution and frame rate settings if necessary․ For audio issues, check microphone sensitivity and ensure no obstructions․ Update firmware for optimal performance and consult the manual for additional troubleshooting steps to enhance clarity․

8․3 Solving Memory Card and Storage Problems

If your DVR isn’t recognizing the memory card, format it using the device or a PC․ Ensure the card is compatible and meets storage requirements․ If issues persist, replace the card․ Regularly check storage capacity and delete unnecessary files to maintain smooth operation and prevent recording interruptions․

Legal and Safety Considerations
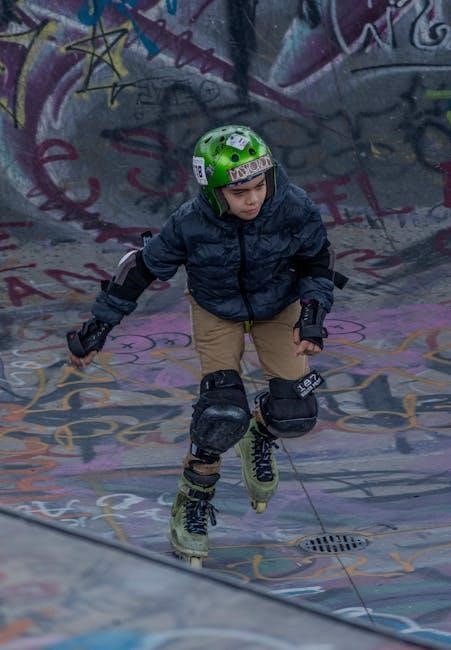
Ensure compliance with local laws regarding dash cam usage․ Check privacy regulations before recording․ Always position the DVR to avoid obstructing your view, and secure it properly for safe operation․

9․1 Dash Cam Legality and Privacy Laws

Research local laws regarding dash cam legality, as some regions restrict recording without consent․ Ensure compliance with privacy laws to avoid legal issues․ Be aware of data protection regulations when capturing or sharing footage․ Always inform passengers if recording audio․

9․2 Using Recorded Footage as Evidence

Footage from your Car DVR 1080p can serve as valuable evidence in legal or insurance matters․ Ensure videos are clear, with time stamps and location data intact․ Store recordings securely to maintain authenticity․ Always check local laws regarding evidence admissibility and proper procedures for submitting footage․

9․3 Safety Tips for Installing and Using the DVR

Ensure the DVR is mounted securely to avoid obstructing your view while driving․ Keep cables organized to prevent tripping hazards․ Use the correct power supply to avoid electrical issues․ Avoid distractions while operating the device․ Regularly check the DVR’s placement and connections for stability and safety․

Frequently Asked Questions

Here are common questions about the Car DVR 1080p, including connectivity, memory card formatting, and troubleshooting power issues․ Find answers to help you resolve issues quickly and effectively․

  • Can I connect the DVR to my smartphone? Yes, via Wi-Fi or a dedicated app․
  • How do I format the memory card? Use the DVR’s menu or a computer․
  • Why won’t the DVR turn on? Check the power supply and connections․

10․1 Can I Connect the DVR to My Smartphone?

Yes, many Car DVR 1080p models support smartphone connectivity via Wi-Fi or a dedicated app․ Connect to the DVR’s Wi-Fi network or download the app to view live footage, transfer videos, or adjust settings remotely․ Ensure your phone and DVR are connected to the same network for seamless pairing․

  • Open the DVR’s Wi-Fi settings․
  • Connect your phone to the DVR’s network․
  • Use the app to access DVR features․

10․2 How Do I Format the Memory Card?

To format the memory card, insert it into your DVR and navigate to the Settings menu․ Select the Format option and confirm․ Alternatively, format the card using your computer, ensuring it’s compatible with the DVR․ Always back up important data before formatting, as it will be erased permanently․

10․3 Why Is My DVR Not Turning On?

Check the power supply and ensure the cable is properly connected․ Verify the power source is functioning․ If issues persist, format the memory card or reset the device․ If the DVR still doesn’t turn on, contact customer support for further assistance or possible repair/replacement options․

Thank you for choosing the Car DVR 1080p․ This manual has guided you through installation, operation, and troubleshooting․ Designed to enhance your driving experience with crystal-clear video quality and advanced features, ensuring your safety and peace of mind on the road․

11․1 Final Thoughts on Using the Car DVR 1080p

Using the Car DVR 1080p enhances your driving experience with high-quality video recording, safety features, and ease of use․ Regularly update firmware, manage storage, and utilize HDMI output for optimal performance․ This device is designed to provide peace of mind and reliability․ For further assistance, refer to the resources provided․

11․2 Resources for Further Assistance

For additional support, visit the official website or download the full Car DVR 1080p manual․ Explore troubleshooting guides, firmware updates, and FAQs․ Contact customer support for personalized help․ Refer to resources like BlackVue or iZEEKER dash cam guides for advanced tips and solutions to enhance your DVR experience․

canon eos1300d manual

The Canon EOS 1300D Manual provides essential guidance for understanding and optimizing camera features, troubleshooting common issues, and accessing detailed resources from Canon’s official website.

1.1 Overview of the Canon EOS 1300D

The Canon EOS 1300D is an entry-level DSLR featuring an 18MP APS-C CMOS sensor and DIGIC 4 image processor. It offers an ISO range of 100-6400, full HD video recording, and compatibility with EF and EF-S lenses. Designed for beginners, it provides user-friendly controls and built-in Wi-Fi/NFC for easy image sharing. The vari-angle LCD screen enhances shooting flexibility. Priced affordably, it’s an ideal choice for those exploring DSLR photography without compromising on essential features.

1.2 Importance of the Manual for Optimal Camera Use

The Canon EOS 1300D manual is crucial for mastering the camera’s features, troubleshooting common errors, and optimizing performance. It provides detailed guidance on initial setup, shooting modes, and maintenance. By understanding the manual, users can resolve issues like “ERR 99,” clean the sensor, and update firmware. It also offers tips for enhancing image quality and utilizing accessories effectively. Whether you’re a beginner or advanced user, the manual ensures you maximize the camera’s potential and capture stunning photos effortlessly.

Key Features and Specifications of the Canon EOS 1300D

The Canon EOS 1300D features an 18MP APS-C CMOS sensor, DIGIC 4 processor, ISO 100-6400 range, and compatibility with EF and EF-S lenses for versatile photography.

2.1 Sensor and Processor Details

The Canon EOS 1300D is equipped with an 18.0-megapixel APS-C CMOS sensor, capturing high-quality images with vibrant colors and sharp details. The sensor works in tandem with the DIGIC 4 image processor, which enhances image processing efficiency, reduces noise, and supports advanced camera functions. This combination ensures excellent performance in various lighting conditions, delivering crisp images even at higher ISO settings. The sensor and processor collaboration enables fast autofocus, smooth operations, and reliable image capture, making it ideal for both casual and professional photography needs.

2.2 ISO Range and Image Quality

The Canon EOS 1300D offers an ISO range of 100-6400, extendable to 12800 for low-light conditions. This range ensures high-quality images with minimal noise, even in challenging lighting. The DIGIC 4 processor optimizes image quality, providing sharp details and rich colors. Whether shooting in bright daylight or dim environments, the camera delivers consistent results, making it versatile for various photography scenarios while maintaining optimal image clarity and detail.

2.3 Lens Compatibility (EF and EF-S Lenses)

The Canon EOS 1300D is compatible with both EF and EF-S lenses, offering versatility for photographers. EF lenses provide wide-angle to telephoto options, while EF-S lenses are designed for APS-C sensors, delivering enhanced performance. This compatibility allows users to explore various focal lengths and specialized optics, from prime lenses for portraits to zoom lenses for landscapes, ensuring adaptability and creative freedom in different shooting situations and styles.

Navigating the Canon EOS 1300D Manual

The manual offers a comprehensive guide, starting with the basic instruction booklet and detailed PDFs available on Canon’s website, ensuring easy access to all camera functions and settings.

3.1 Understanding the Basic Instruction Manual

The Basic Instruction Manual is a concise guide provided with the Canon EOS 1300D, covering essential camera operations, such as initial setup, shooting modes, and basic functions. It introduces beginners to the camera’s core features, including navigation of the menu system and fundamental photography settings. This manual is designed to help users quickly start using the camera, ensuring a smooth transition from unboxing to capturing their first photos. For more detailed instructions, Canon offers downloadable PDF manuals on their website.

3.2 Accessing Detailed Instruction Manuals (PDF)

For in-depth guidance, Canon provides detailed PDF instruction manuals on their official website. These manuals cover advanced features, troubleshooting, and specific functions of the EOS 1300D. Users can download these resources to explore topics like custom settings, error resolutions, and firmware updates. The PDF manuals are comprehensive and ideal for users seeking detailed technical information. They complement the basic manual, offering a deeper understanding of the camera’s capabilities and ensuring optimal use of its features. Visit Canon’s website to access these valuable resources.

3.3 Downloading Additional Resources from the Canon Website

Canon’s website offers a wealth of additional resources for the EOS 1300D, including firmware updates, software, and detailed guides. Users can download PDF manuals, drivers, and troubleshooting guides to enhance their camera experience. These resources provide in-depth information on advanced features, lens compatibility, and error resolution. Regular firmware updates ensure optimal performance and compatibility with the latest hardware. Visit Canon’s official website to explore and download these resources, ensuring your EOS 1300D operates at its best.

Setting Up and Using the Camera

This section guides you through initial configuration, safety precautions, and basic shooting modes. It also introduces advanced features to help you make the most of your EOS 1300D.

4.1 Initial Configuration and Safety Guidelines

Start by carefully unpacking and inspecting your Canon EOS 1300D. Charge the battery fully before first use. Attach the lens by aligning the EF-S mount, ensuring it clicks securely. Insert a memory card, preferably a high-speed SD/SDHC/SDXC card, into the slot. Power on the camera and follow the on-screen prompts to set language, date, and time. Read safety precautions to avoid damage, such as not exposing the camera to extreme temperatures or moisture. Handle the camera and lens with care to prevent scratches or damage.

4.2 Basic Shooting Modes for Beginners

The Canon EOS 1300D offers several user-friendly shooting modes designed for beginners. The Auto Mode automatically adjusts settings for optimal results. Creative Auto simplifies advanced settings like aperture and shutter speed. Scene modes like Portrait, Landscape, and Night Scene are tailored for specific conditions. These modes allow new photographers to capture high-quality images effortlessly while learning the basics of photography. Use the mode dial to select the appropriate mode for your scene and let the camera handle the rest.

4.3 Advanced Features for Professional Use

The Canon EOS 1300D offers advanced features for professional photographers. Manual Mode (M) allows full control over aperture, shutter speed, and ISO. Aperture Priority (Av) and Shutter Priority (Tv) modes enable precise adjustments while the camera adjusts the other settings. Customizable White Balance and AF settings provide flexibility. The camera also supports RAW image capture for post-processing. These features empower professionals to achieve precise control over their photography, ensuring high-quality results in various shooting conditions.

Maintenance and Troubleshooting

Regularly clean the sensor and camera body to prevent damage. Resolve common errors like ERR 99 by cleaning the sensor or updating firmware. Ensure optimal performance and longevity by following Canon’s maintenance guidelines and troubleshooting tips.

5.1 Cleaning the Sensor and Camera Body

Regular cleaning of the sensor and camera body is crucial for maintaining image quality. Use a soft, dry cloth to wipe the exterior and a hand blower for loose debris. For the sensor, switch to manual cleaning mode, use a swab or blower, and avoid touching the sensor surface. Never use harsh chemicals or abrasive materials. Clean the lens and viewfinder regularly. Follow Canon’s guidelines to prevent damage and ensure optimal performance.

5.2 Resolving Common Errors (e.g., ERR 99)

To address ERR 99 on your Canon EOS 1300D, start by turning the camera off and on. Clean the sensor in manual cleaning mode using a blower or swab. Ensure the lens is properly attached and free of debris. If issues persist, reset the camera to default settings or update the firmware. For recurring errors, download the latest firmware from Canon’s official website and follow installation instructions carefully to restore functionality and prevent future malfunctions.

5.3 Updating Firmware and Software

Regularly updating your Canon EOS 1300D’s firmware and software ensures optimal performance, enhanced features, and bug fixes. Visit Canon’s official website to download the latest versions. Before updating, ensure your camera is fully charged and connected to a stable internet connection. Follow the on-screen instructions carefully to avoid interruptions. After completing the update, restart your camera to apply the changes. Always verify the firmware version matches your camera model to maintain compatibility and functionality.

Compatible Lenses and Accessories

The Canon EOS 1300D supports EF and EF-S lenses, offering versatility for various photography needs. Compatible accessories include flash units and extensions, enhancing functionality and creativity.

6.1 Recommended Prime and Zoom Lenses

The Canon EOS 1300D is compatible with EF and EF-S lenses, offering flexibility for diverse photography needs. Prime lenses like the EF 50mm f/1.8 and EF 85mm f/1.2 are ideal for portraits, delivering sharp focus and a shallow depth of field. Zoom lenses such as the EF-S 18-55mm and EF 70-200mm provide versatility for wide-angle to telephoto shots. These lenses enhance creativity and ensure high-quality images, making them essential for both beginners and professionals. Using genuine Canon lenses guarantees optimal compatibility and performance.

6.2 Using Flash and Other Accessories

The Canon EOS 1300D supports external flash units like the Speedlite 470EX-AI for enhanced lighting control. These flashes provide advanced features such as bounce and wireless modes. Additionally, the camera is compatible with remote controllers and tripods, improving stability for low-light or long-exposure shots. Using genuine Canon accessories ensures optimal performance and compatibility. Always refer to the manual for proper setup and usage guidelines to maximize functionality and avoid potential issues with flash synchronization or accessory operation.

Tips for Getting the Most Out of Your Canon EOS 1300D

Master autofocus settings, experiment with shooting modes, and optimize lighting conditions to enhance image quality. Regularly update firmware and use compatible accessories for improved performance and creativity.

7;1 Mastering Autofocus and Exposure Settings

Mastering autofocus and exposure is crucial for capturing sharp, well-lit images. Use One-Shot AF for stationary subjects and AI Servo AF for moving ones. Adjust ISO sensitivity based on lighting conditions to minimize noise. Experiment with aperture and shutter speed to control depth of field and motion blur. Familiarize yourself with the camera’s metering modes to ensure accurate exposure. Regularly update firmware for improved autofocus performance and compatibility with Canon lenses, ensuring optimal image quality in various shooting scenarios.

7.2 Optimizing Image Capture in Various Lighting Conditions

Mastering lighting conditions is essential for stunning images. In low-light, use higher ISO settings (up to 6400) and image stabilization lenses to reduce noise and blur; For bright conditions, adjust aperture to prevent overexposure. Indoors, utilize built-in flash or external lighting for balanced illumination. Shoot during the golden hour for natural, warm tones. Experiment with white balance settings to enhance colors. Use RAW format for better post-processing flexibility. Familiarize yourself with metering modes to capture detail in high-contrast scenes, ensuring optimal results in any lighting environment.

smartheart blood pressure monitor manual

The Smartheart Blood Pressure Monitor is an innovative, automatic device designed to measure blood pressure and heart rate accurately․ It offers a user-friendly solution for home health monitoring․

Overview of the Device and Its Purpose

The Smartheart Blood Pressure Monitor is an advanced, user-friendly device designed to measure blood pressure and heart rate accurately․ Utilizing the oscillometric method, it provides reliable readings equivalent to those obtained in clinical settings․ Its primary purpose is to enable individuals to monitor their cardiovascular health conveniently at home․ The monitor is equipped with features that ensure accuracy, comfort, and ease of use, making it an essential tool for managing hypertension and maintaining overall well-being․ Regular use helps users track their health trends and make informed lifestyle decisions․

Care and Safety Information

Proper care ensures your Smartheart Blood Pressure Monitor functions accurately and safely․ Avoid exposing it to extreme temperatures, moisture, or physical stress to prevent damage․

Precautions for Proper Use

Always follow these precautions to ensure safe and accurate use of your Smartheart Blood Pressure Monitor․ Avoid using the device near other wireless devices, as this may cause interference․ Keep the monitor at least 12 inches away from other electronic devices during use․ Do not move or bend your arm during measurement, as this can affect accuracy․ Ensure the cuff is properly fitted and positioned correctly on your arm․ Avoid using the monitor in extreme temperatures or humid environments․ Never expose the device to direct sunlight or moisture, as this may damage internal components․ Proper handling ensures reliable performance and longevity of the monitor․

Understanding the Oscillometric Method

The Smartheart Blood Pressure Monitor utilizes the oscillometric method, a non-invasive technique to measure blood pressure․ This method detects blood flow movements through an artery, converting them into digital readings․ Unlike traditional auscultation, which requires a stethoscope, the oscillometric method automatically senses vibrations in the cuff․ These vibrations are analyzed to determine systolic and diastolic pressures, as well as heart rate․ The process is equivalent to professional measurements, making it ideal for home use․ This technology ensures accurate, reliable results without the need for manual intervention, providing a convenient solution for monitoring cardiovascular health․

Types of Smartheart Blood Pressure Monitors

Smartheart offers two models: the 01-553 arm monitor and the 01-556 wrist monitor, each designed for accurate blood pressure measurement․

Model 01-553: Automatic Digital Blood Pressure Arm Monitor

The Smartheart 01-553 is an automatic digital blood pressure arm monitor designed for accurate and reliable readings․ It uses advanced pulse sensors and heat sensors to detect electrical signals from the heart through the skin, providing precise measurements of blood pressure and heart rate․ The monitor is user-friendly, with a clear display and easy-to-use controls․ It is ideal for home use and comes with a comprehensive instruction manual to guide users through setup and operation․ Proper care ensures long-term functionality and accuracy․

Model 01-556: Automatic Digital Wrist Blood Pressure Monitor

The Smartheart 01-556 is an automatic digital wrist blood pressure monitor that utilizes the oscillometric method for precise measurements․ Designed for portability and ease of use, it is ideal for monitoring blood pressure on the go․ The device features advanced sensors to ensure accurate readings and is equipped with a memory function to store previous measurements․ Its compact design and user-friendly interface make it a convenient option for personal health management․ The monitor is accompanied by a detailed manual to guide users through its operation and maintenance․

Key Features of the Smartheart Blood Pressure Monitor

The Smartheart Blood Pressure Monitor features advanced pulse and heat sensors for accurate readings, wireless connectivity for data sharing, and a memory function to track measurements over time․

Advanced Pulse Sensors and Heat Sensors

The Smartheart Blood Pressure Monitor incorporates cutting-edge technology with advanced pulse sensors and heat sensors․ These sensors detect electrical signals from the heart through the skin, ensuring accurate measurements of blood pressure and heart rate․ The pulse sensors utilize oscillometric methods to capture arterial movements, while heat sensors enhance signal detection for precise readings․ This technology allows for reliable monitoring without the need for manual inflation or stethoscopes, making it ideal for home use․ Regular software updates further optimize performance, ensuring consistent and trustworthy results over time․

Wireless Device Considerations

When using the Smartheart Blood Pressure Monitor, it is crucial to consider wireless device interactions․ The monitor should be kept at least 12 inches away from other wireless devices during operation to avoid signal interference․ This ensures accurate readings and prevents potential errors․ Additionally, the device operates on a specific frequency band, and maintaining this distance helps preserve data integrity․ Regular updates to the monitor’s firmware are also recommended to optimize wireless performance and compatibility, ensuring seamless integration with other health tracking systems and maintaining reliable operation over time․

Setting Up Your Smartheart Blood Pressure Monitor

Start by unpacking and installing the batteries as instructed․ Connect the device to your arm or wrist, ensuring proper fit․ Follow the manual for accurate setup․

Initial Setup and Configuration

Begin by unpacking your Smartheart Blood Pressure Monitor and installing the provided batteries․ Ensure the cuff is correctly positioned on your arm or wrist․ Power on the device and allow it to initialize․ Follow the on-screen instructions to set the date, time, and user profile if applicable․ For wireless models, pair the monitor with your smartphone or tablet using Bluetooth․ Refer to the manual for specific pairing codes or app download details․ Proper setup ensures accurate measurements and seamless connectivity for data tracking․ Always store the device in a dry, cool place when not in use․

Using the Smartheart Blood Pressure Monitor

Using the Smartheart monitor is simple and effective․ Ensure proper cuff placement, sit comfortably, and avoid movement․ Power on the device and follow the on-screen prompts for accurate results․

Step-by-Step Guide to Measuring Blood Pressure

  1. Sit comfortably with your back straight and feet flat on the floor․
  2. Ensure the cuff is appropriately sized for your arm or wrist․
  3. Place the cuff correctly, following the guide marks provided․
  4. Power on the monitor and wait for the display to initialize․
  5. Remain still and avoid talking during measurement․
  6. Press the start button to begin the reading process․
  7. The cuff will inflate automatically; stay calm until it deflates․
  8. Your blood pressure and heart rate will appear on the screen․
  9. Record your results for future reference or tracking․

Maintenance and Care

Regularly clean the device with a soft cloth and store it in a dry place․ Avoid extreme temperatures and humidity to ensure optimal performance and longevity․

Proper Storage and Handling

To maintain the performance and longevity of your Smartheart Blood Pressure Monitor, proper storage and handling are essential․ Store the device in its original packaging or a protective case to prevent damage․ Keep it in a cool, dry place, away from direct sunlight and moisture․ Avoid submerging the monitor in water or exposing it to extreme temperatures․ Handle the cuff with care to prevent stretching or creasing․ Clean the device regularly with a soft, dry cloth, avoiding harsh chemicals․ Ensure the storage area is free from pests or dampness for optimal preservation․ Always keep the monitor out of reach of children․

Troubleshooting Common Issues

Check for proper cuff placement, ensure batteries are charged, and restart the device if readings are inconsistent․ Refer to the manual for error code solutions․

Resolving Errors and Ensuring Accuracy

If your Smartheart Blood Pressure Monitor displays an error code, refer to the manual for specific solutions․ Common issues include improper cuff placement, low battery, or incorrect operation․ Ensure the cuff is snug and properly positioned․ If readings are inconsistent, restart the device and retry․ For persistent inaccuracies, recalibrate the monitor according to the instructions․ Regularly check the battery level and replace them as needed․ Always follow the manual’s guidelines to maintain accuracy and resolve issues effectively․ Proper troubleshooting ensures reliable blood pressure measurements and extends the device’s lifespan․

Accessories and Additional Resources

Explore the range of Smartheart Blood Pressure Monitor accessories, including carrying cases and extra cuffs․ Visit the official website for user manuals, FAQs, and support․

Available Manuals and User Guides

Access comprehensive manuals for Smartheart Blood Pressure Monitors online․ Models like 01-553 and 01-556 have downloadable PDF guides detailing setup, usage, and troubleshooting․ These resources ensure optimal device performance and user understanding․ Visit the official website or trusted databases for the latest versions․ Quick start guides are also available for initial setup assistance․ Proper use of these resources guarantees accurate blood pressure readings and extends the monitor’s longevity․ Always refer to the manual for specific model instructions and safety precautions․

honeywell th6210u2001 user manual

The Honeywell TH6210U2001 is a programmable thermostat designed for precise temperature control and energy efficiency. It features a backlit display, easy scheduling, and compatibility with various HVAC systems, ideal for home comfort management.

1.1 Key Features and Benefits

The Honeywell TH6210U2001 offers a backlit display for easy readability, programmable temperature scheduling, and compatibility with heat, cool, and heat pump systems. Its energy-saving design helps reduce utility bills. The thermostat features a lock screen to prevent unauthorized changes and a simple interface for intuitive control. It supports both 5-1-1 and 5-2 day schedules, allowing users to customize comfort settings. The device is built with high-quality materials, ensuring durability and reliability. Its contemporary style blends seamlessly with home décor, making it both functional and aesthetically pleasing. These features make it an ideal choice for homeowners seeking efficient temperature management.

1.2 Compatibility and System Requirements

The Honeywell TH6210U2001 is compatible with most HVAC systems, including gas, oil, electric, and heat pumps. It requires a C-wire for proper functionality, ensuring reliable performance. The thermostat supports 24V systems and works with single-stage or multi-stage heating and cooling units. It is designed to integrate seamlessly with existing wiring configurations. Compatibility checks should be performed before installation to ensure smooth operation. The device’s versatility makes it suitable for a wide range of heating and cooling setups, providing consistent temperature control across various home environments. Proper installation ensures optimal performance and energy efficiency.

Installation and Setup

Installation of the Honeywell TH6210U2001 is straightforward, requiring proper wiring and mounting. Ensure compatibility and follow step-by-step instructions for a seamless setup process.

2.1 Compatibility Check and Wiring Requirements

Before installing the Honeywell TH6210U2001, ensure your HVAC system is compatible with the thermostat. Verify wiring requirements, including the need for a common wire (C-wire) in most systems. Proper wiring is essential for accurate temperature control and advanced features. Check the user manual for specific compatibility guidelines and wiring diagrams. If unsure, consult a professional to avoid installation issues. Proper wiring ensures safe and efficient operation of the thermostat, preventing potential malfunctions or damage to your system. Always refer to the manual for detailed instructions tailored to your setup.

2.2 Step-by-Step Mounting and Connection Process

Mounting the Honeywell TH6210U2001 begins with attaching the wall anchors using the provided installation kit. Turn off power to your HVAC system for safety. Remove the old thermostat and mark the wall for drilling. Install the base plate and connect the wires according to the labels in the manual. Secure the thermostat to the base plate and restore power. Ensure all connections are tight and properly labeled for reliable operation. Follow the on-screen prompts to complete the setup process. Always refer to the user manual for specific wiring diagrams and instructions tailored to your system.

Programming the Thermostat

The Honeywell TH6210U2001 allows users to set temperature schedules effortlessly, ensuring comfort and energy efficiency. Its intuitive interface makes programming simple for any time of day.

3.1 Setting Temperature Schedules

The Honeywell TH6210U2001 allows users to set temperature schedules for up to 7 days, providing flexibility and energy efficiency. Access the menu, select the day(s), and choose the desired temperature for morning, day, evening, and night periods. Use the arrows to adjust settings, ensuring comfort throughout the day. This feature helps optimize energy usage by automating temperature adjustments when you’re asleep or away. Save your preferences to maintain consistent comfort without manual adjustments. This programmable thermostat is designed to simplify temperature management while reducing energy costs.

3.2 Switching Between Heat and Cool Modes

To switch between heat and cool modes on the Honeywell TH6210U2001, access the thermostat menu. Use the arrows to navigate to the “System” or “Mode” option. Select either “Heat” or “Cool” based on your preference. Ensure your HVAC system is compatible with the selected mode and properly wired. After choosing the mode, adjust the temperature using the arrows. The thermostat will activate the corresponding system to maintain the set temperature. Always verify system compatibility before switching modes to avoid operational issues. Proper mode selection ensures efficient heating or cooling performance throughout the year.

Operation Modes and Features

The Honeywell TH6210U2001 offers multiple operation modes, including Heat, Cool, and Off, ensuring flexible temperature control. Features like the backlit display, scheduling, and energy-saving modes enhance user convenience and efficiency.

4.1 Using the Hold Feature for Permanent Temperature Settings

The Hold feature on the Honeywell TH6210U2001 allows users to override the programmed schedule, maintaining a permanent temperature setting. To activate, press and hold the “Hold” button until the display confirms the setting. This feature is ideal for consistent comfort without recurring adjustments. The thermostat will retain this temperature indefinitely until another change is made, providing convenience for users who prefer a steady environment. Ensure the system is compatible with your HVAC setup for optimal performance.

4.2 Locking and Unlocking the Thermostat Screen

The Honeywell TH6210U2001 thermostat features a screen lock to prevent accidental changes. To lock, press and hold the “Menu” and “Down” buttons simultaneously for 5 seconds. A 4-digit PIN is required to unlock. If you forget the PIN, contact Honeywell support for assistance. The screen will remain locked until the correct PIN is entered, ensuring settings stay secure. This feature is useful for maintaining consistent temperatures without unwanted adjustments. Note that the thermostat must be installed correctly and the system compatible for this feature to function properly.

Maintenance and Troubleshooting

Regularly clean the thermostat screen and check wiring connections. Common issues include sensor malfunctions or incorrect settings. Resetting the thermostat by removing batteries or reversing them temporarily can resolve many problems.

5.1 Common Issues and Solutions

A common issue with the Honeywell TH6210U2001 is temperature sensor malfunction, indicated by incorrect readings. To resolve, ensure the sensor is clean and properly calibrated. Another issue is unresponsiveness, which can be fixed by resetting the thermostat. Additionally, wiring problems may cause the system to malfunction; check connections to ensure they are secure. If the display is unlit, verify battery installation or wiring connections. For persistent issues, refer to the user manual or contact Honeywell support for further assistance.

5.2 Resetting the Thermostat

To reset the Honeywell TH6210U2001, remove the batteries and insert them backwards for five seconds. This will reset the thermostat without losing settings. Alternatively, pull the thermostat from its base and wait for 30 seconds before reconnecting. This ensures a complete system reset. If issues persist, refer to the manual or contact Honeywell support for further assistance. Resetting can resolve unresponsiveness or incorrect temperature readings. Always ensure proper wiring after resetting to maintain functionality.

Accessing the User Manual and Support

Download the Honeywell TH6210U2001 manual from the official Honeywell website or contact their support team for assistance with troubleshooting, installation, or replacement information.

6.1 Downloading the Honeywell TH6210U2001 Manual

To access the Honeywell TH6210U2001 manual, visit the official Honeywell website. Navigate to the support section and search for your model number. Download the PDF version for easy printing or digital reference. The manual provides detailed instructions for installation, programming, and troubleshooting. It also includes diagrams and specifications to ensure proper setup and operation. Regularly check for updates to ensure you have the latest version. This resource is essential for maximizing the thermostat’s features and resolving any issues quickly.

6.2 Contacting Honeywell Support for Assistance

For assistance with the Honeywell TH6210U2001, visit the official Honeywell website and navigate to the “Support” section. Use the “Contact Us” form or call the customer service hotline. Provide your model number and a detailed description of your issue. You can also access troubleshooting guides and FAQs on their website. Honeywell support is available to help with installation, programming, or resolving technical issues. Ensure you have your thermostat’s serial number ready for faster assistance. Representatives are trained to address concerns efficiently, ensuring your thermostat operates optimally.

ostaszewski manual

The Ostaszewski Manual is a comprehensive guide designed to enhance search skills and improve research efficiency. It offers practical strategies for effective online searches, catering to both beginners and advanced users.

1.1 Overview of the Manual

The Ostaszewski Manual provides a detailed framework for mastering online research and search techniques. It covers essential strategies for effective keyword selection, database navigation, and troubleshooting common search challenges. The manual emphasizes practical applications, such as solving math problems, using weather and dictionary functions, and image recognition. By focusing on efficiency and precision, it helps users streamline their research process and locate relevant information quickly. This guide is tailored for both academic and general-purpose searches, ensuring comprehensive coverage of search methodologies.

1.2 Historical Background

The Ostaszewski Manual was developed to address the growing need for efficient online research strategies. Created by experts, it aims to simplify complex search processes and enhance productivity. Over time, the manual has evolved to incorporate user feedback and advancements in search technology. Its historical development reflects the increasing importance of precise and effective information retrieval in both academic and professional settings, making it a valuable resource for learners and researchers alike.

1.3 Key Features and Objectives

The Ostaszewski Manual emphasizes practical strategies for improving search efficiency and accuracy. Its key features include structured approaches to keyword selection, advanced search operators, and techniques for refining results. The primary objective is to empower users with skills to locate precise information quickly. By focusing on clarity and effectiveness, the manual aims to enhance research outcomes for both academic and professional purposes, ensuring users can navigate complex databases with confidence and precision.

Search Strategies for Effective Research

The Ostaszewski Manual outlines practical search strategies, including advanced operators and keyword optimization, to refine research processes and enhance information retrieval efficiency.

2.1 Basic Search Techniques

Basic search techniques involve using keywords and phrases to locate relevant information efficiently. Start with broad terms related to your topic, then refine searches by adding specificity. Utilize operators like quotes for exact phrases and explore features like math problem-solving or weather checks. This foundational approach ensures effective information retrieval, forming the basis for more advanced strategies.

2.2 Advanced Search Operators

Advanced search operators enhance precision by refining queries. Use the vertical bar (|) to search for multiple terms, ensuring results include either term. Exclude irrelevant content with a minus (-) sign. Quotation marks (“”) enforce exact phrase matching. These tools help filter noise, targeting specific information efficiently. They are especially useful for academic and technical searches, ensuring results align closely with user intent and requirements. Mastering these operators boosts search efficacy significantly.

2.3 Utilizing Quotation Marks for Exact Phrases

Using quotation marks around phrases ensures exact matches in search results. This technique is invaluable for precise information retrieval. By enclosing phrases in quotes, users can avoid irrelevant results and focus on specific content. For example, searching for “climate change impacts” yields targeted articles. This method is particularly useful for academic research, ensuring accuracy and reducing search time. It helps in pinpointing exact phrases, making it a powerful tool for focused inquiries.

Google Search Optimization

Google Search Optimization focuses on maximizing search efficiency through advanced techniques and tools. It enables users to solve math problems, check weather, and perform dictionary lookups directly in the search bar, enhancing productivity and streamlining information retrieval.

3.1 Mastering Google’s Search Capabilities

Mastering Google’s search capabilities involves leveraging advanced operators and features to refine results. Techniques like using quotes for exact phrases, the vertical bar for multiple terms, and excluding irrelevant words enhance precision. Additionally, Google can solve math problems, provide weather updates, and define words, making it a versatile tool for efficient information retrieval and problem-solving. These features streamline searches, saving time and improving accuracy for users.

3.2 Using the Vertical Bar for Multiple Terms

The vertical bar operator allows users to search for content containing either of two or more terms. This is particularly useful when looking for information that might be described using different phrases or synonyms. By entering terms separated by a vertical bar, Google retrieves results that include any of the specified words, broadening the search scope and ensuring comprehensive results without missing relevant information. This technique is especially handy for exploring topics with varying terminology.

3.3 Excluding Irrelevant Terms

To refine search results and exclude unwanted information, the Ostaszewski Manual emphasizes using specific operators. By placing a minus sign (-) before a term, users can eliminate irrelevant content. For example, searching “psychology -sports” excludes results about sports; This technique enhances search precision, ensuring focus on the desired topic and improving overall research efficiency. It is particularly useful for academic or technical searches where clarity and accuracy are essential. This method saves time by filtering out unrelated data.

Academic and Database Searching

The Ostaszewski Manual guides users in navigating academic databases, emphasizing keyword and subject searches for precise results. It ensures efficient access to relevant scholarly articles and resources.

4.1 Navigating Database Search Engines

Navigating database search engines requires strategic use of keywords and filters. The Ostaszewski Manual teaches users to refine searches by applying Boolean operators and leveraging advanced features like thesaurus tools. This ensures precise results, saving time and enhancing research efficiency. By mastering these techniques, users can effectively locate relevant academic articles and resources within vast databases.

4.2 Effective Use of Keywords and Subject Searches

The Ostaszewski Manual emphasizes creating a list of keywords and subject terms to refine database searches. Users are advised to extract terms directly from their assignments or topics. Specific nouns and phrases yield better results. Clarifying ambiguous terms, such as “depression,” by adding context like “mental health,” improves precision. Combining keywords with Boolean operators or OR statements expands search scope, ensuring comprehensive results without redundancy.

4.3 Thesaurus Integration for Precision

The Ostaszewski Manual highlights the importance of using a thesaurus to enhance search precision. By exploring synonyms, antonyms, and related terms, users can broaden or narrow their searches effectively. This tool aids in identifying alternative keywords, ensuring comprehensive coverage of a topic. The integration of thesaurus features helps refine search strategies, making it easier to locate relevant information in databases and improving overall research efficiency. This approach ensures more accurate and targeted results.

Practical Applications of the Manual

The Ostaszewski Manual offers practical tools for real-world tasks, such as solving math problems, checking weather, and dictionary functions, enhancing everyday efficiency and accuracy.

  • Solve math equations directly in search bars.
  • Access weather forecasts by location.
  • Define words instantly for quick reference.

5.1 Solving Math Problems with Search Engines

The Ostaszewski Manual highlights how search engines can directly solve math problems by entering equations into the search bar. For instance, typing “34.92 x 0.2” or “20 of 34.92” quickly provides results, making it ideal for calculations like tip computations. Additionally, search engines can handle complex math, including algebra and graphing, offering visualization for functions. This feature streamlines problem-solving, eliminating the need for separate calculators and enhancing efficiency in both simple and advanced mathematical tasks.

5.2 Weather and Dictionary Functions

The Ostaszewski Manual explains how search engines can instantly provide weather updates by typing “weather” or a city name, such as “weather Seattle.” Additionally, users can access dictionary definitions by prefixing words with “define,” offering quick access to meanings and context. These functions enhance productivity, allowing users to find real-time weather information or define terms without leaving the search engine, making it a versatile tool for everyday needs and academic research.

5.3 Image Recognition and Search

The Ostaszewski Manual highlights the use of Google Lens for image recognition. Users can upload photos, take new ones, or paste URLs into the search bar. By tapping the Google Lens icon, the engine identifies objects, people, or scenes within images. This feature aids in finding related information or similar visuals. Additionally, users can crop images to focus on specific areas, making it a powerful tool for both casual and academic research purposes. This enhances visual search accuracy and convenience significantly.

Academic Writing and Support

The Ostaszewski Manual emphasizes the importance of academic support resources like Western Technical College’s Learning Commons, which offers library and academic services both on-campus and online. Licensed under Creative Commons, it provides accessible tools for research and writing, aiding students in achieving academic success.

6.1 Western Technical College’s Learning Commons

Western Technical College’s Learning Commons provides comprehensive academic support services, both on-campus and online. It serves as a central hub for students, offering access to library resources, tutoring, and research assistance. The Learning Commons is dedicated to fostering academic success, ensuring students have the tools and guidance needed to excel in their studies. Its services are tailored to meet diverse student needs, promoting a supportive and inclusive learning environment.

6.2 Creating Effective Search Term Lists

Creating effective search term lists involves identifying key words and phrases related to your topic. Start by brainstorming nouns, subject headings, and synonyms. Use specific terms to narrow your search and avoid broad results. For example, instead of “depression,” use “mental health depression” for clarity. Combine terms using Boolean operators like “AND” or “OR” to refine results. This strategy ensures precise and relevant information retrieval, enhancing research efficiency and accuracy.

6.4 Combining Multiple Search Terms

Combining multiple search terms enhances precision and efficiency in research. Use Boolean operators like “AND,” “OR,” and “NOT” to connect terms. For instance, searching “narcissistic OR borderline personality disorders” retrieves results for either term. This method saves time by broadening or narrowing search scopes. Additionally, employing advanced operators such as quotation marks for exact phrases or the vertical bar for multiple terms ensures more accurate and relevant results, streamlining the research process effectively.

Troubleshooting and Refinement

Troubleshooting and refinement are crucial for effective searching. Avoid common mistakes, clarify ambiguous terms, and use precise language to improve search accuracy and efficiency.

7.1 Avoiding Common Search Mistakes

Avoiding common search mistakes is essential for effective research. These include using overly broad terms, neglecting advanced operators, and ignoring quotation marks for exact phrases. Overly broad terms yield too many irrelevant results, while failing to use operators like the vertical bar or exclusion symbols can miss critical information. Additionally, not clarifying ambiguous terms may lead to unrelated content. Recognizing these pitfalls helps refine searches, ensuring more precise and relevant outcomes, enhancing overall efficiency.

7.2 Clarifying Search Terms for Precision

Clarifying search terms is crucial for precision in research. Ambiguous terms like “depression” can refer to mental health or economic periods, so adding modifiers like “mental health” narrows results. Using specific keywords and phrases ensures relevance. For example, combining “narcissistic” and “borderline personality disorder” with “OR” retrieves targeted information. This strategy refines searches, reducing irrelevant content and enhancing the quality of results, aligning with the Ostaszewski Manual’s emphasis on efficient and accurate information retrieval.

7.3 Handling Ambiguous Terms

Ambiguous terms can lead to broad or irrelevant search results. The Ostaszewski Manual suggests refining such terms by adding context or modifiers. For example, “depression” could mean mental health or economic downturns. By specifying “mental health depression” or “Great Depression,” searches become more precise. Additionally, using advanced operators like quotes for exact phrases or OR for related terms helps narrow results. This technique ensures searches yield relevant, focused information, enhancing research efficiency and accuracy.

The Ostaszewski Manual empowers users with advanced search techniques, ensuring efficient and precise results. Its strategies enhance research capabilities, making it an invaluable resource for future academic and professional applications.

8.1 Summary of Key Concepts

The Ostaszewski Manual provides a structured approach to mastering search techniques, database navigation, and practical applications. It emphasizes the importance of precise search terms, advanced operators, and tools like thesaurus integration. The manual also covers troubleshooting strategies to refine results and avoid common mistakes. By bridging the gap between theory and practice, it equips users with the skills to efficiently locate relevant information, enhancing their research and problem-solving capabilities.

8.2 Future Applications and Development

The Ostaszewski Manual is poised for expansion into emerging technologies like AI-driven search tools and advanced image recognition. Future updates may incorporate real-time data integration and enhanced cross-database compatibility, ensuring it remains a leading resource for researchers. By adapting to technological advancements, the manual will continue to empower users in diverse fields, from academia to professional sectors, fostering innovation and efficiency in information retrieval and application.

skmei watch manual

Welcome to the Skmei Watch Manual! This guide helps you understand and operate your Skmei watch effectively, covering setup, features, troubleshooting, and maintenance tips.

1.1 Importance of the User Manual

The user manual is essential for understanding your Skmei watch’s features, troubleshooting issues, and ensuring proper maintenance. It provides detailed instructions tailored to your specific model, helping you maximize functionality and longevity. Referencing the manual ensures you can resolve common problems and customize settings effectively, making it a vital resource for optimal use.

1.2 How to Find the Manual Online

Finding the Skmei watch manual online is straightforward. Visit the official Skmei website or authorized retailers like Amazon. Search using your watch model number, such as “Skmei 1483 manual,” to locate the PDF. Ensure you download from trusted sources to avoid unauthorized versions. If unavailable, check forums or support pages for user-shared documents or contact Skmei customer support directly.

Understanding Your Skmei Watch

Discover the key features and components of your Skmei watch, designed for functionality and style. Refer to your manual for detailed guidance on its operation and care.

2.1 Key Features of Skmei Watches

Skmei watches are known for their digital displays, multiple time zones, and customizable settings. They often include features like alarm functions, stopwatch modes, and adjustable brightness for optimal use. Additionally, models such as the Skmei 1483 offer specific functionalities that enhance user experience, making them versatile for various lifestyles and preferences. Refer to your manual for model-specific details.

2.2 Basic Components of the Watch

Your Skmei watch typically includes a digital display, buttons for navigation (A and B), and an adjustable strap. The display shows time, date, and mode information, while the buttons allow you to cycle through features. The strap ensures a secure fit, and the watch casing houses the internal mechanisms. These components work together to provide a user-friendly experience tailored to your needs.

Setting Up Your Skmei Watch

Start by setting the time, date, and time zone. Use the buttons to navigate through modes and adjust settings according to your preferences for optimal functionality.

3.1 Setting the Time and Date

To set the time and date on your Skmei watch, press and hold the A key until the year starts flashing. Use the B key to adjust the year, month, and date. Once set, press the A key again to confirm. Ensure accuracy for proper functionality. Refer to the manual for detailed step-by-step instructions.

3.2 Adjusting the Time Zone

To adjust the time zone on your Skmei watch, press the B key twice to enter the time zone mode. Use the C key to select your desired time zone or country code. Ensure the correct zone is highlighted before saving. This feature ensures accurate timekeeping while traveling. Refer to your manual for specific instructions tailored to your Skmei model for optimal results.

Operating Modes of the Skmei Watch

Explore the various operating modes of your Skmei watch, including Normal Time Mode and Special Features, to maximize functionality and user experience. Learn how to switch between modes seamlessly for different activities and preferences. This section helps you understand the diverse operations your watch offers, ensuring optimal use in everyday life.

4.1 Normal Time Mode

In Normal Time Mode, your Skmei watch displays the current time and date. To access this mode, press the B key twice until ‘TIME’ appears. This mode is ideal for everyday use, providing a clear view of essential timekeeping functions. Use the A key to set or adjust the time and date settings as needed for accurate timekeeping. This mode ensures simplicity and convenience for daily wear.

4.2 Special Features and Functions

Your Skmei watch offers additional functions beyond timekeeping, such as alarms, stopwatches, and timers. Press the B key to cycle through modes and access these features. The stopwatch allows precise timing, while alarms help remind you of important events. Some models also include a timer for interval tracking. Explore these features to maximize your watch’s functionality for sports, work, or daily activities. Refer to your manual for specific button combinations to activate these modes.

Troubleshooting Common Issues

Resolve issues like incorrect time settings or battery drain by restarting your watch or checking for debris. Consult the manual for detailed solutions to ensure optimal performance.

5.1 Resolving Time Setting Problems

If your Skmei watch shows the wrong time, restart it by pressing and holding the reset button. Ensure the time zone matches your location. If issues persist, sync manually by pressing A key to access settings. Refer to the manual for specific instructions tailored to your model. Proper synchronization ensures accurate timekeeping and optimal functionality. Always check for debris or damage that may affect performance. Regular maintenance and correct button usage are key to resolving time-related issues effectively. By following these steps, you can restore your watch to precise timekeeping instantly.

5.2 Addressing Battery and Power Issues

If your Skmei watch has a blank screen or stops functioning, it may indicate a low battery. Replace the battery by carefully opening the back case, ensuring no moisture enters. Use a compatible replacement battery and secure the case tightly. Avoid touching internal components to prevent damage. If issues persist, consult the manual or contact a professional. Proper battery replacement ensures optimal performance and extends the watch’s lifespan. Always verify the battery type specified for your model to maintain functionality. If unsure, refer to the user manual for detailed instructions or seek assistance from a certified technician. This will help prevent any further complications and ensure your watch operates smoothly. Regular checks can help identify battery-related problems early, preventing sudden malfunctions. By following these steps, you can resolve power issues effectively and keep your Skmei watch running accurately. Remember, improper handling can cause permanent damage, so proceed with caution. If the watch still doesn’t power on after replacement, check for any debris or corrosion on the battery contacts and clean them gently. This simple step often resolves unexpected power issues. Always store spare batteries in a cool, dry place to maintain their effectiveness. For models with rechargeable batteries, ensure the charging cable is securely connected and the watch is fully charged before use. If you notice any swelling or leakage, discontinue use and replace the battery immediately to prevent further damage. Keep in mind that extreme temperatures can affect battery performance, so store your watch in a stable environment. If you’re unsure about any step, consult the manual or contact customer support for guidance. Proper care and maintenance will ensure your Skmei watch remains reliable and functional for years to come. By addressing battery issues promptly and correctly, you can enjoy uninterrupted timekeeping and other features of your watch. Always prioritize using high-quality batteries to maintain the performance and longevity of your device. If your watch has a battery-saving mode, enable it to extend battery life during periods of inactivity. This feature is especially useful for travelers or those who don’t wear their watch frequently. For older models, consider upgrading to a newer version with improved battery technology for better performance. Regularly updating your watch’s software, if applicable, can also enhance battery efficiency and overall functionality. By taking these precautions, you can enjoy a seamless experience with your Skmei watch and address any battery-related concerns effectively. Remember, a well-maintained watch not only lasts longer but also provides accurate and reliable service. If you’re still experiencing issues after following these steps, it may be time to consult a professional technician who specializes in watch repairs. They can diagnose and resolve complex problems that may not be covered in the user manual. Additionally, some models may require specific tools or expertise for battery replacement, so don’t hesitate to seek help if needed. Your watch is a valuable timepiece, and proper care ensures it continues to serve you well. Always keep your manual handy for quick reference and guidance on routine maintenance. If you’ve misplaced your manual, download a digital copy from the official Skmei website or authorized retailers. This ensures you have access to the most accurate and up-to-date instructions for your specific model. By staying informed and proactive, you can address battery and power issues before they become major problems. Enjoy the convenience and style of your Skmei watch with peace of mind, knowing you’re equipped to handle any situation that arises. Remember, a little care goes a long way in preserving the performance and appearance of your timepiece. For any unexpected issues, don’t hesitate to reach out to Skmei’s customer support team for assistance. They are trained to provide solutions tailored to your watch model and ensure your experience with their products remains positive. In summary, addressing battery and power issues on your Skmei watch is straightforward when you follow the right steps and seek help when needed. Keep your watch in great condition and enjoy its features without interruption. Happy timekeeping!

Maintenance and Care Tips

Regularly clean your Skmei watch with a soft cloth to prevent dust buildup. Protect it from moisture and extreme temperatures to maintain accuracy and longevity. Store it in a cool, dry place when not in use.

6.1 Cleaning and Protecting the Watch

Keep your Skmei watch clean by gently wiping it with a soft, dry cloth. Avoid using harsh chemicals or abrasive materials that could damage the finish. For leather straps, use a damp cloth sparingly to prevent moisture buildup. Regular cleaning prevents dust and dirt from affecting performance. Store the watch in a cool, dry place to protect it from extreme temperatures and humidity.

6.2 Replacing the Battery Safely

To replace the battery, first ensure the watch is turned off to avoid power surges. Carefully open the back case using a specialized tool to prevent damage. Gently disconnect the old battery and insert the new one, ensuring proper alignment. Reassemble the watch and test its functionality. Always use a compatible battery and consider consulting a professional for complex models to maintain water resistance and functionality.

Skmei Watch Model-Specific Instructions

Model-specific instructions ensure optimal performance for your Skmei watch, covering unique features and setup requirements for different models to enhance functionality and user experience effectively always.

7.1 Skmei 1483 Watch Manual Highlights

The Skmei 1483 watch manual provides detailed instructions for its unique features, including time zone settings, alarm functions, and LED display. It also covers troubleshooting tips specific to this model, ensuring optimal performance and user satisfaction. The manual is available online as a downloadable PDF, making it easily accessible for users to reference anytime, enhancing their overall experience with the Skmei 1483 watch.

7.2 Unique Features of Popular Models

Popular Skmei models like the 1155 and 1483 boast unique features such as dual time zones, customizable alarms, and LED backlights. The 1155 model, for instance, offers a sleek design and water resistance, while the 1483 includes advanced time-setting options. These features enhance functionality and user experience, making each model stand out with its specific capabilities for different preferences and needs.

Frequently Asked Questions

Explore common queries about Skmei watches, such as time zone issues, battery life, and model-specific features, to resolve issues quickly and effectively.

8.1 Country Code and Time Zone Issues

Users often face challenges with country codes and time zones. Ensure your watch is set to the correct region for accurate timekeeping. If your location isn’t listed, refer to the manual or online resources for alternative codes. Adjusting the time zone may require syncing with a nearby city or updating via settings. Troubleshooting tips are available online to resolve such issues efficiently.

8.2 Common User Queries and Solutions

Users frequently inquire about setting the time, adjusting modes, and resolving battery issues. Solutions include restarting the watch, checking the manual for specific instructions, and ensuring proper battery installation. For mode adjustments, press and hold buttons as indicated. Online forums and FAQs offer additional support for troubleshooting common problems. Regular updates and maintenance can prevent many issues from arising.

Advanced Functions and Customization

Explore advanced features like customizable watch faces and special modes. Learn to tailor settings and activate functions for fitness tracking, alarms, and more.

9.1 Customizing Watch Settings

Customize your Skmei watch by adjusting settings like watch faces, time zones, and alarm tones. Use the menu to personalize features such as display brightness and language preferences. Ensure your watch is tailored to your lifestyle for optimal functionality and user experience.

9.2 Using Special Modes Effectively

Special modes on your Skmei watch, such as Stopwatch, Timer, and Alarm, enhance functionality. Access these modes by pressing the corresponding buttons or navigating through the menu. Properly using these features ensures you maximize your watch’s capabilities and enjoy a seamless user experience tailored to your needs.

10.1 Summary of Key Points

Key points include understanding watch features, proper setup, and maintenance. Refer to the manual for model-specific instructions and troubleshooting. Regular cleaning and battery care extend longevity. For issues, consult FAQs or online resources. Customization and special modes enhance functionality. Always follow guidelines for optimal performance and user satisfaction with your Skmei watch.

10.2 Final Tips for Optimal Use

Regularly update your watch software and clean the screen for clarity. Use special modes wisely to conserve battery. Store the watch in a cool, dry place when not in use. Always refer to the manual for model-specific guidance. By following these tips, you’ll ensure your Skmei watch performs optimally and lasts longer, providing reliable service for years to come.

omron bp786 manual

Welcome to the Omron BP786 Blood Pressure Monitor, a wireless, upper arm device using the oscillometric method for accurate readings․ This guide provides essential setup and usage instructions․

1․1 Overview of the Device

The Omron BP786 is a wireless, upper arm blood pressure monitor designed for accuracy and convenience․ It features advanced oscillometric technology to measure systolic, diastolic, and heart rate․ The device includes a ComFit cuff for comfort, storing up to 200 readings for two users․ It also supports data transfer to the Omron Wellness App via Bluetooth․ The monitor comes with an AC adapter, quick guide, and instruction manual, ensuring easy setup and operation for home use․

1․2 Importance of the Manual for Users

The manual is essential for understanding the Omron BP786’s features, operation, and maintenance․ It provides step-by-step guidance for setup, usage, and troubleshooting, ensuring accurate readings and proper device care․ The manual also explains how to interpret data, store readings, and transfer information to the Omron Wellness App․ By following the instructions, users can maximize the monitor’s functionality, resolve common issues, and maintain its performance over time, making it a vital resource for optimal use and health monitoring․

Key Features of the Omron BP786

The Omron BP786 features wireless connectivity, upper arm measurement, and storage for multiple users․ It uses the oscillometric method for accurate blood pressure readings and connects to the Omron Wellness App for data transfer․ Designed for convenience and precision, it offers advanced monitoring capabilities and user-friendly functionality, making it an ideal choice for home use․

2․1 Wireless Connectivity and Upper Arm Measurement

The Omron BP786 offers seamless wireless connectivity, enabling easy data transfer to the Omron Wellness App․ Designed for upper arm use, it ensures accurate blood pressure readings․ The device supports multiple users, storing their data separately․ Its advanced oscillometric technology provides reliable measurements․ The ComFit cuff enhances comfort and accuracy․ This feature-rich monitor is ideal for tracking health metrics conveniently, with results synced directly to your smartphone for ongoing monitoring and analysis․ It combines innovation with user-friendly design for optimal performance․

2․2 Storage Capacity for Multiple Users

The Omron BP786 allows storage of blood pressure readings for multiple users, with each user’s data kept separate for clarity․ It supports up to two users, storing their readings internally․ The device ensures organized tracking of health metrics, with results easily accessible for review․ This feature is ideal for shared use in households, providing personalized monitoring for each user․ The stored data can be synced with the Omron Wellness App, enabling detailed analysis and long-term health tracking․ This capability makes it a practical choice for families or shared living situations․

2․3 Oscillometric Method of Blood Pressure Measurement

The Omron BP786 employs the oscillometric method, a non-invasive technique for measuring blood pressure․ This method uses cuff inflation to detect pulse oscillations, calculating systolic and diastolic pressures․ It ensures accurate readings without the need for manual calculations․ The device automatically processes these oscillations, providing reliable results․ This technology is widely used in medical settings for its precision and ease of use, making it a trusted choice for home monitoring․ The BP786’s use of this method enhances user confidence in the accuracy of their readings․

How to Use the Omron BP786

The Omron BP786 is easy to use, with a pre-attached cuff and intuitive interface․ Simply wrap the cuff, press start, and let the device measure your blood pressure accurately․

3․1 Preparing the Device for First Use

Before first use, ensure all components are included: monitor, cuff, quick guide, and instruction manual․ Insert the batteries or connect the AC adapter․ Set the date and time as instructed in the manual․ Familiarize yourself with the device’s parts, such as the cuff, display, and buttons․ Read the manual carefully to understand proper usage and safety precautions․ This preparation ensures accurate and reliable blood pressure measurements from the start․

3․2 Taking Accurate Blood Pressure Readings

To ensure accurate readings, sit comfortably with your back straight and feet flat on the floor․ Rest your arm on a table at heart level․ Secure the cuff snugly, avoiding tight clothing interference․ Press the start button; the monitor will inflate and deflate automatically․ Remain still and silent during measurement․ The device will display systolic, diastolic, and pulse rates․ For consistency, measure at the same time daily, ideally before eating or exercising․ Record results for tracking and consultation with healthcare professionals․

Data Transfer and Connectivity

Sit comfortably with your back straight and feet flat on the floor․ Place your arm on a table at heart level, ensuring the cuff fits snugly․ Avoid tight clothing․ Press the start button; the monitor will inflate and deflate automatically․ Stay still and silent during measurement․ The device will display systolic, diastolic, and pulse rates․ For consistency, measure at the same time daily, ideally before eating or exercising․ Record results for tracking and consultation with healthcare professionals․

4․1 Transferring Data to the Omron Wellness App

To transfer data, open the Omron Wellness app and ensure your BP786 is connected via Bluetooth․ Select the “Transfer” option to sync readings․ The app stores data securely, allowing easy tracking of blood pressure trends․ Compatible with iOS and Android, it offers detailed reports and sharing options․ Enable “Share Data” in settings to link with Apple Health or other platforms․ This feature helps manage health records and share insights with healthcare providers for better monitoring and guidance․

4․2 Troubleshooting Connection Issues

If the Omron BP786 fails to connect to the app, restart both the monitor and your smartphone․ Ensure Bluetooth is enabled and the app is updated․ Check the app’s settings to confirm the device is paired correctly․ If issues persist, reset the monitor by removing the batteries and reinserting them․ Consult the manual for detailed steps or contact Omron support for further assistance․ Regularly updating the app and monitor firmware helps maintain a stable connection for seamless data transfer․

Maintenance and Storage

Regularly clean the Omron BP786 with a soft cloth and avoid harsh chemicals․ Store the device in a dry place, away from extreme temperatures, using the original storage case to protect it․

5;1 Cleaning the Device and Cuff

To maintain your Omron BP786, clean the device and cuff regularly with a soft, dry cloth․ Avoid using harsh chemicals, alcohol, or abrasive materials, as they may damage the surfaces․ For the cuff, gently wipe it with a clean, damp cloth if necessary, but ensure it is completely dry before use․ Regular cleaning prevents bacterial growth and ensures accurate measurements․ Never submerge the device or cuff in water․ Store the cuff flat to prevent creasing and check for wear periodically․ Refer to the manual for detailed cleaning instructions․

5․2 Proper Storage Conditions

Store the Omron BP786 in a cool, dry place, away from direct sunlight and extreme temperatures (between 50°F and 104°F)․ Avoid humid environments to prevent damage․ Keep the device and cuff out of reach of children․ Store the cuff flat to maintain its shape and functionality․ Use the original packaging if available for better protection․ Ensure the device is turned off before storage to conserve battery life․ For long-term storage, refer to the manual for specific guidelines to maintain optimal performance and longevity of the monitor․

Troubleshooting Common Issues

Refer to the manual for solutions to error codes, connectivity problems, or inaccurate readings․ Restart the device, check cuff placement, and ensure proper battery installation for optimal performance․

6․1 Error Messages and Their Solutions

The Omron BP786 may display error codes like E1, E2, E3, or E4, indicating issues such as improper cuff placement or low battery․ For E1, ensure the cuff is correctly wrapped․ For E2, check battery levels or connections․ E3 may signal excessive arm movement; remain still during measurement․ E4 could indicate internal device issues, requiring a restart or contacting support․ Refer to the manual for detailed solutions to resolve these errors and restore proper functionality․

6․2 Resolving Measurement Inconsistencies

If your Omron BP786 shows inconsistent readings, ensure the cuff is properly positioned and inflated․ Check for correct cuff size and placement on your upper arm․ Avoid movement during measurement, as this can cause inaccuracies․ Verify the device is at heart level and the room temperature is stable․ If issues persist, restart the monitor, ensure the cuff is snug, and take multiple measurements․ For persistent inconsistencies, refer to the manual or contact Omron support for further assistance․

Warranty and Customer Support

The Omron BP786 is backed by a limited warranty․ For inquiries or issues, contact Omron customer service via phone, email, or visit their official website․

7․1 Understanding the Warranty Terms

The Omron BP786 Blood Pressure Monitor is covered by a limited warranty that protects against manufacturing defects․ The warranty typically lasts for two years from the date of purchase and includes coverage for both parts and labor․ It is essential to review the warranty terms to understand what is included and what is excluded, such as damage caused by misuse or normal wear and tear․ For detailed warranty information, refer to the official Omron website or contact their customer support team․

7․2 Contacting Omron Customer Service

For any inquiries or issues regarding the Omron BP786, customers can contact Omron’s customer support team․ They are available to assist with product-related questions, troubleshooting, and warranty claims․ You can reach them via phone, email, or through the official Omron website․ Customer service is typically available during business hours, Monday through Friday․ Ensure to have your product serial number ready for faster assistance․ Visit the Omron website for the most up-to-date contact information and support options․

The Omron BP786 offers precise blood pressure monitoring with advanced features like wireless connectivity and storage for multiple users, ensuring accurate and convenient health tracking for optimal wellness․

8․1 Summary of Key Points

The Omron BP786 is a wireless upper arm blood pressure monitor that uses the oscillometric method for accurate readings․ It offers storage for multiple users, easy data transfer via the Omron Wellness app, and a user-friendly interface․ The device ensures precise measurements, and its connectivity features make it ideal for tracking health trends․ Regular maintenance and troubleshooting tips are provided to ensure longevity and optimal performance, making it a reliable choice for home blood pressure monitoring․

8․2 Final Tips for Optimal Use

Ensure proper cuff placement and maintain a steady arm during measurement․ Regularly update the Omron Wellness app for the latest features․ Clean the cuff and monitor as instructed to maintain accuracy․ Store the device in a dry, cool place to preserve its functionality․ Check battery levels and use the AC adapter when needed․ For best results, follow the manual’s guidelines and troubleshoot any issues promptly․ This will ensure reliable blood pressure monitoring and extend the device’s lifespan․