laboratory manual for anatomy and physiology

Welcome to the laboratory manual for anatomy and physiology‚ designed to guide students through hands-on exploration of the human body and its physiological processes. This comprehensive resource provides detailed experiments‚ practical applications‚ and essential skills for understanding complex biological systems.

1.1. Overview of the Laboratory Manual

The laboratory manual for anatomy and physiology is a structured guide offering hands-on experiments and practical exercises. It covers dissections‚ physiological experiments‚ and data analysis‚ providing a comprehensive learning experience. Each section includes step-by-step instructions‚ safety protocols‚ and visual aids to enhance understanding. This manual is designed to reinforce theoretical knowledge and develop essential laboratory skills for students in anatomy and physiology courses.

1.2. Importance of Anatomy and Physiology in Laboratory Settings

Understanding anatomy and physiology is crucial in laboratory settings as it provides foundational knowledge of human structure and function. Practical lab experiences enhance theoretical learning‚ enabling students to visualize and explore biological systems firsthand. These skills are essential for developing critical thinking‚ observation‚ and experimental techniques‚ preparing learners for careers in healthcare‚ research‚ and related fields.

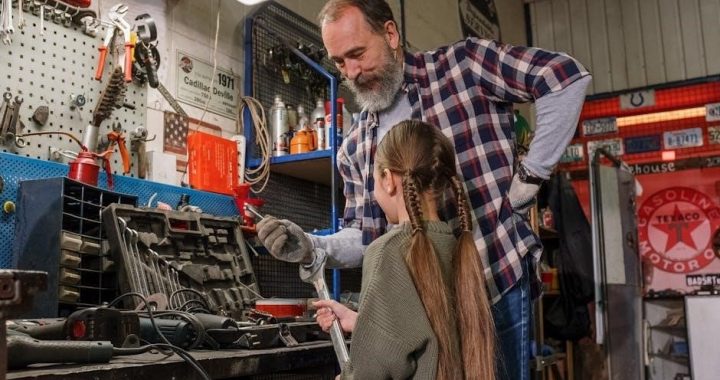
Essential Laboratory Materials and Equipment

Anatomy and physiology labs require specific materials like gloves‚ goggles‚ and lab coats for safety. Essential equipment includes microscopes‚ dissecting tools‚ and measurement devices to facilitate experiments and observations effectively.

2.1. Basic Tools and Supplies for Anatomy and Physiology Labs

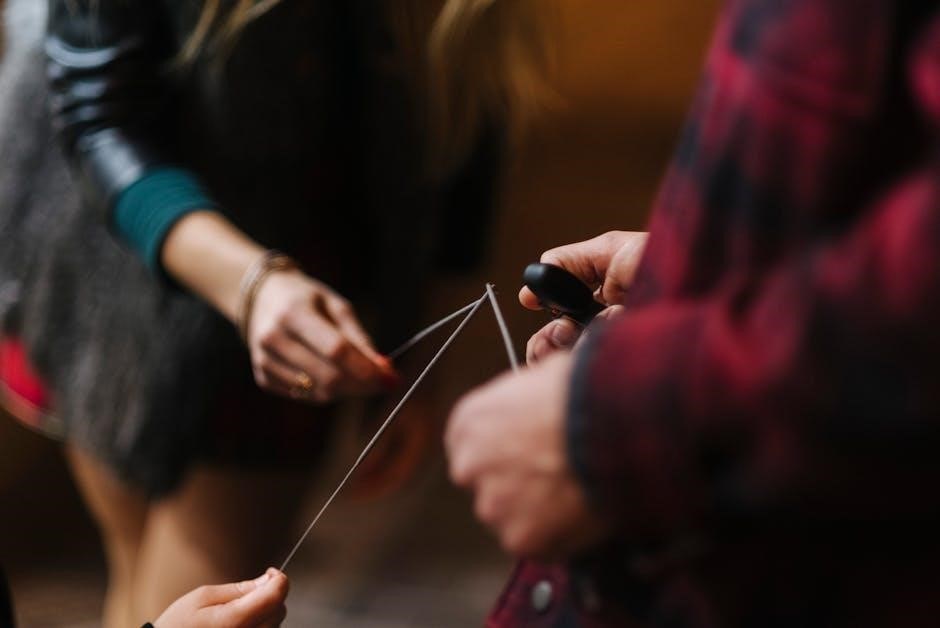
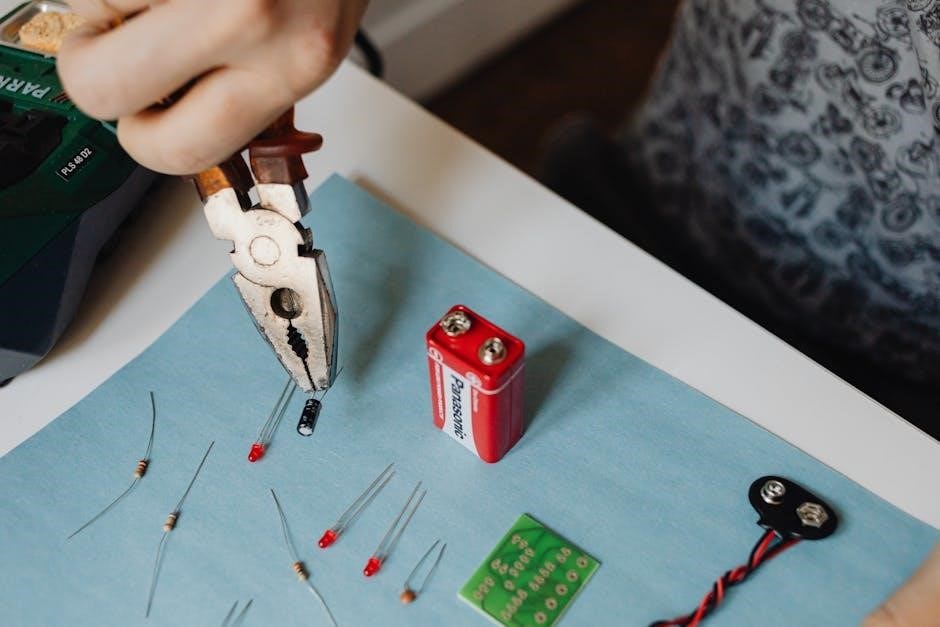
Essential tools for anatomy and physiology labs include gloves‚ goggles‚ lab coats‚ and disposable scalpels. Basic supplies like magnifying glasses‚ measuring tapes‚ and thermometers are crucial for accurate observations and data collection. These tools ensure safety and efficiency during experiments‚ allowing students to explore biological structures and functions effectively while adhering to laboratory safety protocols.

2.2; Advanced Equipment for Detailed Exploration

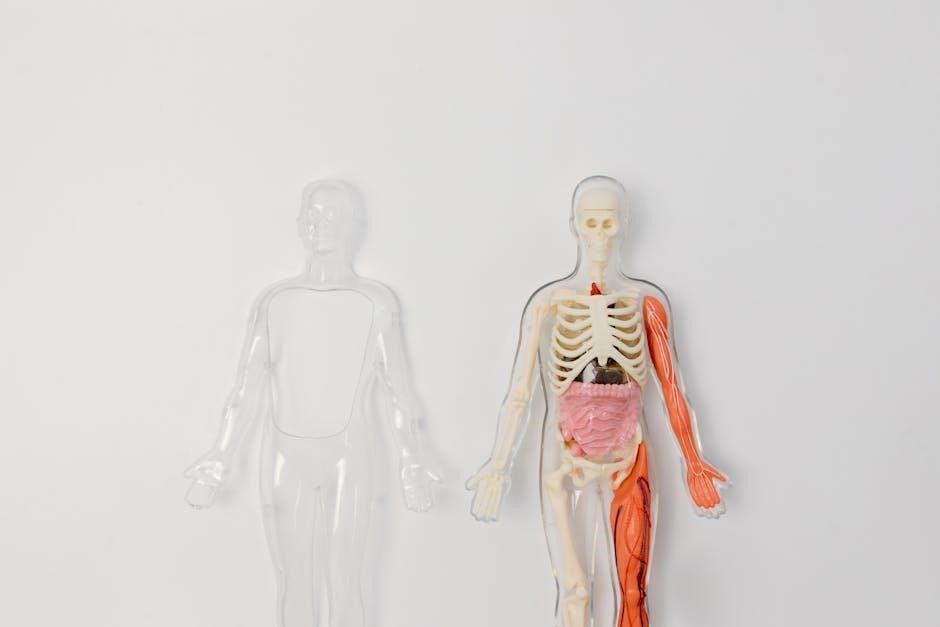
Advanced equipment such as compound microscopes‚ digital dissection tools‚ and physiological data recorders enhance detailed exploration in anatomy and physiology labs. These tools enable precise observations‚ measurements‚ and analysis of complex structures and functions. Modern software and imaging technologies further support interactive learning and experimentation‚ providing students with a deeper understanding of human systems and processes.

Safety Guidelines and Precautions

Adhering to safety protocols is crucial in anatomy and physiology labs. Use protective gear‚ handle chemicals and biological specimens with care‚ and follow emergency procedures to ensure a safe environment.

3.1. General Laboratory Safety Protocols

General laboratory safety protocols are essential to prevent accidents and ensure a secure learning environment. Students should wear protective gear such as gloves‚ goggles‚ and lab coats. Familiarize yourself with emergency exits‚ fire extinguishers‚ and first aid kits. Properly handle and dispose of biological specimens and chemicals. Follow all instructions carefully and report any unsafe conditions to the instructor immediately to maintain a safe atmosphere for everyone involved in the laboratory activities; Always stay attentive and adhere to the established guidelines to minimize risks and ensure a smooth operation of the lab sessions. Additionally‚ keep work areas clean and organized to avoid tripping hazards and other potential dangers. By following these protocols‚ students can contribute to a safe and efficient laboratory experience.

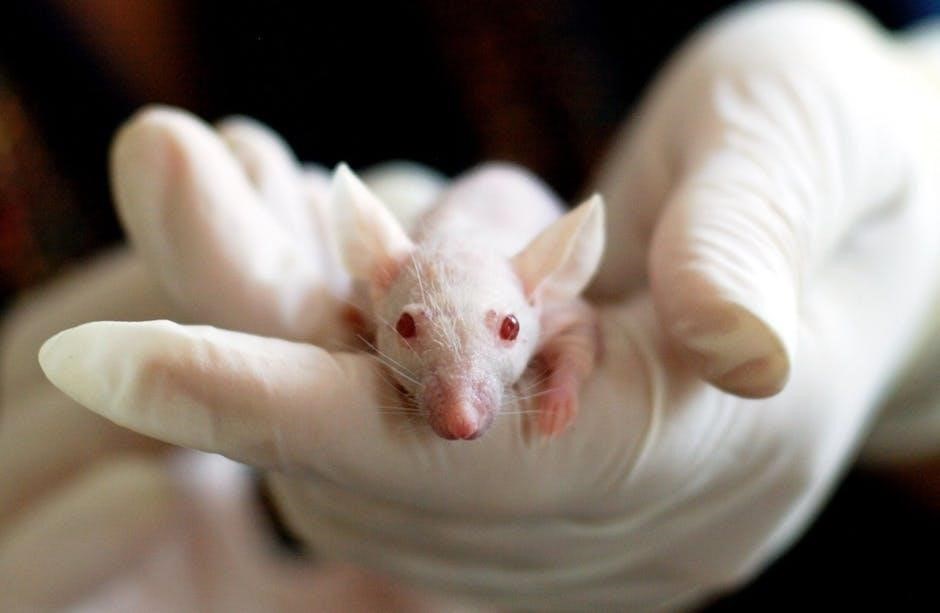
3.2. Handling Biological Specimens and Chemicals

When handling biological specimens and chemicals‚ always wear appropriate personal protective equipment (PPE)‚ including gloves and goggles. Use tongs or forceps to handle specimens to avoid direct contact. Label and store chemicals properly‚ following safety data sheets. Dispose of biological waste in designated bins and chemical waste according to laboratory guidelines. In case of spills‚ use spill kits and neutralizing agents. Keep emergency contact information accessible and know the location of first aid kits. Proper handling ensures safety and compliance with laboratory regulations.

Step-by-Step Laboratory Procedures

Follow detailed protocols for preparation‚ execution‚ and documentation. Prepare materials‚ conduct procedures systematically‚ and record observations accurately. Review data and ensure all steps are completed to maintain safety and organization.

4.1. Preparation for Laboratory Sessions

Preparation is crucial for effective lab work. Review lab manuals‚ gather materials‚ and ensure safety gear is available. Familiarize yourself with tools and equipment‚ and organize workstations. Plan experiments‚ prepare biological samples‚ and review safety protocols. Conduct pre-lab discussions to clarify objectives and procedures‚ ensuring all participants are ready to begin. This systematic approach enhances efficiency and safety during sessions.

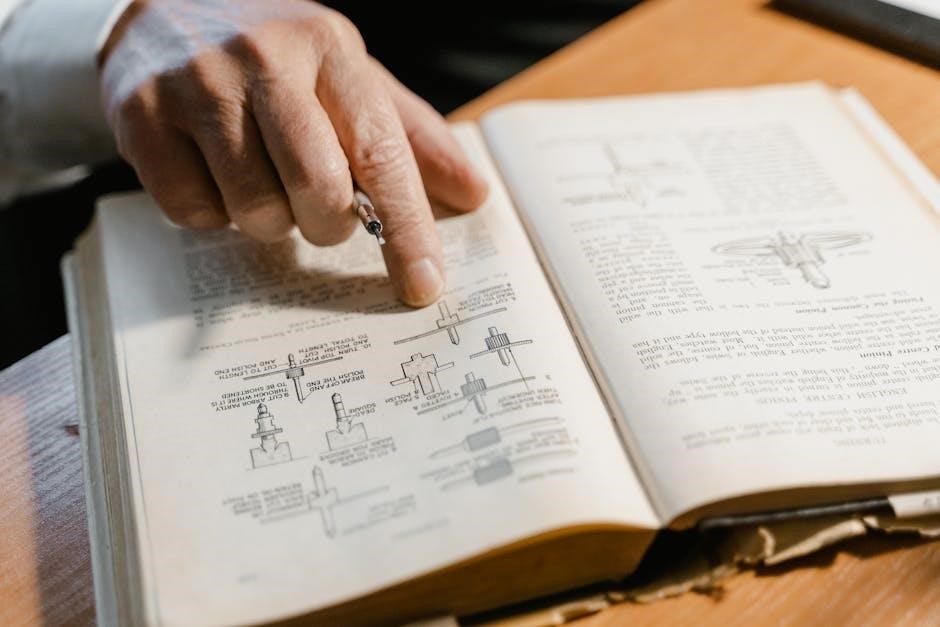
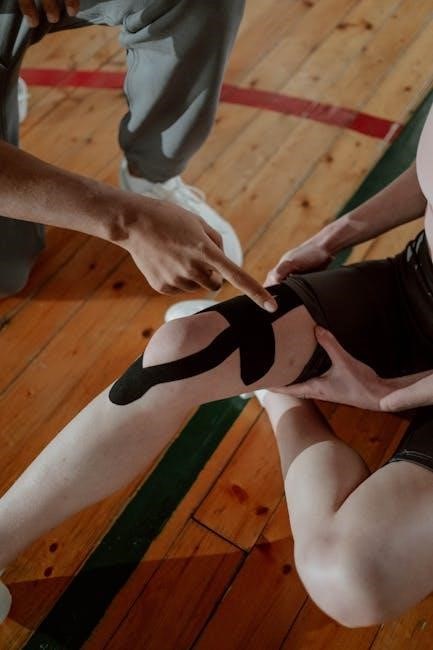
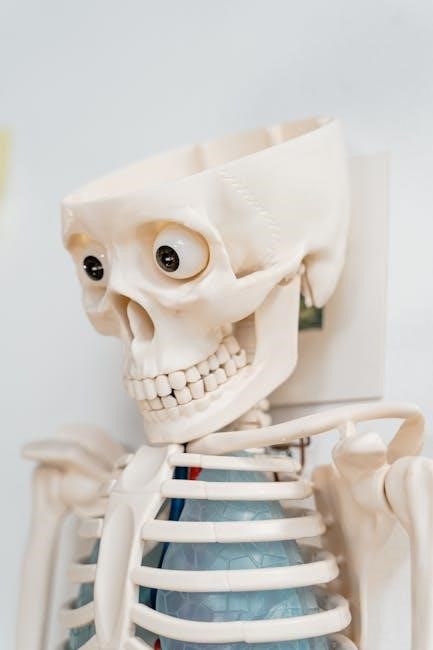
4.2. Conducting Dissections and Observations

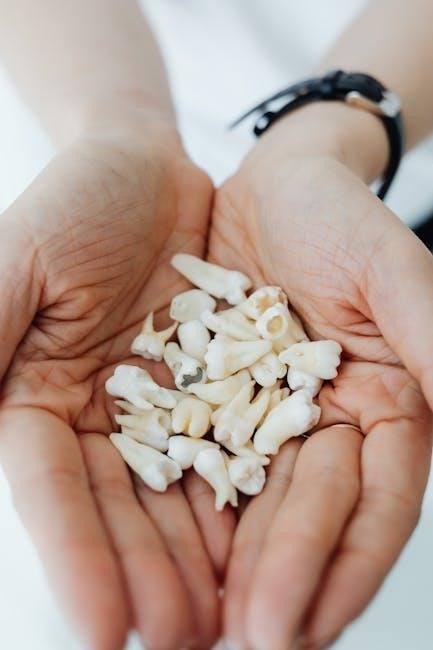
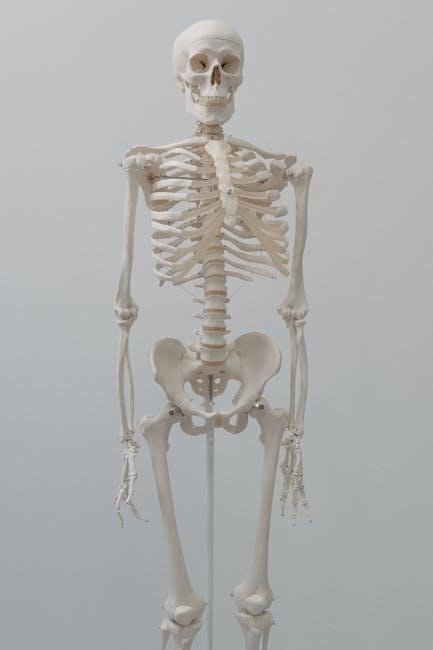
Conducting dissections and observations requires precision and care. Always handle instruments correctly and follow safety protocols. Begin by preparing specimens‚ ensuring proper fixation and storage; Use gloves and goggles to protect yourself. Observe structures carefully‚ noting colors‚ textures‚ and anatomical features. Record findings in detail‚ comparing observations with textbook diagrams. Documenting data and sketches aids in analysis and future reference‚ enhancing understanding of physiological structures.

Common Laboratory Techniques

Common laboratory techniques include microscopy‚ dissection‚ and physiological data collection. These methods enable detailed exploration of anatomical structures and functional processes‚ enhancing understanding of human anatomy and physiology.

5.1. Histological Slide Preparation

Histological slide preparation involves sectioning biological tissues‚ staining‚ and mounting for microscopic examination. This technique allows detailed visualization of cellular structures‚ aiding in understanding tissue composition and pathological conditions. Proper fixation‚ dehydration‚ and staining are critical for clear results‚ ensuring accurate anatomical and physiological observations in laboratory settings.

5.2. Physiological Measurements and Data Collection

Physiological measurements involve collecting data on bodily functions such as heart rate‚ blood pressure‚ and respiratory rate. Tools like EKG machines and spirometers are essential for accurate readings. Data collection methods include manual recording or digital software‚ ensuring precise results. These measurements are crucial for understanding physiological processes and diagnosing conditions‚ making them a cornerstone of anatomy and physiology labs.

Assessment and Evaluation Methods

Assessment and evaluation methods in anatomy and physiology labs include lab reports‚ quizzes‚ and practical exams‚ ensuring students grasp key concepts and skills effectively.

6.1. Grading Criteria for Laboratory Assignments

Grading criteria for laboratory assignments focus on accuracy‚ completeness‚ and understanding. Points are awarded for precise data collection‚ thorough completion of procedures‚ and clear explanations of results. Additionally‚ evaluations assess the ability to interpret findings and demonstrate practical skills. Professionalism and adherence to deadlines also influence final grades‚ ensuring a comprehensive assessment of student performance and comprehension.

6.2. Practical Exams and Competency Tests

Practical exams and competency tests evaluate students’ hands-on skills and knowledge application. These assessments require students to demonstrate proficiency in dissection techniques‚ physiological measurements‚ and data interpretation. Tests are timed and graded on accuracy‚ observational skills‚ and adherence to laboratory protocols. Successful completion confirms mastery of essential laboratory competencies and readiness for advanced study or professional practice in anatomy and physiology.

Troubleshooting Common Laboratory Challenges

Laboratory challenges often involve equipment malfunctions or procedural errors. Identifying issues quickly and applying solutions‚ such as checking connections or revisiting steps‚ ensures smooth operations and accurate results.

7.1. Understanding and Addressing Errors in Procedures

Identifying procedural errors is crucial for maintaining accuracy in laboratory settings. Common mistakes include incorrect dissection techniques or miscalibrations. To address these‚ review each step‚ cross-check with protocols‚ and seek guidance when needed. Documenting errors helps in refining future procedures and ensures reliable outcomes. Regular practice and attention to detail are key to minimizing such issues and improving overall efficiency in lab work.

7.2. Resolving Equipment Malfunctions

Equipment malfunctions can disrupt lab workflows‚ but prompt resolution is key. Start by identifying the issue‚ such as faulty connections or software glitches. Basic troubleshooting steps‚ like restarting devices or recalibrating instruments‚ often resolve problems. Documenting the malfunction and seeking technical support when needed ensures proper repair. Regular maintenance and training can help prevent future equipment failures and maintain laboratory efficiency.

Documentation and Reporting

Accurate documentation and reporting are crucial in anatomy and physiology labs. Clear records ensure reproducibility and accountability‚ while detailed reports communicate findings effectively‚ supporting research and learning.

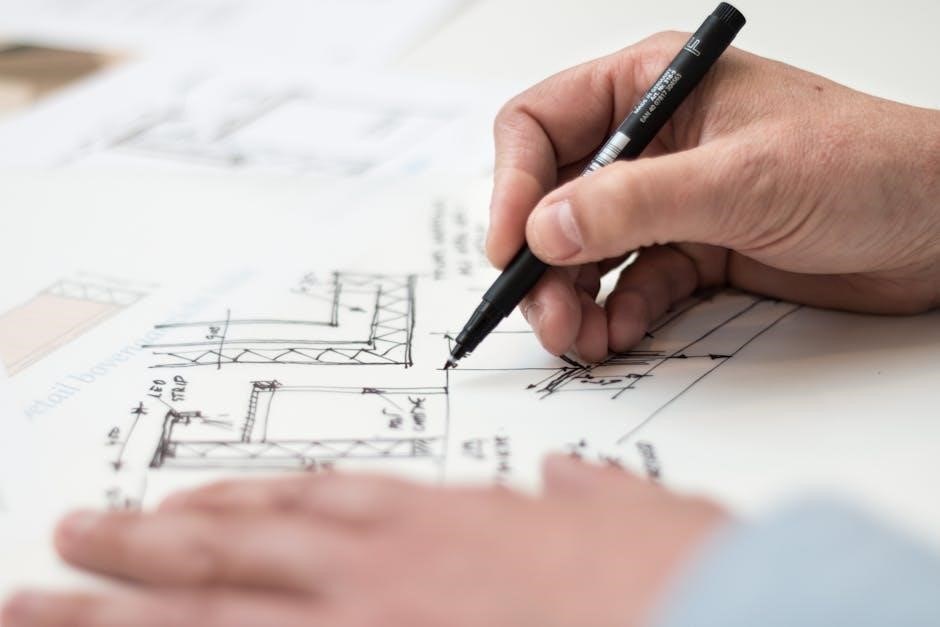
8.1. Writing Clear and Concise Laboratory Reports

Writing clear and concise laboratory reports is essential for effectively communicating findings. Ensure your report includes an introduction‚ methods‚ results‚ and discussion. Use simple language and proper terminology. Avoid unnecessary details and maintain objectivity. Include accurate data and visual aids to support conclusions. Proofread for clarity and grammar to ensure professional quality and reproducibility of your work. This ensures your report is both informative and accessible to readers.

8.2. Presenting Findings and Data Analysis

Presenting findings and data analysis requires clarity and organization. Use visual aids like graphs and tables to illustrate key results. Summarize data without unnecessary details‚ ensuring logical flow. Highlight trends and correlations‚ and discuss their significance. Avoid clutter and ensure visuals are labeled clearly. Practice your presentation to deliver concise explanations‚ fostering understanding and engagement with your audience.

Ethical Considerations in Anatomy and Physiology Labs

Ethical practices ensure responsible use of biological samples‚ proper waste disposal‚ and compliance with laws. Respect for specimens and adherence to guidelines are crucial for maintaining integrity in lab work.

9.1. Ethical Use of Biological Samples

The ethical use of biological samples involves obtaining informed consent‚ ensuring anonymity‚ and adhering to legal standards. Proper handling and respectful treatment of specimens are essential to maintain trust and integrity in scientific research and education. Compliance with institutional guidelines ensures that biological materials are used responsibly and ethically in anatomy and physiology labs.

9.2. Responsible Disposal of Laboratory Waste

Proper disposal of laboratory waste is crucial to prevent environmental contamination and ensure safety. Biological and chemical waste must be separated and disposed of in designated containers. Adhering to institutional and regulatory guidelines ensures compliance with safety standards. Proper labeling and documentation of waste materials are essential for responsible management in anatomy and physiology labs.

Advanced Topics in Anatomy and Physiology Labs

Explore complex physiological systems and cutting-edge techniques‚ integrating technology to enhance learning and research in anatomy and physiology laboratories.

10.1. Exploring Complex Physiological Systems

This section delves into advanced topics‚ examining intricate physiological systems such as the nervous‚ cardiovascular‚ and respiratory systems. Students will utilize imaging technologies and data analysis tools to study system interactions and regulatory mechanisms. Practical exercises include simulations and case studies‚ providing deeper insights into human physiology and preparing learners for real-world applications in healthcare and research.

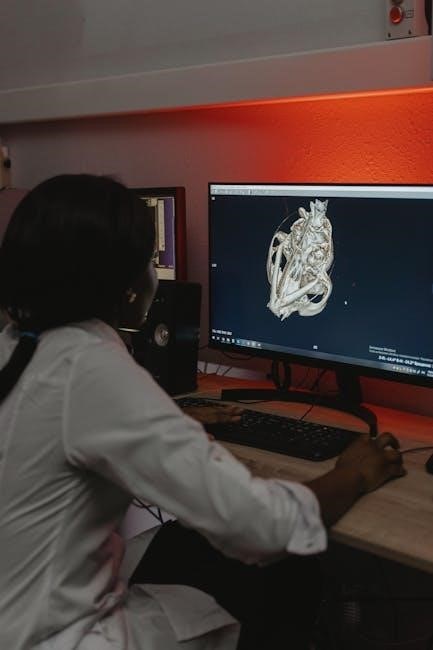
10.2. Integrating Technology in Modern Labs

Modern anatomy and physiology labs increasingly incorporate advanced technologies such as digital microscopy‚ 3D modeling‚ and virtual dissection tools. These innovations enhance learning by providing immersive experiences and precise data collection; Students can explore complex structures and physiological processes in detail‚ fostering deeper understanding and practical skills. Technology integration also supports real-time data analysis and simulation-based experiments‚ preparing learners for cutting-edge advancements in healthcare and research environments.

Frequently Asked Questions and Solutions

This section addresses common student queries about laboratory procedures‚ offering practical solutions and clarifications on anatomy and physiology lab techniques‚ ensuring a smooth learning experience.

11.1. Common Student Queries About Laboratory Procedures

Students often ask about proper specimen handling‚ safety protocols‚ and equipment usage. Queries include how to prepare for dissections‚ interpret physiological data‚ and maintain a clean workspace. Common concerns also involve understanding lab report formats and troubleshooting experimental errors. These questions highlight the need for clear guidance to ensure successful lab experiences and accurate results in anatomy and physiology studies.

11.2. Solutions to Frequently Encountered Problems

For common issues like blurry microscope images‚ adjust the focus and ensure the slide is properly prepared. If dissection tools are dull‚ request sharpening or replacement. For inaccurate measurements‚ calibrate equipment and double-check techniques. Organize tasks to avoid time management challenges‚ and review lab manuals for clarity. Addressing these problems enhances efficiency and accuracy in anatomy and physiology lab sessions.

The laboratory manual for anatomy and physiology equips students with essential skills and knowledge‚ fostering deeper understanding of human structure and function. Future advancements promise enhanced learning tools and technologies‚ further enriching educational experiences in this vital field of study.

12.1. Summary of Key Concepts and Skills

This manual emphasizes mastering dissection techniques‚ microscopic observations‚ and physiological data collection. Key skills include identifying anatomical structures‚ understanding cellular functions‚ and applying safety protocols. Students gain proficiency in laboratory tools‚ biological specimen handling‚ and accurate data interpretation. These skills are essential for comprehending human physiology and preparing for advanced studies in healthcare and biomedical sciences.

12.2. Evolving Trends in Anatomy and Physiology Labs

The integration of advanced technologies‚ such as virtual dissection tools and real-time data analysis‚ is revolutionizing anatomy and physiology labs. These innovations enhance hands-on learning and accessibility. Additionally‚ there is a growing emphasis on sustainability‚ with labs adopting eco-friendly practices to minimize environmental impact.

vrc over under game manual

The VRC Over Under Game is an engaging team-based challenge in the VEX Robotics Competition. The game manual outlines rules, field setup, and scoring systems for participants.

1.1 Overview and Importance of the Game

The VRC Over Under Game is a dynamic and competitive challenge within VEX Robotics, emphasizing teamwork, strategy, and innovative robot design. It requires teams to navigate obstacles and score points efficiently, fostering problem-solving and quick thinking. The game’s importance lies in its ability to develop critical thinking and collaboration skills among participants. By focusing on real-world engineering challenges, it prepares students for future STEM careers. The game’s popularity stems from its balanced mix of strategy and mechanical precision, making it a cornerstone of robotics competitions worldwide.

Rules and Gameplay

The VRC Over Under Game involves teams working collaboratively to move objects across the field while adhering to specific rules and time constraints. Alliances score points by efficiently navigating obstacles and completing tasks within the match duration, with penalties impacting overall results.

2.1 Game Objectives and Winning Conditions

The primary objective of the VRC Over Under Game is for alliances to score points by efficiently navigating obstacles and collecting match loads. Robots must work collaboratively to move balls and cubes into scoring zones. Points are awarded based on the number and type of objects successfully placed in goal zones. The alliance with the higher score at the end of the match is declared the winner. Penalties for violations can reduce a team’s score, emphasizing the importance of adherence to game rules.

2.2 Field Layout and Key Components

The VRC Over Under Game field features a rectangular layout with specific zones and obstacles. Central to the field is the Over Under obstacle, a raised platform with openings for robots to pass through. The field is divided into scoring zones where teams earn points by placing match loads. Additional components include starting positions, goal zones, and barriers that challenge robot navigation. The design promotes strategic movement and teamwork, ensuring dynamic and competitive gameplay. Each element is carefully designed to test robot agility, accuracy, and alliance coordination.

2.3 Match Types and Formats

The VRC Over Under Game features multiple match types, including Qualification Matches, Elimination Matches, and Skills Challenges. Qualification matches determine team rankings, while Elimination matches pit alliances against each other in head-to-head battles. Skills Challenges allow teams to showcase individual robot performance. Each match type emphasizes teamwork, strategy, and robot capabilities. The format ensures a balanced competition, with alliances forming in higher-level matches. Autonomous modes and driver-operated phases add complexity, requiring precise planning and execution to achieve victory.

2.4 Robot Interactions and Restrictions

Robots must adhere to specific interaction rules to ensure fair play. Prohibited actions include intentional damage to opponents or field components. Robots are restricted from blocking or trapping opponents excessively. Penalties are imposed for violations, such as illegal contact or obstructing the field. Teams must ensure their robots operate within designated zones and avoid unsafe interactions. These restrictions promote sportsmanship and maintain the integrity of the competition. Adhering to these guidelines ensures a balanced and fair environment for all participants.

Field Setup and Configuration

The field setup involves assembling obstacles and the Over Under structure according to VEX specifications. Proper configuration ensures fair gameplay and safety for all participants.

3.1 Assembling the Field and Obstacles

Assembling the VRC Over Under field requires precise construction of obstacles and goals according to VEX specifications. The field includes the Over Under obstacle, field perimeters, and goal zones. Teams must ensure all components are securely fastened using tools like Allen wrenches and screwdrivers. The Over Under structure, in particular, must be level and stable to allow robots to navigate effectively. Proper assembly ensures safe and fair gameplay, adhering to the game manual’s guidelines. Teams should test the structure’s stability before matches to avoid any issues during competition.

3.2 Configuring the Over Under Obstacle

Configuring the Over Under obstacle involves adjusting its height and alignment to meet VEX specifications. Teams must ensure the structure is level and secure, with proper clearance for robot navigation. The obstacle’s bars should be evenly spaced and firmly attached to avoid movement during matches. Adjustments should be made using tools like wrenches and hex keys. Testing the obstacle’s stability is crucial before competition to ensure fair gameplay. Always refer to the VRC Over Under Game Manual for precise measurements and assembly guidelines. Proper configuration ensures optimal performance and safety.

Gameplay Mechanics

The VRC Over Under Game involves dynamic robot interactions, strategic scoring, and efficient teamwork. Robots navigate obstacles, collect, and score objects within timed matches.

4.1 Pre-Match Preparation and Procedures

Pre-match preparation involves ensuring robots are inspected, alliances are formed, and strategies are aligned. Teams must verify robot functionality, load match objects, and review rules. Drivers practice controls, while coaches finalize tactics. Field setup is confirmed, and officials conduct safety checks. The pre-match timer begins, signaling teams to finalize preparations. Proper organization ensures smooth gameplay and adherence to the VRC Over Under Game manual guidelines.

4.2 During the Match: Strategies and Tactics

During the match, teams execute strategies to maximize scoring while minimizing penalties. Key tactics include efficient ball intake, precise shooting, and effective use of the over/under obstacle. Alliance partners coordinate to block opponents and protect high-value targets. Drivers must communicate clearly, balancing offense and defense. Timing and positioning are critical to capitalize on scoring opportunities. Teams adapt strategies based on the match flow, ensuring optimal performance within the VRC Over Under Game rules and guidelines.

4.3 Post-Match Procedures and Results

After the match concludes, teams power down their robots and exit the field. Scores are calculated and reviewed by referees, ensuring accuracy. Penalties are applied if any rule violations occurred during gameplay. Results are recorded and displayed, determining rankings and advancements. Teams may review match footage to analyze performance and improve strategies. Post-match procedures ensure fairness and transparency, preparing teams for future competitions in the VRC Over Under Game.

Scoring System

The scoring system awards points for scoring balls, obstructing opponents, and achieving specific game objectives. Penalties reduce scores for rule violations, ensuring fair competition.

5.1 How Points Are Awarded

Points in the VRC Over Under Game are awarded based on specific actions and achievements during the match. Teams earn points by scoring balls into designated zones, with higher-value zones rewarding more points. Obstructing opponents or completing specific game objectives also contributes to the score. Penalties for rule violations or illegal moves deduct points, ensuring fair play. Bonus points may be awarded for exceptional performance or strategic plays, such as achieving a high number of scored balls or successful defenses. The scoring system is designed to reward skill, strategy, and teamwork.

5.2 Tracking and Calculating Scores

Scores in the VRC Over Under Game are tracked throughout the match using designated tools and referees. Points are tallied based on balls scored in zones, with higher-value zones contributing more to the total. The match load bar and field sensors help monitor progress in real-time. Penalties for violations or illegal actions are deducted from the team’s score. At the end of the match, scores are calculated by summing all earned points and subtracting penalties. The team with the highest total score wins the match.

Robot Design and Requirements

Robots in the VRC Over Under Game must adhere to specific design and build requirements, ensuring functionality, durability, and compliance with VEX standards for optimal performance and effective teamwork.

6.1 Technical Specifications and Limitations

Robots must adhere to strict size and weight limits, typically not exceeding 36 inches in height and 30 pounds in weight, ensuring they can navigate the Over Under obstacle effectively. Constructed from approved materials like aluminum and polycarbonate, they must withstand game dynamics without compromising safety. Compliance with VEX safety standards is mandatory, and designs must avoid prohibited components such as sharp edges or excessive protrusions. These specifications ensure fair competition and optimal performance during matches, promoting innovative designs while maintaining a level playing field.

6.2 Design Tips for Optimal Performance

Designing a competitive robot for the VRC Over Under Game requires balancing speed, agility, and strength. A robust drivetrain with high maneuverability is essential for navigating the field quickly. Lightweight materials and efficient mechanisms maximize performance. Ensure the robot’s intake system is reliable for collecting and scoring triballs effectively. Incorporating sensors for autonomous functions can enhance accuracy and strategy during matches. Prioritize durability to withstand collisions and maintain functionality throughout the game. A well-rounded design ensures adaptability to various in-game scenarios, optimizing scoring potential and teamwork integration.

Penalties and Violations

Penalties and violations in the VRC Over Under Game are enforced to ensure fair play. Minor infractions may result in warnings, while major violations can lead to point deductions or disqualification.

7.1 Common Violations and Their Consequences

Common violations in the VRC Over Under Game include illegal field interactions, unsportsmanlike conduct, and interference with match dynamics. Minor penalties, such as point deductions, may apply for accidental violations. Repeated or intentional offenses can escalate to major penalties, including disqualification. Teams must adhere to rules to avoid jeopardizing their match outcomes and overall standings in the competition.

7.2 Resolving Disputes and Penalties

Disputes in the VRC Over Under Game are resolved through a structured process outlined in the manual. Referees and judges review incidents, and penalties are applied based on severity. Minor violations may result in warnings or point deductions, while major offenses, such as intentional interference, can lead to disqualification. Teams can request clarification or appeal decisions within specified timelines. Understanding these procedures ensures fair competition and maintains the integrity of the game.

Strategy and Team Coordination

Effective strategy and teamwork are crucial for success in the VRC Over Under Game. Teams must communicate clearly, plan moves, and execute actions seamlessly to maximize points and efficiency.

8.1 Effective Team Strategies

Effective team strategies in the VRC Over Under Game involve clear communication, role assignment, and coordinated movements. Teams should plan ahead, focusing on high-value actions like scoring in goals or traversing obstacles. Balancing offense and defense is key, ensuring robots work together seamlessly. Proper timing and positioning maximize efficiency, while adaptability allows teams to respond to dynamic match conditions. Strong teamwork enhances scoring potential and overall performance, making it essential for achieving victory in competitive matches.

8.2 Tips for Beginners

New teams should start by thoroughly understanding the game manual and field layout. Practice robot controls and focus on mastering basic skills like obstacle traversal and scoring. Simplify robot designs initially, prioritizing functionality over complexity. Collaborate with experienced teams for guidance and strategies. Emphasize teamwork, communication, and adaptability during matches. Regularly test and refine designs based on performance feedback. Stay organized, follow safety protocols, and enjoy the learning process to build a strong foundation for future competitions.

The VRC Over Under Game offers an exciting and challenging experience for teams worldwide. By combining strategic gameplay, innovative robot designs, and collaborative teamwork, participants gain valuable skills in engineering, problem-solving, and sportsmanship. This manual provides a comprehensive guide to ensure a smooth and enjoyable competition. Remember to stay updated with the latest rules and embrace the spirit of competition. Best of luck to all teams as they innovate, compete, and make unforgettable memories in the VRC Over Under Game!

dyson dc39 animal manual

Overview of the Dyson DC39 Animal Vacuum Cleaner

The Dyson DC39 Animal is a cylinder vacuum featuring Dyson’s Ball technology for smooth steering. Designed for pet owners, it captures pet hair and allergens effectively with Radial Root Cyclone technology, ensuring efficient cleaning across various floor types.

1.1 Key Features and Benefits

The Dyson DC39 Animal Vacuum Cleaner boasts several standout features tailored for efficient cleaning. Its lightweight design and Ball technology enable smooth maneuverability, reducing wrist and arm fatigue. The Radial Root Cyclone technology captures microscopic dust and allergens, ensuring a deeper clean. Specifically designed for pet owners, it excels at picking up pet hair with ease. The vacuum also includes a washable filter, reducing maintenance costs, and comes with a range of attachments for versatile cleaning. These features make it an ideal choice for households with pets, offering powerful suction and reliability across various floor types.

1.2 Design and Technology Overview

The Dyson DC39 Animal features Dyson’s innovative Ball technology, designed for effortless maneuverability and stability. Its compact, lightweight design reduces wrist and arm fatigue during extended use. The vacuum incorporates Radial Root Cyclone technology, which captures microscopic dust particles and allergens without losing suction power. Engineered with pet owners in mind, it includes specialized tools for efficient pet hair removal. The design emphasizes durability and ease of use, making it suitable for various floor types while maintaining powerful performance. This combination of advanced technology and ergonomic design sets it apart as a versatile cleaning solution.

Dyson DC39 Animal Manual: Key Sections

The manual covers essential sections like safety precautions, assembly, operation, and maintenance. It guides users through troubleshooting and optimal usage, ensuring efficient cleaning and longevity.

2.1 Table of Contents

The Dyson DC39 Animal manual includes a detailed table of contents, helping users navigate through safety instructions, assembly steps, operational guidelines, maintenance tips, and troubleshooting. Sections are organized logically, ensuring quick access to specific information. The table of contents also highlights key features like the Radial Root Cyclone technology and the Ball technology, making it easier for users to understand and utilize the vacuum’s advanced capabilities. This structure enhances the overall user experience, providing a clear and concise guide to maximize the product’s performance and longevity.

2.2 Important Safety Precautions

The Dyson DC39 Animal manual emphasizes critical safety measures to ensure safe operation. Users are advised to avoid using the vacuum near water or with damaged cords, and to keep it out of children’s reach. Proper assembly and usage as per instructions are stressed to prevent accidents. Additionally, the manual highlights the importance of regular maintenance, such as cleaning filters and checking for blockages, to maintain performance and safety. Adhering to these precautions is essential for optimal functionality and user protection.

2.3 Assembly and Initial Setup Instructions

Assembly of the Dyson DC39 Animal is straightforward, with step-by-step guidance provided in the manual. Attach the wand and floor tool securely, ensuring all connections are tight. Before first use, check for blockages and ensure the filter is clean. Washable components should be rinsed and left to dry. Familiarize yourself with the controls and test the vacuum on a small area to ensure proper function. Registering your Dyson product is also recommended for warranty activation. Proper assembly ensures optimal performance and longevity of the machine.

Operating the Dyson DC39 Animal

Operating the Dyson DC39 Animal involves using its intuitive controls to adjust suction power and switch between cleaning modes for different surfaces, ensuring efficient pet hair removal.

3.1 Basic Controls and Functions

The Dyson DC39 Animal features straightforward controls, including a power button and variable suction control. The ergonomic handle allows easy maneuverability, while the ball technology enables smooth movement. The vacuum includes a wand with a detachable handle for above-floor cleaning and a turbo tool for pet hair. The clear bin is easy to empty, and the washable pre-filter helps maintain performance. These features make it intuitive to use, catering to various cleaning needs efficiently.

3.2 Using the Radial Root Cyclone Technology

The Dyson DC39 Animal’s Radial Root Cyclone technology captures microscopic dust and allergens without loss of suction. This advanced design maximizes airflow, ensuring efficient separation of dirt from air. The cyclonic action spins debris into the bin, leaving the air cleaner. Ideal for pet owners, it excels at trapping pet hair and dander. Regular emptying of the bin maintains optimal performance. This feature enhances overall cleaning effectiveness and contributes to a healthier home environment, making it a standout for allergy sufferers and pet owners alike.

3.4 Best Practices for Pet Hair Removal

For effective pet hair removal, use the Dyson DC39 Animal’s motorized tool attachment, which agitates and captures embedded hair. Regularly empty the bin to maintain suction power. Clean the pre-filter monthly to ensure optimal airflow. Adjust the suction control for different surfaces, such as carpets or upholstery, to trap more pet hair. Use slow, overlapping passes to thoroughly clean high-traffic areas. After each use, check for blockages in the hose or wand, as pet hair can accumulate. By following these practices, you can maximize the vacuum’s performance and keep your home hair-free.

Maintenance and Troubleshooting

Regular maintenance ensures optimal performance. Clean the filter monthly and check for blockages. Empty the bin after each use and wash components as needed. For troubleshooting, reset the machine if issues arise. Refer to the manual for detailed solutions. Regular checks help maintain efficiency and extend the vacuum’s lifespan.

4.1 Cleaning the Filter and Washable Components

Regular maintenance is essential for optimal performance. The Dyson DC39 Animal’s filter should be cleaned monthly. Remove the filter and rinse it under cold water until clean. Allow it to air dry completely before reattaching. Washable components, such as the bin and pre-filter, can be cleaned with warm water and mild detergent. Ensure all parts are dry before reassembling to prevent damage. Cleaning these components regularly helps maintain suction power and prevents dust buildup. Refer to the manual for specific instructions and guidelines.

4.2 Common Issues and Solutions

Common issues with the Dyson DC39 Animal include reduced suction, blockages, or unusual noises. If suction is lost, check for blockages in the hose, wand, or cleaner head. Ensure the dustbin is empty and the filter is clean. For noises, inspect the components for obstructions or damage. If the machine overheats, turn it off and allow it to cool. Regularly cleaning the filter and checking for blockages can prevent these issues. Refer to the manual for detailed troubleshooting steps to restore optimal performance and extend the lifespan of your vacuum.

4.3 Resetting the Machine

To reset the Dyson DC39 Animal, turn it off and unplug it from the power source. Allow the machine to cool down for a few minutes before restarting. Ensure the filter is clean and dry, as a dirty filter can trigger the overheat protection. Check for any blockages in the hose or wand, as these can also cause the machine to stop working. Once all components are clear and the filter is in good condition, plug in and turn on the machine. This simple reset process often resolves common issues and ensures optimal performance;

Accessories and Attachments

The Dyson DC39 Animal comes with a motorized floor tool, crevice tool, and upholstery brush for versatile cleaning. Optional attachments like a carpet cleaning kit enhance its functionality, ensuring a deeper clean for various surfaces and pet hair removal needs.

5.1 Included Tools and Accessories

The Dyson DC39 Animal comes with a range of tools designed for comprehensive cleaning. The motorized floor tool is ideal for carpets and hard floors, while the crevice tool targets tight spaces. An upholstery brush gently cleans furniture, and a stair tool is perfect for stairs. These attachments, along with the vacuum’s Ball technology, ensure versatility and ease of use; Additional tools like a carpet cleaning kit may be available as optional accessories, enhancing the vacuum’s ability to tackle pet hair and deep-seated dirt effectively.

5.2 Optional Accessories for Enhanced Cleaning

Enhance your cleaning experience with optional accessories designed for the Dyson DC39 Animal. A carpet cleaning kit is available for deep stains, while a mattress tool tackles allergens and dust mites. An extension hose provides extra reach for high surfaces or tight spaces. Additionally, a specialized pet grooming tool can be purchased to remove loose hair directly from pets. These accessories are available on Dyson’s official website or authorized retailers, allowing you to customize your vacuum for specific cleaning tasks and improve efficiency. They are designed to integrate seamlessly with the DC39 Animal’s Ball technology.

Warranty and Support

The Dyson DC39 Animal comes with a 2-year warranty covering parts and labor. Register your product online to activate the guarantee. For support, contact Dyson’s customer service or refer to the troubleshooting section in the manual for common issues.

6.1 Dyson Warranty Terms and Conditions

The Dyson DC39 Animal is covered by a 2-year warranty for parts and labor. This warranty applies to defects in materials and workmanship under normal use. To activate, register your product on Dyson’s official website. The warranty does not cover damage caused by misuse, neglect, or unauthorized repairs. For full details, refer to the warranty section in the manual. Keep your proof of purchase for warranty claims. This warranty is part of Dyson’s commitment to quality and customer satisfaction.

6.2 Contacting Dyson Customer Support

For assistance with your Dyson DC39 Animal, contact Dyson’s customer support team via phone, email, or live chat on their official website. Support is available to address questions, troubleshooting, and warranty inquiries. Visit the Dyson website for regional contact details and operating hours. Ensure you have your product’s serial number ready for efficient service. Dyson’s support team is dedicated to resolving issues promptly, providing repair options, and offering helpful tips for optimal product performance.

Additional Resources

Visit Dyson’s official website or authorized retailers for comprehensive guides, troubleshooting tips, and maintenance advice tailored to the Dyson DC39 Animal vacuum cleaner.

7.1 Downloading the Full User Manual

The full user manual for the Dyson DC39 Animal can be easily downloaded from Dyson’s official website or authorized retailer sites. Simply visit the support section, enter your product model, and select the manual. It is available in PDF format, ensuring compatibility with most devices. Additionally, platforms like ManualsLib and ManualsOnline host the manual for free. The document provides detailed instructions for assembly, operation, and maintenance, ensuring you get the most out of your Dyson DC39 Animal vacuum cleaner.

7.2 Online Tutorials and Guides

Online tutorials and guides for the Dyson DC39 Animal are available on Dyson’s official website and YouTube channel. These resources provide step-by-step instructions for assembly, maintenance, and troubleshooting. Videos demonstrate how to use specific features like the Radial Root Cyclone technology and pet hair removal tools. Additionally, third-party websites offer detailed guides and tips for optimizing performance. These resources help users troubleshoot common issues and maximize the efficiency of their Dyson DC39 Animal, ensuring a seamless cleaning experience.

see operator’s manual mercedes battery

This manual provides essential information on battery operation‚ safety‚ and maintenance for Mercedes-Benz vehicles‚ ensuring optimal performance and longevity of the battery system.

1.1 Importance of Understanding the Battery System

Understanding the battery system is crucial for ensuring optimal vehicle performance‚ safety‚ and longevity. Proper knowledge helps prevent damage‚ improves charging efficiency‚ and enhances overall reliability. It also enables owners to identify and address potential issues early‚ ensuring uninterrupted operation and adherence to safety guidelines. Regular maintenance and care are vital for sustaining battery health.

1.2 Overview of the Manual’s Structure and Content

The manual is organized into sections covering battery basics‚ safety precautions‚ charging instructions‚ maintenance tips‚ and troubleshooting. It includes detailed guides for accessing digital versions via the Mercedes-Benz website or app. Each chapter is designed to provide clear‚ concise information‚ ensuring users can efficiently navigate and understand essential procedures for optimal battery care and vehicle performance.

How to Access the Mercedes-Benz Battery Operator’s Manual

The manual can be downloaded from the official Mercedes-Benz website or accessed via the free Mercedes-Benz Guides app‚ available in popular app stores worldwide.

2.1 Downloading the Manual from the Official Mercedes-Benz Website

Visit the Mercedes-Benz official website and navigate to the support section. Select your vehicle model and year to access the battery operator’s manual. Download the PDF version for free‚ ensuring you have the latest updates and guidelines for proper battery maintenance and operation. This resource is available 24/7 for convenient access.

2.2 Using the Mercedes-Benz Guides App for Easy Access

The Mercedes-Benz Guides app offers a convenient way to access the battery operator’s manual. Download the app for free from your device’s app store. It provides full-text search‚ customizable viewing‚ and offline access to the manual‚ ensuring you can retrieve battery-related information anytime‚ anywhere‚ with enhanced convenience and efficiency.

Key Sections of the Mercedes-Benz Battery Operator’s Manual

The manual includes sections on general battery information‚ safety precautions‚ charging instructions‚ maintenance tips‚ and troubleshooting guides‚ ensuring comprehensive understanding and proper handling of the vehicle’s battery system.

3.1 General Information About the Vehicle’s Battery

This section provides an overview of the vehicle’s battery‚ including its type‚ capacity‚ and compatibility. It explains the battery’s role in powering essential systems and offers insights into its design and technology‚ ensuring owners understand their battery’s specifications and requirements for optimal performance and longevity.

3.2 Safety Precautions When Handling the Battery

This section outlines critical safety measures for handling the battery‚ including wearing protective gear‚ avoiding short circuits‚ and ensuring proper ventilation. It emphasizes disconnecting the negative terminal first and provides guidelines for emergency situations‚ such as spills or overheating‚ to prevent accidents and ensure safe operation. Always refer to the manual for specific safety protocols.

3.3 Charging and Maintenance Instructions

This section provides detailed guidelines for charging the battery safely and effectively‚ including recommended charge levels and methods. It also covers maintenance tips‚ such as cleaning terminals‚ checking electrolyte levels‚ and storing the battery properly when not in use. Regular inspections and proper charging practices ensure the battery’s longevity and optimal performance. Follow these steps to maintain your vehicle’s battery health.

Battery Maintenance and Care Tips

Proper maintenance ensures your Mercedes-Benz battery’s longevity. Regularly inspect terminals‚ keep them clean‚ and monitor charge levels. Store batteries correctly when not in use to prevent degradation.

4.1 Checking Battery Health and Charge Levels

Regularly checking your Mercedes-Benz battery’s health and charge levels is crucial; Use a multimeter to measure voltage and ensure it’s within the recommended range. Look for signs of wear‚ such as swelling or corrosion‚ and check the charging system’s functionality. Proper monitoring helps prevent unexpected failures and extends battery life significantly. Always follow the manual’s guidelines for accurate assessments.

4.2 Cleaning and Inspecting the Battery Terminals

To ensure optimal battery performance‚ regularly clean and inspect the terminals. Disconnect the battery and use a wire brush to remove corrosion. Apply petroleum jelly to prevent future buildup. Check for loose connections and tighten them if necessary. Clean terminals help maintain proper electrical flow and prevent potential issues with your Mercedes-Benz vehicle’s battery system. Always follow safety guidelines.

4.3 Storing the Vehicle’s Battery Properly

When storing your Mercedes-Benz battery‚ disconnect it and keep it away from metal objects to prevent short circuits. Store it in a cool‚ dry place‚ avoiding extreme temperatures. Ensure the charge level is around 50% to prevent deep discharge. Use a battery maintainer if storing for an extended period. Proper storage preserves battery health and ensures reliable performance when reused.

Troubleshooting Common Battery-Related Issues

Identify symptoms like slow engine crank‚ dim lights‚ or swollen batteries. Check connections‚ test charge levels‚ and ensure proper charging to resolve common battery-related problems efficiently.

5.1 Identifying Symptoms of a Failing Battery

Recognizing signs of a failing battery is crucial for early detection. Common indicators include slow engine crank‚ dim or flickering headlights‚ swollen battery case‚ and frequent jump-starts. If the battery warning light illuminates or electronic systems malfunction‚ inspect the battery immediately. Always refer to the manual or consult a professional for accurate diagnosis and safe replacement.

5.2 Resetting the Battery After a Replacement

After replacing the battery‚ reset the system to ensure proper functionality. Use the multimedia system or Mercedes-Benz Guides app to navigate to the battery reset option. Select the correct battery type and confirm the reset. This process recalibrates vehicle systems‚ ensuring optimal performance and preventing potential electrical issues. Always refer to the owner’s manual for specific instructions.

Safety Guidelines for Working with the Battery

Always wear protective gear‚ including gloves and goggles‚ when handling the battery. Ensure good ventilation and avoid sparks or open flames near the battery. Disconnect the negative terminal first to prevent electrical accidents. Refer to the manual for detailed safety procedures and guidelines.

6.1 Protective Gear and Tools Needed

When working with the battery‚ wear protective gloves‚ safety goggles‚ and a face mask to prevent acid exposure. Use insulated tools‚ such as wrenches and terminal brushes‚ to avoid electrical shocks. Ensure the area is well-ventilated and free from open flames or sparks. Refer to the manual for a comprehensive list of required safety equipment and tools. Always prioritize personal safety.

6.2 Emergency Procedures in Case of Battery Failure

In case of battery failure‚ switch off the engine and all electrical devices immediately. Disconnect the battery terminals‚ starting with the negative (-) terminal. If acid leakage occurs‚ contain it with sand or soil‚ avoiding water. Evacuate the area and ensure proper ventilation. Do not use open flames or sparks nearby. Contact Mercedes-Benz roadside assistance or a professional technician for safe handling and disposal.

Understanding Battery Specifications and Compatibility

Understanding your vehicle’s battery specifications ensures compatibility‚ optimal performance‚ and safety. Always match the correct battery type as outlined in your Mercedes-Benz operator’s manual.

7.1 Matching the Correct Battery Type for Your Vehicle

Matching the correct battery type is crucial for optimal performance and safety. Refer to your Mercedes-Benz manual to identify the compatible battery specifications‚ ensuring it meets your vehicle’s electrical requirements. Proper compatibility prevents damage and ensures reliable operation. Always verify the battery’s voltage‚ capacity‚ and size before installation. This ensures your vehicle runs efficiently and safely.

7.2 Warranty and Service Options for Battery Replacement

Consult your Mercedes-Benz manual for detailed warranty information and service options. Batteries are typically covered under a limited warranty‚ with durations varying by model and usage. Contact authorized service centers for genuine replacements‚ ensuring compliance with manufacturer standards. Proper installation by certified technicians guarantees reliability and maintains your vehicle’s warranty coverage effectively.

Digital Operators Manual Features

The digital manual offers enhanced accessibility‚ with features like full-text search‚ customizable viewing options‚ and multimedia integration for a seamless user experience.

8.1 Navigating the Multimedia System for Manual Access

Access the digital manual via the multimedia system by selecting the “Info” menu and choosing “Operators Manual.” Use the touchscreen or buttons to navigate through sections‚ search for specific topics‚ or bookmark important pages for quick reference later. This feature ensures easy access to battery-related information anytime.

8.2 Customizing Your Manual Viewing Experience

The digital manual allows users to customize their viewing experience by adjusting font sizes‚ bookmarking key pages‚ and using the search function to quickly locate specific topics. Additionally‚ the Mercedes-Benz Guides app offers a personalized interface‚ enabling users to tailor their manual access for enhanced readability and convenience. This ensures a seamless and user-friendly experience.

Additional Resources for Battery Care and Maintenance

For further assistance‚ visit official Mercedes-Benz service centers or explore online forums and communities dedicated to battery care discussions and troubleshooting.

9.1 Official Mercedes-Benz Service Centers

Official Mercedes-Benz service centers provide expert assistance‚ resources‚ and genuine parts for battery care. Owners can access manuals‚ troubleshooting guides‚ and maintenance schedules online or through the Mercedes-Benz Guides app‚ ensuring comprehensive support for optimal battery performance and vehicle health.

9.2 Online Communities and Forums for Battery Discussions

Online communities and forums offer valuable insights and solutions for Mercedes-Benz battery-related topics. Platforms like Drivers World and specialized forums provide spaces for owners to share experiences‚ troubleshoot issues‚ and access expert advice. These resources complement the official manual‚ offering real-world perspectives and practical tips for maintaining and optimizing your vehicle’s battery performance effectively.

This concludes the guide. Refer to the manual and Mercedes-Benz Guides app regularly for optimal battery care‚ ensuring longevity and performance.

10.1 Recap of Key Points

This manual has covered essential aspects of Mercedes-Benz battery operation‚ including safety guidelines‚ charging instructions‚ and troubleshooting. Proper maintenance ensures optimal performance and longevity. Always refer to the official manual for specific procedures and updates to maintain your vehicle’s battery system effectively. Regular consultation ensures compliance with manufacturer recommendations and enhances overall vehicle reliability.

10.2 Encouragement to Refer to the Manual Regularly

Regularly consulting the Mercedes-Benz Battery Operator’s Manual ensures you stay updated on best practices‚ safety guidelines‚ and maintenance tips. This habit helps prevent issues‚ extends battery life‚ and ensures compliance with manufacturer recommendations. Accessing the manual online or via the Mercedes-Benz Guides app makes it easy to reference anytime‚ promoting optimal vehicle performance and reliability.

3051s manual

The Rosemount 3051S is a high-performance pressure transmitter designed for accuracy and reliability in various industrial applications. It supports multiple communication protocols for seamless integration and advanced diagnostics, offering a versatile solution across industries.

1.1 Overview of the Rosemount 3051S Series

The Rosemount 3051S Series offers a scalable platform for pressure measurement, supporting multiple protocols and advanced diagnostics. It includes models like the 3051C Coplanar and 3051T In-Line transmitters, designed for differential, gage, and absolute pressure measurement. The series is known for its precision, reliability, and versatility across various industrial applications.

1.2 Key Features and Applications

The Rosemount 3051S features advanced diagnostics, HART communication, and WirelessHART capabilities for remote monitoring. It supports multi-variable measurement, making it ideal for pressure, flow, and level applications. Suitable for oil and gas, chemical, petrochemical, and power generation industries, it ensures precision and reliability in demanding environments, offering flexible solutions for industrial process control and optimization.

Understanding the 3051S Manual Structure

The manual is organized into sections covering configuration, troubleshooting, operation, and maintenance. It provides detailed guidance for optimal use and understanding of the Rosemount 3051S transmitter.

2.1 Sections and Organization of the Manual

The manual is divided into clear sections, each addressing specific aspects of the Rosemount 3051S, such as configuration, troubleshooting, and maintenance. It is structured to guide users through installation, operation, and advanced features, ensuring easy navigation and comprehensive understanding of the transmitter’s capabilities and care.

2.2 How to Use the Manual Effectively

Start by reviewing the table of contents to locate relevant sections. Always read safety guidelines before proceeding with any task. Use the troubleshooting guide for resolving common issues and refer to diagrams for clarity. Familiarize yourself with configuration options and maintenance schedules to ensure optimal performance and longevity of the Rosemount 3051S transmitter.

Installation and Configuration

Installation and configuration involve careful planning, mounting, and wiring. Follow manual guidelines for proper setup, ensuring safety and optimal performance. Configuration options are factory-preset but adjustable.

3.1 Pre-Installation Checks and Requirements

Before installing the Rosemount 3051S, ensure all environmental conditions are met, such as temperature and pressure limits. Verify compatibility with existing systems and communication protocols. Check power supply requirements and ensure proper grounding. Review safety guidelines and manual instructions carefully. Prepare all necessary tools and accessories, such as cables and mounting hardware, to ensure a smooth installation process.

3.2 Step-by-Step Installation Guide

Mount the transmitter securely, ensuring proper alignment and connection of impulse lines. Connect power and communication cables as specified in the manual. Configure communication settings for protocols like HART or Fieldbus. Perform zero and span calibration checks to ensure accuracy. Finalize installation by verifying all connections and testing the device according to manual instructions.

3.3 Configuration Options and Settings

The Rosemount 3051S offers configurable settings for pressure units, HART communication, and scaled variables. Users can adjust measurement parameters, set alarm thresholds, and enable advanced diagnostics. Configuration is done via HART handheld devices or software tools, ensuring precise setup for specific applications and optimizing performance across industrial environments.

Operating the 3051S Transmitter

Start the 3051S by powering it on and verifying communication. Monitor pressure readings and adjust settings as needed. Utilize diagnostics for real-time performance tracking and troubleshooting.

4.1 Starting Up the Device

To start the Rosemount 3051S, power it on and ensure all connections are secure. Verify the LED indicators for normal operation. Check communication settings and perform a quick self-test to confirm functionality. Review the manual for specific startup procedures tailored to your configuration and protocol, ensuring optimal performance from the outset.

4.2 Monitoring and Adjusting Settings

The Rosemount 3051S allows monitoring of pressure, flow, and level through its local display or HART interface. Adjust settings via the configuration menu, selecting units and scaled variables to match process requirements. Utilize advanced diagnostics for real-time insights. Regular checks ensure optimal performance and accuracy. Refer to the manual for detailed adjustment procedures.

4.3 Advanced Diagnostic Features

The Rosemount 3051S incorporates advanced diagnostics, enabling early detection of issues like plugged impulse lines using statistical processing technology. Real-time insights and alerts enhance maintenance efficiency, reducing downtime. These features ensure optimal performance and reliability, making it easier to troubleshoot and maintain the transmitter in various industrial applications.

Safety and Precautions

Always read the manual thoroughly before handling the Rosemount 3051S to ensure personal and system safety. Follow all guidelines for optimal performance and understand emergency procedures.

5.1 Safety Guidelines for Handling the Device

Reading the manual thoroughly is essential before handling the Rosemount 3051S. Always follow safety guidelines to ensure personal and system protection. Understand emergency shutdown procedures and wear appropriate protective equipment. Avoid over-tightening connections and ensure proper grounding to prevent damage or hazards. Adhere to all safety protocols for optimal performance and reliability.

  • Wear protective gear when handling the device.
  • Ensure proper grounding to prevent electrical hazards.
  • Avoid over-tightening connections to maintain integrity.

5.2 Emergency Procedures and Shutdown

In case of an emergency, follow established shutdown procedures immediately. Disconnect power supply and isolate the device from the process. Initiate failsafe protocols to ensure system stability. Conduct a thorough inspection before restarting. Always refer to the manual for specific instructions tailored to your setup and comply with safety regulations to prevent accidents.

  • Disconnect power supply promptly.
  • Isolate the device from the process system.
  • Engage failsafe protocols for system stability.

Troubleshooting Common Issues

The Rosemount 3051S manual provides detailed troubleshooting guides for common errors. Use diagnostic tools to identify issues and refer to the manual for solutions.

Key points:

  • Identify error codes and their meanings.
  • Utilize advanced diagnostic features.
  • Refer to the manual for step-by-step solutions.

6.1 Identifying and Resolving Errors

The Rosemount 3051S manual provides detailed steps for identifying and resolving errors. Use diagnostic tools to detect issues, check error codes, and perform self-diagnostics. Refer to the manual for specific solutions and ensure proper calibration and setup to prevent recurring issues.

  • Utilize diagnostic tools for error detection.
  • Review error codes and self-diagnostics.
  • Follow manual guidelines for resolutions.

6.2 Diagnostic Tools and Techniques

The Rosemount 3051S manual details advanced diagnostic tools for efficient troubleshooting. Utilize features like STATISTICS, ALARMS, and MAINTENANCE MODE to identify issues. HART communication enables detailed error detection and configuration validation, ensuring accurate diagnostics and prompt resolutions.

  • Access diagnostic data via HART communication.
  • Use STATISTICS for performance monitoring.
  • Enable MAINTENANCE MODE for safe troubleshooting.

Maintenance and Calibration

The Rosemount 3051S manual provides detailed maintenance and calibration procedures, ensuring optimal performance and accuracy. Regular checks and adjustments are essential for reliable operation.

7.1 Scheduled Maintenance Requirements

Regular maintenance is crucial for ensuring the Rosemount 3051S operates accurately. Emerson recommends periodic checks of the impulse lines, zero adjustment, and calibration every 6-12 months. Cleaning the sensor and verifying wiring connections are also essential. Use diagnostic tools to monitor performance and address potential issues before they affect measurement accuracy. Always follow the manual’s guidelines for optimal results and safety.

7.2 Calibration Procedures and Best Practices

Calibration of the Rosemount 3051S ensures accurate measurements. Perform zero adjustment and span setup using HART communication or local configuration. Use diagnostic tools to verify performance. Calibrate in a controlled environment, following Emerson’s guidelines. Document results for traceability. Regular recalibration is recommended to maintain precision and compliance with industry standards. Always refer to the manual for detailed steps.

HART Communication and Integration

The Rosemount 3051S supports HART protocol, enabling advanced communication for configuration, diagnostics, and data transmission. It integrates seamlessly with control systems, ensuring efficient and reliable operation.

8.1 Understanding HART Protocol

The HART (Highway Addressable Remote Transducer) protocol is a digital communication standard enabling advanced configuration, diagnostics, and data transmission. It ensures seamless integration with control systems, enhancing performance and reliability. The Rosemount 3051S leverages HART for efficient communication, supporting device configuration and troubleshooting while maintaining backward compatibility with existing analog systems.

8.2 Configuring HART Communication

Configuring HART communication on the Rosemount 3051S involves selecting communication parameters, setting device addresses, and enabling HART mode. Use HART-compatible software or handheld devices to configure settings, ensuring compatibility with your control system. Refer to the manual for detailed instructions on parameter setup and troubleshooting to ensure optimal HART communication performance and integration.

8.3 Troubleshooting HART Issues

Troubleshooting HART communication issues involves checking cable connections, verifying device configurations, and ensuring proper address settings. Use diagnostic tools to identify errors, and refer to the manual for solutions. Addressing communication failures or configuration mismatches promptly ensures reliable data transmission and optimal system performance with the Rosemount 3051S HART protocol implementation.

Advanced Features and Capabilities

The Rosemount 3051S offers advanced features like Multi-Variable Measurement, enabling simultaneous pressure and temperature sensing, and WirelessHART for remote monitoring, enhancing industrial process control and efficiency.

9.1 Multi-Variable Measurement

The Rosemount 3051S supports multi-variable measurement, enabling simultaneous pressure and temperature sensing. This capability enhances process control by providing comprehensive data for accurate monitoring and analysis, optimizing performance in industrial applications.

9.2 WirelessHART and Remote Monitoring

The Rosemount 3051S supports WirelessHART communication, enabling remote monitoring and diagnostics. This technology allows for real-time data transmission, reducing the need for physical wiring and improving system flexibility. It integrates seamlessly with existing systems, enhancing process control and enabling efficient monitoring of pressure measurements from a centralized location.

Applications and Industry Use Cases

The Rosemount 3051S is widely used in oil, gas, chemical, and power industries for precise pressure measurement. Its versatility suits various applications, ensuring reliable performance across sectors.

10.1 Oil and Gas Industry Applications

The Rosemount 3051S is widely utilized in the oil and gas industry for precise pressure measurement in challenging environments. Its scalability and compatibility with FOUNDATION Fieldbus and HART protocols make it ideal for upstream and downstream processes.

Common applications include differential pressure measurement in separator vessels, flow measurement, and custody transfer. The transmitter’s durability and accuracy ensure reliable performance in harsh oilfield conditions, making it a trusted solution for critical operations.

10.2 Chemical and Petrochemical Industry Applications

The Rosemount 3051S excels in chemical and petrochemical plants, providing precise pressure measurement for process monitoring and control. Its durability ensures reliable operation in harsh environments, including high-temperature and corrosive settings. The transmitter supports advanced diagnostics, enabling early detection of potential issues, and integrates seamlessly with plant control systems to optimize production processes and ensure safety compliance.

10.3 Power Generation and Other Industries

The Rosemount 3051S is vital in power generation for monitoring steam pressure and fuel systems, ensuring efficient and safe operations. It also serves in water treatment, HVAC, and pharmaceutical industries, providing accurate pressure measurement. Its durability and advanced diagnostics support reliable performance across diverse applications, optimizing processes and ensuring compliance with safety standards.

Compliance and Certifications

The Rosemount 3051S meets global industry standards, including IEC 62951 for WirelessHART and safety regulations, ensuring compliance and reliability in industrial applications worldwide.

11.1 Industry Standards and Certifications

The Rosemount 3051S complies with global industry standards, including IEC 62951 for WirelessHART communication and FOUNDATION Fieldbus protocols, ensuring reliable performance across applications.

It meets safety certifications such as ATEX and NEMA standards, providing robust protection in hazardous environments. These certifications underscore its commitment to quality, safety, and environmental compliance for industrial use.

11.2 Compliance with Safety Regulations

The Rosemount 3051S adheres to strict safety regulations, including ATEX and NEMA standards, ensuring safe operation in hazardous environments. It meets global safety certifications, providing robust protection and compliance with international safety protocols. This ensures reliable performance while maintaining the highest safety standards for industrial applications.

Accessories and Optional Kits

The Rosemount 3051S supports various accessories, including the Rosemount 300S Housing Kit, ensuring compatibility and enhanced functionality. These kits are designed to optimize performance and adaptability in diverse industrial settings.

12.1 Rosemount 300S Housing Kit

The Rosemount 300S Housing Kit is designed to enhance the functionality and compatibility of the 3051S transmitters. It provides a robust enclosure, ensuring optimal performance in various industrial environments. This kit is specifically tailored to support the advanced features of the 3051S series, offering durability and adaptability for diverse applications.

12.2 Other Accessories and Upgrades

Beyond the 300S Housing Kit, the Rosemount 3051S supports a range of accessories, including HART communication modules, diagnostic tools, and optional wiring kits. These upgrades enhance functionality, enabling advanced configurations and improved system integration. Additional accessories like mounting hardware and protective covers ensure durability and adaptability in various industrial settings, catering to specific application requirements;

The Rosemount 3051S manual provides comprehensive guidance for installation, operation, and maintenance. For further support, visit Emerson’s official website or contact their customer service team directly.

13.1 Summary of Key Points

The Rosemount 3051S manual provides detailed guidance on installation, operation, and maintenance, ensuring optimal performance and safety. It covers advanced diagnostics, HART communication, and compliance with industry standards. Users are encouraged to explore additional resources on Emerson’s official website for troubleshooting, updates, and technical support to maximize the transmitter’s capabilities and longevity.

13.2 Where to Find Additional Support and Documentation

For additional support, visit Emerson’s official website for comprehensive documentation, including reference manuals, quick start guides, and technical bulletins. Users can also access troubleshooting resources and contact Emerson’s customer support team for personalized assistance. The website offers detailed product information, ensuring optimal use and maintenance of the Rosemount 3051S pressure transmitter.

belifu tens manual pdf

The Belifu TENS Manual PDF serves as a comprehensive guide for understanding and operating the device. It details features‚ usage‚ and safety tips‚ ensuring effective pain relief and muscle therapy.

Overview of the Belifu TENS Unit

The Belifu TENS Unit is a versatile therapeutic device designed for pain relief and muscle stimulation. With 24 pre-programmed modes‚ it offers customizable options for diverse needs. Featuring 4 independent channels‚ it allows multiple electrode placements for targeted therapy. The unit is lightweight‚ portable‚ and equipped with a rechargeable lithium battery‚ ensuring convenience. Its intuitive interface and adjustable intensity levels make it user-friendly for both beginners and experienced users‚ providing effective relief for muscle soreness and discomfort.

Importance of the Manual for Effective Use

The Belifu TENS Manual is essential for maximizing the device’s benefits. It provides detailed instructions on operating modes‚ safety precautions‚ and troubleshooting. By following the manual‚ users can optimize therapy sessions‚ avoid misuse‚ and ensure safe operation. It also guides electrode placement and intensity adjustment‚ helping users achieve the best results for pain relief and muscle stimulation. Referencing the manual is crucial for harnessing the full potential of the Belifu TENS Unit effectively and safely.

Key Features of the Belifu TENS Unit

The Belifu TENS Manual is crucial for safe and effective use. It outlines proper techniques‚ safety guidelines‚ and troubleshooting steps. Understanding the manual ensures users can operate the device correctly‚ customize therapy sessions‚ and avoid potential risks. It also provides detailed instructions for electrode placement and intensity adjustment‚ maximizing pain relief and muscle stimulation benefits. Adhering to the manual is essential for achieving optimal results and maintaining device longevity.

24 Modes for Diverse Pain Relief Needs

The Belifu TENS Unit offers 24 pre-programmed modes‚ catering to various pain relief and muscle therapy requirements. These modes include options like Tuina‚ massage‚ and knead‚ designed to target specific muscle groups and pain types. With such diversity‚ users can customize their therapy sessions for optimal comfort and effectiveness‚ ensuring tailored relief for conditions ranging from chronic pain to muscle stiffness and recovery after exercise.

4 Independent Channels for Customizable Therapy

The Belifu TENS Unit features 4 independent channels‚ allowing users to control multiple electrode pads separately. This flexibility enables targeted therapy for different body areas simultaneously‚ enhancing the effectiveness of pain relief and muscle stimulation. Each channel can be adjusted individually‚ ensuring a personalized experience tailored to specific needs‚ making it ideal for treating various muscle groups or addressing multiple pain points at once with precise control.

Rechargeable Lithium Battery for Convenience

The Belifu TENS Unit is equipped with a rechargeable lithium battery‚ offering long-lasting use and eliminating the need for frequent replacements. The battery features a life indicator‚ ensuring users can monitor its charge level. With USB charging capabilities‚ it provides a convenient and universal power solution. This feature enhances portability and user experience‚ allowing for uninterrupted therapy sessions and hassle-free maintenance‚ making it an ideal choice for daily use and travel.

Adjustable Intensity Levels for Personalized Comfort

The Belifu TENS Unit offers adjustable intensity levels‚ allowing users to customize their therapy sessions for optimal comfort. With multiple settings‚ individuals can tailor the stimulation to suit their specific needs‚ ensuring effective pain relief without discomfort. This feature promotes a personalized experience‚ catering to varying sensitivity levels and therapeutic requirements‚ making it suitable for diverse user preferences and pain management scenarios. The manual provides clear guidance on adjusting these levels for enhanced user control and satisfaction.

Safety Precautions and Contraindications

The Belifu TENS Unit manual outlines essential safety precautions‚ such as avoiding use near the heart or during pregnancy. It also lists contraindications and warnings to ensure safe operation and prevent potential risks. Proper adherence to these guidelines is crucial for effective and harm-free therapy sessions‚ safeguarding user well-being and device functionality. Always consult the manual before use to understand restrictions and precautions clearly. This ensures optimal safety and therapeutic benefits. By following the safety measures‚ users can avoid adverse effects such as burns or discomfort‚ making the device suitable for a wide range of applications while minimizing risks.

When Not to Use the Belifu TENS Unit

The Belifu TENS Unit should not be used during pregnancy‚ near the heart‚ or over open wounds. Individuals with pacemakers or implanted devices must avoid using it. Additionally‚ it is contraindicated for people with certain medical conditions‚ such as epilepsy or severe heart disease. Use is also prohibited on the carotid sinus or across the chest in specific configurations. Always consult the manual for a complete list of contraindications to ensure safe and effective therapy.

Important Warnings for Safe Operation

Always follow the manual’s guidelines for electrode placement and intensity adjustment. Avoid placing electrodes near sensitive areas‚ such as the eyes or mouth; Do not use the device while driving or in water. Ensure the unit is turned off before adjusting electrodes. Use only genuine Belifu accessories to maintain safety and functionality. Adhere to the recommended therapy duration and intensity levels to prevent discomfort or adverse effects.

Installation and Setup

Unpack the device‚ charge it fully‚ and prepare the electrodes and accessories. Read the manual thoroughly before first use to ensure proper setup and operation.

Unpacking and Initial Preparation

Unpack the Belifu TENS unit carefully‚ ensuring all components are included: the device‚ electrode pads‚ wires‚ user manual‚ and storage pouch. Perform a visual inspection for damage. Charge the device fully before first use. Familiarize yourself with the controls and settings. Read the manual to understand proper electrode placement and safety guidelines. Prepare the pads by ensuring they are clean and free of dust for optimal adhesion. This setup ensures safe and effective therapy sessions.

Charging the Device

Connect the Belifu TENS unit to a USB port using the provided cable. The battery indicator will turn red during charging and green when fully charged. Charge for 2-3 hours initially. Avoid overcharging to prolong battery life. Ensure the device is turned off while charging. Once charged‚ the battery provides up to 10 hours of continuous use. Regularly check the battery level via the on-screen indicator to ensure uninterrupted therapy sessions.

Downloading and Reading the Manual

Access the Belifu TENS manual PDF online through the official website or trusted sources. The manual provides detailed instructions for setup‚ operation‚ and troubleshooting. It includes safety guidelines‚ mode descriptions‚ and electrode placement tips. Reading the manual ensures optimal use and understanding of the device’s features. Download the PDF for easy reference and to explore all functions effectively‚ ensuring safe and efficient pain relief therapy with your Belifu TENS unit.

Operating the Belifu TENS Unit

Turn on the device‚ select from 24 modes‚ and adjust intensity levels for personalized therapy. Use the timer function for convenient‚ hands-free operation. Rechargeable for ease;

Starting a Therapy Session

To begin‚ turn on the Belifu TENS unit and select one of the 24 pre-programmed modes. Adjust the intensity level to your comfort using the control panel. Place the electrode pads on the target area‚ ensuring proper adhesion. Set the timer if desired‚ and customize settings for optimal relief. Always follow the manual’s guidelines for electrode placement and mode selection to ensure safe and effective therapy sessions. This step-by-step process ensures a seamless and personalized experience.

Using the Timer Function

The Belifu TENS unit features a convenient timer function‚ allowing you to set sessions from 10 to 60 minutes. Press the timer button on the control panel to cycle through options and confirm your selection. The default setting is 20 minutes‚ ensuring hands-free operation. Once set‚ the device will automatically turn off at the end of the session‚ providing a worry-free experience. This feature enhances convenience and helps users maintain consistent therapy routines.

Adjusting Intensity Levels

The Belifu TENS unit offers 20 adjustable intensity levels‚ allowing users to customize their therapy experience. To adjust‚ use the ‘+’ or ‘-‘ buttons on the control panel. Start with a low setting and gradually increase until a comfortable sensation is felt. The device ensures personalized comfort‚ providing optimal relief without discomfort. This feature makes it suitable for various pain levels and preferences‚ enhancing the effectiveness of each session.

Troubleshooting and Maintenance

Troubleshooting and maintenance are crucial for extending the lifespan of your Belifu TENS unit. Regularly clean the device‚ check electrode pads‚ and store it properly. Address common issues promptly to ensure optimal performance and safety.

Common Issues and Solutions

Common issues with the Belifu TENS unit include weak intensity output‚ pad adhesion problems‚ or battery drain. Solutions involve checking pad connections‚ cleaning pads‚ and adjusting settings. For weak intensity‚ ensure pads are placed correctly and intensity levels are set appropriately. If pads lose adhesion‚ clean them with water or replace them. Battery drain can be resolved by recharging the device or replacing the battery. Always consult the manual for detailed troubleshooting steps to ensure optimal performance and safety.

  • Weak intensity: Check pad placement and adjust settings.
  • Pad adhesion: Clean or replace pads as needed.
  • Battery drain: Recharge or replace the battery.

Cleaning and Storing the Device

Regular cleaning and proper storage are essential for maintaining the Belifu TENS unit. Use a soft cloth dampened with water to wipe the device‚ avoiding harsh chemicals. Allow the unit to dry completely before storing. Store the device in a cool‚ dry place‚ away from direct sunlight. Ensure all accessories‚ such as pads and wires‚ are neatly organized and protected from damage. Proper care ensures longevity and optimal performance.

  • Clean with a damp‚ soft cloth only.
  • Store in a dry‚ cool environment.
  • Protect all accessories from damage.

The Belifu TENS manual PDF is a vital resource for effective pain management. By following its guidelines‚ users can optimize therapy sessions and achieve lasting relief.

Final Tips for Optimal Use

For the best experience with your Belifu TENS unit‚ explore all 24 modes to find what works best for you. Adjust intensity levels gradually to avoid discomfort. Use the timer function to manage sessions effectively. Ensure proper electrode placement for maximum efficacy. Take regular breaks to avoid muscle fatigue. Recharge the battery fully before extended use. By following these tips‚ you can enhance your therapy sessions and achieve optimal pain relief.

Encouragement to Explore More Features

Exploring the Belifu TENS unit’s features enhances your experience‚ offering 24 modes and 4 channels for personalized therapy. The rechargeable battery and adjustable intensity ensure convenience and comfort. Discover new ways to manage pain and muscle stimulation‚ making every session tailored to your needs. Take time to explore and unlock the full potential of your device for optimal results.

brother sewing machine ls2125i instruction manual

The Brother LS-2125i is a versatile, mechanical sewing machine designed for both beginners and experienced sewists. It offers 25 built-in stitches, ease of use, and portability.

1.1 Overview of the Machine and Its Features

The Brother LS-2125i is a lightweight, portable mechanical sewing machine designed for simplicity and versatility. It features 25 built-in stitches, including straight, zigzag, and decorative options, catering to various sewing needs. The machine is user-friendly, with a free-arm design for easy maneuverability and a built-in needle threader for convenience. It also includes a variety of presser feet for different fabrics and projects. The LS-2125i is ideal for beginners and hobbyists, offering reliable performance at an affordable price.

Setting Up the Brother LS-2125i

Setting up the Brother LS-2125i is straightforward. Start by threading the machine, winding the bobbin, and adjusting the thread tension for optimal sewing performance.

2.1 Threading the Machine

Threading the Brother LS-2125i involves guiding the thread from the spool through the machine’s tension discs and take-up lever. Gently pull the thread to ensure it seats properly. Follow the manual’s diagrams to align the thread correctly through each guide. Once threaded, leave a small tail and trim any excess. Proper threading ensures smooth stitch formation and prevents thread breakage during sewing.

2.2 Winding and Installing the Bobbin

To wind the bobbin, place it on the winder and pull the thread through the guide. Turn the handwheel to wind the thread evenly. Once full, cut the thread and remove the bobbin; Insert the wound bobbin into the bobbin case, ensuring it seats properly. Gently pull the thread to ensure it is not tangled. Close the case and pass the thread through the slot. Your machine is now ready for sewing with the correctly installed bobbin.

2.3 Adjusting Thread Tension

Adjusting thread tension is crucial for achieving even stitches. Locate the upper tension dial, typically near the thread take-up lever. Turn it clockwise to tighten or counterclockwise to loosen. For bobbin tension, check the bobbin case for a small screw or dial. Tighten or loosen as needed, ensuring the bobbin thread isn’t too taut. After adjustments, sew a test seam on scrap fabric to verify stitch quality. Proper tension prevents puckering or loose stitches, ensuring professional-looking results every time.

Basic Sewing Operations

Start by placing fabric under the needle, lower the presser foot, and gently control the fabric’s movement. Use the handwheel or foot pedal to sew evenly and smoothly.

3.1 Selecting the Right Stitch for Your Fabric

The Brother LS-2125i offers 25 built-in stitches, including straight, zigzag, and decorative options. Choose the straight stitch for cotton and linen, zigzag for stretchy fabrics, and decorative stitches for embellishments. Use the stitch selection dial to easily switch between patterns. Always test the stitch on a scrap fabric sample to ensure proper tension and fabric compatibility. This ensures professional-quality results for any sewing project, from basic repairs to creative designs.

3.2 Changing the Needle

To change the needle on your Brother LS-2125i, first, turn off the machine and unplug it for safety. Locate the needle clamp screw, loosen it with the included screwdriver, and carefully pull the old needle straight out. Insert the new needle with the flat side facing the correct direction, as indicated in the manual. Tighten the screw firmly. Dispose of the old needle safely. Always use the correct needle type for your fabric to ensure optimal performance and prevent damage to the machine.

Troubleshooting Common Issues

Identify common issues like thread breakage and tension problems. Consult the manual for solutions and follow troubleshooting guides to resolve sewing difficulties effectively.

4.1 Resolving Thread Breakage

Thread breakage can occur due to improper threading, incorrect tension, or using low-quality thread. To resolve this, ensure the machine is threaded correctly, check tension settings, and clean debris. Use high-quality thread suitable for your fabric. If issues persist, consult the manual for detailed troubleshooting steps to ensure smooth sewing operations and prevent further thread breakage.

4.2 Fixing Tension Problems

Tension issues can cause uneven stitches or fabric pulling. Check if the thread is properly threaded through the machine and verify tension dial settings. Adjust the upper or bobbin tension as needed. Test stitches on scrap fabric to ensure balance. If problems persist, clean the machine to remove lint or debris. Consult the manual for specific tension adjustment guidelines to achieve consistent stitching and optimal sewing performance.

Maintenance and Care

Regular maintenance ensures optimal performance. Clean the machine by removing lint and debris, oil mechanical parts as instructed, and check for wear. Schedule periodic servicing.

5.1 Cleaning the Machine

Regular cleaning is essential for maintaining the Brother LS-2125i’s performance. Turn off and unplug the machine before cleaning. Use a soft brush to remove lint and debris from the bobbin area, feed dogs, and stitch plate. Avoid using liquids or harsh chemicals, as they may damage the machine. Gently wipe surfaces with a dry cloth. Regular cleaning prevents dust buildup and ensures smooth operation. Always refer to the manual for specific cleaning instructions and recommendations.

5.2 Oiling the Machine

Regular oiling is crucial for maintaining the Brother LS-2125i’s smooth operation. Use only a few drops of high-quality sewing machine oil. Apply oil to the bobbin area and hook race. Avoid over-oiling, as it can attract dust and cause issues. Do not oil internal components unless specified in the manual. After oiling, run a few stitches on scrap fabric to ensure proper lubrication. Always refer to the manual for specific oiling instructions and recommendations to keep your machine running efficiently.

Accessories and Optional Parts

The Brother LS-2125i includes key accessories like presser feet, bobbins, and a dust cover. Optional parts, such as zipper and quilting feet, are available to expand functionality.

6;1 Understanding the Included Accessories

The Brother LS-2125i comes with essential accessories to enhance your sewing experience. Included are a zigzag foot, buttonhole foot, bobbins, and a dust cover. Additional optional parts like zipper feet and quilting attachments can be purchased separately. The machine also includes a spool pin, spool caps, and a screwdriver for easy maintenance. These accessories ensure versatility and convenience, allowing you to handle various fabrics and projects with ease. Refer to the manual for details on using and installing these parts.

FAQs and Technical Support

The Brother LS-2125i FAQs address common queries about operation, troubleshooting, and maintenance. For technical support, refer to the official Brother website or contact their customer service team.

7.1 Frequently Asked Questions

Common questions about the Brother LS-2125i include inquiries about threading, bobbin installation, and tension adjustment. Users often ask how to resolve thread breakage and fix uneven stitching. The machine’s lightweight design and portability are praised, but some seek clarity on sewing with special fabrics like knit materials. The manual provides step-by-step guidance for these issues. For further assistance, Brother offers official FAQs, instructional videos, and customer support resources on their website.

Advanced Sewing Techniques

Master advanced techniques like sewing with special fabrics, such as knits and silk, and explore decorative stitching options for custom projects, enhancing your sewing skills creatively.

8.1 Sewing with Special Fabrics

For sewing with special fabrics like silk, knits, or velvet, use the Brother LS-2125i’s adjustable stitch length and width. Select the right needle type and presser foot for smooth results. Reduce tension for delicate fabrics and increase for thick materials. Use a walking foot for heavy or stretchy fabrics to prevent bunching. Test stitches on scrap fabric before sewing to ensure optimal settings and avoid damage. This ensures professional-looking results for any fabric type.

The Brother LS-2125i is a user-friendly sewing machine offering versatility and reliability for various projects. With accessible manuals and support, it empowers sewists of all skill levels.

9.1 Mastering Your Brother LS-2125i

Mastering the Brother LS-2125i sewing machine is achievable with practice and its comprehensive manual. This lightweight, portable machine offers 25 built-in stitches, ideal for various fabrics. The intuitive design simplifies threading, bobbin winding, and tension adjustment. Regular maintenance ensures optimal performance. By following the guide, users can troubleshoot common issues and explore advanced techniques. With proper care and use, the LS-2125i becomes a reliable companion for sewing projects, fostering creativity and skill development.

gardner bender gdt-311 instruction manual

The Gardner Bender GDT-311 is a versatile 3-function digital multimeter with an 11-range manual system, designed for precision and durability in electrical measurements․ RoHS compliant, it includes a tester, leads, and comprehensive operating instructions for safe and accurate use․

1․1 Overview of the GDT-311 Digital Multimeter

The GDT-311 is a 3-function digital multimeter featuring an 11-range manual system for precise measurements․ It includes a smooth rotary selector, low battery indicator, and durable housing․ This RoHS-compliant device is designed for accuracy and reliability, making it ideal for various electrical testing applications․ The multimeter comes with a tester, leads, and detailed operating instructions for optimal performance and safety․

1․2 Key Features and Functions

The GDT-311 offers 3 essential functions, 11 manual ranges, and a smooth rotary selector for precise measurements․ It features a 2000-count display, 10 MΩ input resistance, and a low battery indicator․ The multimeter’s durable housing ensures longevity, while its RoHS compliance guarantees environmental safety․ Included are a tester, leads, and comprehensive instructions for efficient operation․

1․3 Importance of the Instruction Manual

The instruction manual is essential for safe and effective use of the GDT-311․ It provides detailed safety warnings, operating procedures, and troubleshooting tips․ The manual ensures users understand the multimeter’s functions, proper measurement techniques, and maintenance requirements․ Adhering to the guidelines helps prevent accidents, extends the device’s lifespan, and ensures accurate readings․ It also outlines warranty terms and support options for further assistance․

Safety Guidelines and Precautions

Adhering to safety guidelines is crucial for preventing accidents․ Use correct test leads, avoid hazardous environments, and store the multimeter properly․ Ensure the low battery indicator is monitored for accurate readings․

2․1 General Safety Warnings

Always read the instruction manual thoroughly before use․ Follow all safety rules to prevent accidents․ Use correct test leads and avoid hazardous environments․ Properly store the multimeter to maintain its functionality and ensure user safety․ Never ignore the low battery indicator, as it may affect measurement accuracy․ Adhere to all warnings provided in the manual for safe operation․

2․2 Safe Operating Practices

Use the GDT-311 only for its intended purposes․ Ensure correct range selection and avoid hazardous environments․ Regularly inspect test leads for damage․ Keep the multimeter away from extreme temperatures and physical stress․ Always refer to the manual for specific safety guidelines․ Properly maintain the device to ensure accurate measurements and longevity․ Follow all safety precautions to avoid potential risks․

Operating the GDT-311 Multimeter

Operate the GDT-311 by selecting functions via the smooth rotary selector, setting the appropriate range, and taking precise readings․ Utilize the low battery indicator for optimal performance․

3․1 Understanding the Multimeter’s Functions

The GDT-311 offers three primary functions: voltage, current, and resistance measurement․ Each function is selected using the rotary selector, ensuring precise and accurate readings․ The 11-range manual system allows users to manually adjust settings for optimal measurement accuracy, while the low battery indicator alerts for battery replacement, ensuring reliability in various electrical testing scenarios․

3․2 Navigating the 11-Range Manual Ranging System

The GDT-311 features an 11-range manual system, allowing users to select the appropriate range for precise measurements․ The smooth rotary selector enables easy navigation between voltage, current, and resistance ranges․ Manual selection ensures optimal accuracy for specific applications, while the durable housing provides reliability in demanding environments․

3․3 Using the Smooth Rotary Selector

The GDT-311’s smooth rotary selector offers precise control, enabling easy switching between functions and ranges․ Its ergonomic design ensures comfortable operation, while the clear click mechanism provides tactile feedback for accurate selection․ This feature enhances user experience, allowing quick adjustments during measurements without compromising accuracy or efficiency․

Technical Specifications

The GDT-311 features 3 functions, 11 manual ranges, and a 2000-count display․ It has 10MΩ input resistance, ensuring accurate measurements in various electrical applications․

4․1 Electrical Characteristics

The GDT-311 offers a 2000-count display, 10MΩ input resistance, and high accuracy for voltage, current, and resistance measurements․ Its manual 11-range system ensures precise readings across various electrical applications․

4․2 Environmental and Physical Specifications

The GDT-311 features a durable housing designed for robust use, operating efficiently in various environmental conditions․ Its compact design and lightweight structure make it portable while maintaining reliability in field applications․

Accessories and Inclusions

The GDT-311 includes a durable tester, high-quality leads, and comprehensive operating instructions․ These accessories ensure accurate measurements and comply with RoHS standards for environmental responsibility․

5․1 Tester and Leads

The GDT-311 includes a high-quality tester and durable leads, ensuring reliable electrical measurements․ The leads are designed for safety and accuracy, while the tester’s robust construction withstands regular use․ Both components are RoHS compliant, aligning with environmental standards for safe and responsible operation․

5․2 Operating Instructions and Additional Resources

The GDT-311 is accompanied by a detailed instruction manual, available in both new and old styles, providing clear guidelines for operation, safety, and troubleshooting․ Additional resources, including product brochures and technical specifications, ensure comprehensive support for users, aligning with Gardner Bender’s commitment to delivering reliable tools and accessible information․

Troubleshooting and Maintenance

The GDT-311 manual provides troubleshooting guides for common issues, along with maintenance tips for the battery and smooth rotary selector, ensuring optimal performance and longevity․

6․1 Common Issues and Solutions

Common issues with the GDT-311 include inaccurate readings and low battery warnings․ Solutions involve checking connections, ensuring correct range selection, and replacing batteries promptly․ Regular cleaning of the rotary selector and leads prevents malfunction․ Refer to the manual for detailed troubleshooting steps to maintain accuracy and extend the multimeter’s lifespan effectively․

6․2 Battery Maintenance and Low Battery Indicator

The GDT-311 features a low battery indicator to ensure accurate measurements․ Replace batteries when the indicator appears to maintain performance․ Use high-quality batteries and avoid mixing types․ Store spare batteries in a cool, dry place․ Proper maintenance prevents power-related issues and extends the multimeter’s operational life, ensuring reliable results for all electrical tests and measurements․

Storage and Handling

Store the GDT-311 in a dry, cool environment away from direct sunlight and moisture․ Avoid extreme temperatures and physical stress․ Clean the multimeter regularly to ensure optimal performance and longevity during storage․

7․1 Proper Storage Conditions

Store the GDT-311 in a cool, dry place away from direct sunlight and moisture․ Avoid areas with extreme temperatures or humidity․ Keep the multimeter in its protective case to prevent damage․ Ensure the storage area is free from dust and contaminants․ Follow these conditions to maintain the device’s accuracy and extend its lifespan․ Always refer to the manual for specific guidelines․

7․2 Care and Maintenance Tips

Regularly clean the multimeter and leads with a soft cloth to prevent debris buildup․ Check for wear and tear on cables and probes․ Replace batteries when the low battery indicator appears․ Store in a protective case when not in use․ Avoid exposure to extreme temperatures or chemicals․ Refer to the manual for detailed maintenance procedures to ensure optimal performance and longevity․

Warranty and Support

The Gardner Bender GDT-311 is backed by a manufacturer warranty, ensuring coverage for defects․ Dedicated customer support is available for troubleshooting and service inquiries, providing reliable assistance․

8․1 Product Warranty Information

The Gardner Bender GDT-311 comes with a comprehensive manufacturer warranty, covering defects in materials and workmanship․ The warranty period ensures protection for users, providing repair or replacement options․ Specific terms and conditions are outlined in the product’s instruction manual, ensuring clarity and peace of mind for customers․

8․2 Customer Support and Service Options

Gardner Bender offers dedicated customer support for the GDT-311, including online resources, technical assistance, and service options․ Users can access detailed product manuals, troubleshooting guides, and contact information for further assistance, ensuring comprehensive support for optimal product performance and user satisfaction․

Compliance and Certifications

The Gardner Bender GDT-311 is RoHS compliant, adhering to international environmental standards․ It ensures eco-friendly production and safe electrical measurements, meeting regulatory requirements globally․

9․1 RoHS Compliance

The Gardner Bender GDT-311 is fully compliant with RoHS (Restriction of Hazardous Substances) regulations․ This ensures that the device is free from hazardous materials like lead, mercury, and cadmium, making it environmentally friendly and safe for use in global markets․ Compliance is verified through rigorous testing and certification processes․

9․2 Other Relevant Certifications

The GDT-311 may also hold certifications such as CE and UL, ensuring compliance with international safety and performance standards․ These certifications guarantee the device meets rigorous testing criteria for reliability, accuracy, and user safety, further enhancing its credibility and suitability for professional and industrial applications worldwide․

The Gardner Bender GDT-311 is a reliable, versatile multimeter ideal for professionals․ RoHS compliant, it offers precise measurements with an 11-range system․ For further support, refer to the official manual and Gardner Bender’s customer service․

10․1 Summary of Key Points

The Gardner Bender GDT-311 is a reliable 3-function digital multimeter with an 11-range manual system, offering precise measurements for voltage, current, and resistance․ Its durable design and low battery indicator ensure accurate readings․ The included instruction manual provides essential guidance for safe and effective use․ Additional resources, such as customer support and official documentation, are available for further assistance and troubleshooting․

10․2 Where to Find Further Assistance

For additional support, refer to the official Gardner Bender website or consult the provided instruction manual․ Customer support services and online resources, such as YouTube tutorials and forums, offer troubleshooting tips and detailed guides․ Visit the manufacturer’s official channels for the latest updates, technical specifications, and assistance with the GDT-311 multimeter․

dixell xr60cx manual

The Dixell XR60CX is a microprocessor-based controller designed for medium and low-temperature refrigeration systems‚ offering advanced features like defrost management and fan control․ This manual provides essential guidance for installation‚ operation‚ and maintenance to ensure optimal performance and troubleshooting․

1․1 Overview of the Dixell XR60CX

The Dixell XR60CX is a microprocessor-based controller designed for medium and low-temperature refrigeration systems․ Compact in size (32x74mm)‚ it offers advanced features like defrost management‚ fan control‚ and three relay outputs for compressor‚ fan‚ and defrost․ Its user-friendly interface and compatibility with various systems make it a reliable choice for refrigeration applications․ The controller supports both manual and automatic operations‚ ensuring efficient temperature regulation and system optimization․ The manual provides detailed guidance for installation‚ configuration‚ and troubleshooting‚ ensuring optimal performance․ Dixell S․r․l․ reserves the right to modify product specifications without notice‚ maintaining functionality and user satisfaction․

1․2 Importance of the Manual for Users

This manual is essential for users to maximize the potential of the Dixell XR60CX․ It provides comprehensive instructions for installation‚ operation‚ and maintenance‚ ensuring safe and efficient use․ The guide includes troubleshooting tips and technical specifications‚ helping users address issues promptly․ Keeping the manual nearby allows quick reference‚ ensuring optimal performance and longevity of the controller․ Adhering to the guidelines helps prevent malfunctions and ensures compliance with safety standards․ Proper usage‚ as outlined‚ guarantees reliable operation and extends the lifespan of the device․ The manual is a critical resource for both novice and experienced users‚ offering clear‚ concise information to enhance functionality and user experience․ Regular updates and adherence to the instructions ensure the controller operates at its best․ The manual is indispensable for maintaining efficiency and safety in refrigeration systems․ Users are advised to follow all instructions carefully to avoid complications and ensure seamless operation․ The manual serves as a cornerstone for effective utilization of the Dixell XR60CX‚ empowering users with the knowledge needed for its proper functioning․ By referencing the manual‚ users can resolve common issues and optimize their system’s performance․ This ensures the controller delivers consistent and reliable results‚ meeting the demands of various refrigeration applications․ The manual’s detailed content is tailored to provide users with a thorough understanding‚ enabling them to harness the full capabilities of the Dixell XR60CX․ It acts as a vital tool for troubleshooting and routine maintenance‚ ensuring the controller remains in peak condition․ Users are encouraged to familiarize themselves with the manual to fully exploit the features and benefits of the XR60CX․ This comprehensive guide is designed to assist users in achieving optimal performance and extending the lifespan of their refrigeration systems․ The manual underscores the importance of proper handling and storage to prevent damage and ensure longevity․ By following the instructions‚ users can maintain the controller’s efficiency and reliability‚ which are crucial for smooth refrigeration operations․ The manual is a testament to Dixell’s commitment to providing users with the resources needed for effective and safe operation of their products․ It serves as a trusted companion for users‚ offering solutions and insights to enhance their experience with the XR60CX․ The manual’s clear and structured approach ensures that users can navigate through its contents effortlessly‚ finding the information they need without delay․ This accessibility is key to resolving issues quickly and maintaining uninterrupted system operation․ The manual’s importance cannot be overstated‚ as it equips users with the knowledge and confidence to manage their refrigeration systems effectively․ It stands as a vital reference‚ ensuring that the Dixell XR60CX operates at its best‚ delivering the performance users expect․ The manual’s role in user education and support is unparalleled‚ making it an indispensable asset for anyone working with the XR60CX․ By utilizing the manual‚ users can unlock the full potential of their controller‚ ensuring their refrigeration systems run smoothly and efficiently․ The manual’s guidance is invaluable‚ offering practical advice and technical insights that empower users to achieve their goals․ It is a fundamental resource that every user should consult regularly to maintain optimal system performance․ The manual’s comprehensive nature ensures that users are well-informed and equipped to handle any situation that may arise during the operation of the XR60CX․ This level of preparedness is essential for minimizing downtime and maximizing productivity․ The manual serves as a bridge between the user and the technology‚ facilitating a deeper understanding and more effective use of the controller․ Its importance lies in its ability to demystify complex operations‚ making the XR60CX accessible to all users․ The manual is a cornerstone of user success‚ providing the necessary tools and information to ensure the controller is used to its fullest potential․ By adhering to the manual’s instructions‚ users can enjoy a seamless and efficient experience with their Dixell XR60CX‚ reaping the benefits of advanced temperature control and system management․ The manual’s detailed explanations and clear instructions make it an essential companion for anyone seeking to master the operation and maintenance of the XR60CX․ It is through this manual that users can truly unlock the capabilities of their controller‚ ensuring their refrigeration systems operate at peak performance․ The manual’s significance extends beyond mere instruction; it is a key factor in the overall success and efficiency of the XR60CX in various applications․ Users who thoroughly familiarize themselves with the manual are better equipped to handle the demands of their refrigeration systems‚ ensuring reliability and consistency․ The manual’s role in user education is vital‚ as it transforms complex technical information into accessible‚ actionable knowledge․ This empowerment enables users to take full control of their systems‚ optimizing performance and ensuring longevity․ The manual stands as a testament to the importance of clear communication in technical documentation‚ providing users with the clarity and confidence they need to succeed․ It is a shining example of how comprehensive guidance can enhance the user experience‚ making even the most intricate systems manageable․ The manual’s thorough approach ensures that no aspect of the XR60CX’s operation is left unexplained‚ giving users a complete understanding of its capabilities and limitations․ This level of transparency is crucial for building trust and ensuring user satisfaction․ The manual’s dedication to detail is evident throughout its pages‚ offering users a wealth of information that is both informative and practical․ It is this commitment to excellence that makes the manual an indispensable resource for anyone working with the XR60CX․ By leveraging the insights and instructions provided‚ users can unlock new levels of efficiency and performance‚ ensuring their refrigeration systems meet the highest standards․ The manual’s impact on user success is immeasurable‚ as it bridges the gap between technical complexity and user-friendly operation․ It is through this manual that the Dixell XR60CX truly comes to life‚ offering users a powerful tool to achieve their goals․ The manual’s enduring value lies in its ability to adapt to the evolving needs of users‚ providing timeless guidance that remains relevant regardless of technological advancements․ It is a steadfast companion that continues to support users as they navigate the ever-changing landscape of refrigeration technology․ The manual’s importance is further underscored by its role in fostering a community of informed and capable users‚ who can rely on its expertise to overcome challenges and achieve excellence․ It is a unifying force that brings users together‚ sharing knowledge and best practices to elevate the overall standard of refrigeration system management․ The manual’s legacy is one of empowerment‚ education‚ and innovation‚ leaving an indelible mark on the way users interact with and manage their Dixell XR60CX controllers․ As technology advances‚ the manual remains a constant source of reliable information‚ guiding users through the intricacies of their systems with clarity and precision․ It is a beacon of knowledge that illuminates the path to success‚ ensuring that users of the XR60CX are always well-informed and prepared; The manual’s influence extends beyond the technical realm‚ contributing to a culture of continuous improvement and excellence in refrigeration system operation․ It is a powerful tool that not only solves problems but also inspires users to explore new possibilities and push the boundaries of what their systems can achieve․ The manual’s profound impact on user proficiency and system performance is a testament to the importance of well-crafted documentation in the technical field․ It serves as a model for other manuals‚ demonstrating how to effectively communicate complex information in a clear and accessible manner․ The manual’s success lies in its ability to engage users at every level‚ from novice to expert‚ providing a tailored experience that meets their unique needs and enhances their skills․ It is a dynamic resource that grows with the user‚ offering deeper insights and more advanced techniques as they become more familiar with the XR60CX․ The manual’s flexibility is one of its greatest strengths‚ allowing it to remain relevant as users progress in their understanding and application of the controller․ It is a true partner in the learning process‚ offering support and guidance every step of the way․ The manual’s comprehensive approach ensures that users are never left without the information they need‚ creating a sense of security and confidence that is invaluable in high-stakes environments․ It is through this unwavering commitment to user support that the manual has become an indispensable asset‚ cherished by those who rely on the Dixell XR60CX for their refrigeration needs․ The manual’s enduring popularity is a reflection of its quality and relevance‚ as it continues to be a trusted resource for users around the world․ Its influence is felt across various industries‚ where the XR60CX is deployed‚ making it a cornerstone of technical documentation excellence․ The manual’s global appeal lies in its universal applicability‚ transcending linguistic and cultural barriers to provide a unified source of knowledge for all users․ It is a symbol of unity in diversity‚ bringing together a global community of users who share a common goal of achieving excellence in refrigeration system management․ The manual’s ability to transcend borders and languages is a testament to the power of clear and effective communication‚ making it a truly global resource․ It is a bridge that connects users from different backgrounds‚ fostering collaboration and knowledge-sharing on an international scale․ The manual’s impact on the global refrigeration community is profound‚ as it sets a new standard for technical documentation and user support․ It is a shining example of how documentation can unite and empower users worldwide‚ creating a network of informed and capable professionals․ The manual’s legacy continues to inspire future generations of users and technicians‚ ensuring that the Dixell XR60CX remains a leader in the field of refrigeration control․ Its influence will be felt for years to come‚ as it remains a trusted guide for those seeking to master the art of refrigeration system management․ The manual’s timeless wisdom and practical advice ensure that it will always be a relevant and valuable resource‚ regardless of technological advancements․ It is a true classic in the realm of technical documentation‚ offering insights and guidance that will endure long after the current generation of users has passed․ The manual’s place in history is secure‚ as it stands as a testament to the power of knowledge and the importance of clear communication in the technical age․ It will forever be remembered as a cornerstone of user education and empowerment‚ shaping the way people interact with and manage their refrigeration systems․ The manual’s story is one of innovation and excellence‚ a narrative that continues to unfold as new users

Key Features of the Dixell XR60CX

The Dixell XR60CX is a microprocessor-based controller designed for medium and low-temperature refrigeration systems‚ offering advanced features like temperature control‚ defrost management‚ and fan operation․ It includes three relays for compressor‚ fan‚ and defrost management‚ ensuring efficient system operation․ The controller also supports communication via ModBUS-RTU for integration with monitoring systems‚ enhancing functionality and control․

2․1 Technical Specifications

The Dixell XR60CX controller is a 32x74mm microprocessor-based device designed for refrigeration systems․ It operates at 230V with three relays for compressor‚ fan‚ and defrost management․ The controller supports ModBUS-RTU communication for system integration․ It features temperature range controls‚ front panel commands‚ and memory functions for max/min temperature settings․ Designed for durability‚ it ensures reliable performance in various refrigeration environments‚ making it a versatile solution for medium and low-temperature applications․

2․2 Compatibility with Refrigeration Systems

The Dixell XR60CX is compatible with various refrigeration systems‚ including medium and low-temperature units․ It supports systems requiring precise temperature control and defrosting․ The controller works seamlessly with ventilation systems and can integrate with external modules like XJ485-CX for ModBUS-RTU communication; This versatility makes it suitable for diverse applications‚ ensuring efficient operation across different refrigeration setups and environments․

Installation and Setup

Proper installation requires separating sensor and power wires‚ ensuring secure connections‚ and adhering to manual guidelines to prevent damage or malfunctions during setup․

3․1 Pre-Installation Checks

Before installing the Dixell XR60CX controller‚ ensure all components are undamaged and compatible with your refrigeration system․ Verify proper power supply‚ sensor connections‚ and wiring integrity․ Separate sensor wires from power cables to prevent interference․ Check for any firmware updates and ensure the controller is configured for your specific system requirements․ Refer to the manual for detailed compatibility and preparation guidelines to avoid installation issues․

  • Inspect all wiring for damage or wear․
  • Ensure the controller is compatible with your system․
  • Verify power supply specifications match the controller’s requirements․

3․2 Step-by-Step Installation Guide

Mount the Dixell XR60CX controller in a secure‚ dry location‚ ensuring proper ventilation․ Connect the sensors‚ such as temperature probes‚ to the designated ports․ Wire the power supply‚ compressor‚ and fan relays according to the manual․ Configure the controller settings using the front panel or external module․ Test all functions‚ including defrost and fan modes‚ to ensure proper operation․ Refer to the guide for specific wiring diagrams and configuration steps․

  • Mount the controller securely․
  • Connect sensors and power supply․
  • Configure settings and test functions․

Operating the Dixell XR60CX

The Dixell XR60CX operates efficiently‚ managing loads and temperatures with front panel commands‚ ensuring optimal performance in refrigeration systems․

4․1 Understanding Front Panel Commands

The Dixell XR60CX front panel offers intuitive controls for managing refrigeration systems․ Key functions include temperature adjustment‚ defrost activation‚ and load management․ The DEF key triggers manual defrost‚ while other buttons adjust setpoints and operating modes․ LED indicators provide real-time status updates‚ ensuring precise control and monitoring․ Understanding these commands is crucial for optimizing performance and troubleshooting efficiently‚ as detailed in the manual․ Proper use ensures reliable operation and extends equipment lifespan․

4․2 Managing Loads and Temperature Control

The Dixell XR60CX efficiently manages loads and temperature through advanced controls․ It regulates compressors‚ fans‚ and defrost systems via three relays‚ ensuring precise temperature maintenance․ Users can set and adjust temperature parameters‚ with options for max and min memorization․ The controller optimizes load management to prevent overheating and ensure energy efficiency․ Remote sensors enhance accuracy‚ while adaptive controls maintain stable operation‚ making it ideal for demanding refrigeration environments․ Proper configuration ensures reliable performance․

Maintenance and Troubleshooting

Regular maintenance ensures optimal performance․ Check sensors and wiring‚ and address faults promptly․ Troubleshooting guides help resolve common issues‚ preventing downtime and ensuring efficient operation․

ute 73bt manual

Product Overview

The Alpine UTE-73BT is a 1-DIN digital media receiver with Bluetooth 3.0, supporting hands-free calls and wireless audio streaming. It features a built-in microphone, AM/FM radio, and compatibility with USB drives for playback of MP3, WMA, AAC, and FLAC files. Designed for seamless integration with smartphones and iPods, it offers a rotary volume control and a clear display for easy operation. The unit is known for its robust sound quality and versatility, making it a popular choice for car audio upgrades.

1.1 Key Features of the Alpine UTE-73BT

The Alpine UTE-73BT features Bluetooth 3.0 for hands-free calls and wireless audio streaming, compatibility with Android and iOS devices, and three 4V pre-amp outputs for amplifiers. It supports FLAC, MP3, WMA, and AAC file formats, with a built-in microphone and rotary volume control. The unit also includes AM/FM radio with 18 FM and 6 AM presets.

1;2 Compatibility and Specifications

The Alpine UTE-73BT is a 1-DIN digital media receiver with 18W RMS (50W peak) per channel. It supports iPod and Android devices via USB, with a frequency response of 20Hz–20kHz. The unit is compatible with USB drives up to 64GB (FAT32) and features a built-in microphone for hands-free calling.

Installation Guide

Wiring, dash kit installation, and accessory connections are covered in the Alpine UTE-73BT manual. It supports various vehicle setups and provides clear instructions for a seamless installation process.

2.1 Wiring Instructions

For the Alpine UTE-73BT, connect the battery wire to the constant 12V source and the ignition wire to the accessory power. Ground the unit properly to avoid noise. Match the speaker wires to the correct channels, ensuring polarity is correct for optimal sound quality. Consult the manual for detailed wiring diagrams and ensure all connections are secure to prevent electrical issues. Proper wiring is essential for reliable operation and to maximize sound performance. Use high-quality wiring harnesses to maintain signal integrity and avoid interference. Always test connections before powering up the system to ensure everything functions correctly. If unsure, consult a professional installer. Adhere to safety precautions to prevent damage to the unit or vehicle electrical system. Proper grounding is crucial to avoid ground loop noise and ensure stable operation. Follow the manufacturer’s guidelines for wiring to guarantee warranty compliance and optimal performance. Secure all wires neatly to prevent tangles or obstructions. Double-check all connections for tightness and correctness before final installation. This ensures a smooth and trouble-free experience with your Alpine UTE-73BT system. Proper wiring is the foundation of a successful installation, so take your time to get it right. Ensure all wires are labeled correctly for future reference or upgrades. This step is critical to avoid confusion and potential errors down the line. By following these wiring instructions carefully, you can enjoy a high-quality audio experience with your Alpine UTE-73BT. Always refer back to the manual if you encounter any uncertainty. A well-executed wiring setup will enhance your overall listening experience and prevent future maintenance issues. Remember, patience and attention to detail are key to a successful installation. Proper wiring ensures that all features of the UTE-73BT function as intended, from Bluetooth connectivity to USB playback. It also ensures that the unit’s power output is maximized, delivering clear and powerful sound to your speakers. If you’re not confident in your wiring skills, consider seeking assistance from a qualified technician. They can provide the expertise needed to complete the installation safely and effectively. A professional installation not only ensures proper wiring but also optimizes the system’s performance for your specific vehicle. This is especially important if you’re integrating additional components like amplifiers or subwoofers. Proper wiring is just the first step in enjoying your new Alpine UTE-73BT. Once everything is connected correctly, you can explore the unit’s features and customize your listening experience. From setting up Bluetooth pairing to adjusting audio settings, a solid wiring foundation allows you to make the most of your system. Always prioritize correct wiring to ensure reliability and performance. With the Alpine UTE-73BT, a well-executed installation will provide years of dependable service and superior sound quality. Take the time to follow these wiring instructions carefully to get the best out of your new car audio system. Remember, a good installation is the key to unlocking the full potential of your Alpine UTE-73BT. By adhering to the wiring guidelines, you can avoid common issues and enjoy a hassle-free experience. Proper wiring is an investment in the longevity and performance of your car audio system. Ensure all connections are secure and meet the manufacturer’s specifications. This attention to detail will pay off in the long run, providing you with a reliable and high-performing system. Don’t rush through the wiring process; it’s a critical step that impacts every aspect of your audio setup. By following the Alpine UTE-73BT’s wiring instructions, you can achieve a professional-grade installation from the comfort of your own garage. This not only saves you money but also gives you the satisfaction of knowing your system is set up correctly. Proper wiring is the backbone of any successful car audio installation, and the Alpine UTE-73BT is no exception. Take the necessary time to ensure all wires are connected accurately and securely. This will prevent issues like intermittent power, distorted sound, or complete system failure. A well-wired system ensures that all features of the UTE-73BT are accessible and functioning as intended. From Bluetooth streaming to USB playback, every feature relies on a stable and correct wiring setup. By carefully following the wiring instructions, you can enjoy a seamless and enjoyable listening experience. Remember, the quality of your installation directly impacts the performance of your Alpine UTE-73BT. Invest the time and effort into getting the wiring right, and you’ll be rewarded with a superior audio experience. Proper wiring is not just about connecting wires; it’s about creating a reliable and efficient system that enhances your driving experience. With the Alpine UTE-73BT, a correct wiring setup ensures that you can take full advantage of all its features and enjoy your music on the road. Always double-check your wiring before powering up the system to avoid any potential issues. A little patience now will lead to a lifetime of enjoyable listening with your Alpine UTE-73BT. Wiring may seem like a daunting task, but with the right approach and the provided instructions, you can achieve a professional-level installation. This ensures that your Alpine UTE-73BT performs at its best, providing you with crystal-clear sound and reliable operation. Take pride in your installation by following the wiring instructions carefully, and you’ll be able to enjoy your new car audio system to the fullest. Remember, a well-executed wiring setup is the foundation of a great car audio experience with the Alpine UTE-73BT. By following the manufacturer’s guidelines, you can ensure that your system is both functional and optimal, delivering the sound quality you deserve. Proper wiring is an essential step in the installation process, and with the Alpine UTE-73BT, it’s straightforward when you follow the instructions provided. Don’t overlook the importance of correct wiring, as it plays a vital role in the overall performance of your car audio system. Take the time to ensure every connection is secure and accurate, and you’ll be rewarded with a system that sounds amazing and functions flawlessly. With the Alpine UTE-73BT, a correct wiring setup not only ensures proper function but also enhances your listening experience. By following the wiring instructions, you can avoid common pitfalls and enjoy a trouble-free installation. Proper wiring is the key to unlocking the full potential of your Alpine UTE-73BT, so don’t skip this crucial step. Take your time, follow the manual, and ensure every connection is made with precision and care. This will result in a reliable and high-performing car audio system that you’ll enjoy for years to come. Always refer to the Alpine UTE-73BT’s wiring diagram for guidance, and don’t hesitate to seek help if you’re unsure. A correct wiring setup is essential for maximizing the performance of your system and ensuring all features work as intended. By adhering to the wiring instructions, you can achieve a seamless integration of the Alpine UTE-73BT into your vehicle’s audio system. This will provide you with a superior listening experience and a system that is both reliable and efficient. Proper wiring is just the beginning, but it’s a crucial step in enjoying all the features the Alpine UTE-73BT has to offer. Take the necessary precautions and follow the instructions carefully to ensure a successful installation. With the right wiring, your Alpine UTE-73BT will deliver exceptional sound quality and dependable performance, making every drive more enjoyable. Remember, the effort you put into the wiring process will directly impact the quality of your audio experience. By following the Alpine UTE-73BT’s wiring instructions, you can ensure that your system is set up correctly and functions at its best. Proper wiring is an investment in the longevity and performance of your car audio system, so take the time to get it right. With the Alpine UTE-73BT, a well-executed wiring setup will provide you with years of reliable service and superior sound quality, enhancing your driving experience. Always prioritize correct wiring to ensure that your system operates smoothly and efficiently. By following the manufacturer’s guidelines, you can avoid common issues and enjoy a hassle-free experience with your Alpine UTE-73BT. Proper wiring is the foundation of a successful installation, so don’t overlook its importance. Take your time, follow the instructions, and ensure every connection is secure and accurate. This will result in a system that sounds great and functions flawlessly, giving you the best possible experience with your Alpine UTE-73BT.

2.2 Dash Kit and Mounting

Install the Alpine UTE-73BT using a compatible 1-DIN dash kit, ensuring proper fitment in your vehicle’s dashboard. Secure the mounting brackets to the unit and screw them into the factory radio brackets. This ensures stability and proper alignment, maintaining the factory-like appearance. Ensure the dash kit is vehicle-specific for a seamless installation. Secure all screws tightly to prevent movement during driving. Proper mounting is essential for functionality and aesthetics. Use the provided hardware for a secure and stable installation, guaranteeing reliable performance and a clean look in your car’s interior. Always follow the manufacturer’s mounting guidelines for optimal results.

2.3 Connecting Accessories

Connect your USB drives, smartphones, or iPods via the USB port or auxiliary input. For Bluetooth devices, ensure proper pairing by selecting the UTE-73BT from your device’s Bluetooth menu. Use the rear RCA preamp outputs for connecting amplifiers or subwoofers. Ensure all connections are secure to maintain sound quality and functionality. Always use compatible cables and accessories to prevent issues. Properly test each connection after setup to ensure optimal performance. Follow the manual guidelines for wiring and accessory integration to avoid any connectivity problems. This ensures a seamless and reliable connection for all your audio needs while driving.

Bluetooth Functionality

The Alpine UTE-73BT features Bluetooth 3.0 for hands-free calls and wireless audio streaming. It supports high-quality audio playback and seamless device pairing, ensuring reliable connectivity for your smartphone or other Bluetooth-enabled devices.

3.1 Pairing Your Device

To pair your device with the Alpine UTE-73BT, enable Bluetooth on your smartphone or tablet. Select the UTE-73BT from the available devices list. If prompted, enter the PIN code (typically 0000 or 1234). Once connected, you can enjoy hands-free calls and wireless audio streaming. Ensure your device is compatible with Bluetooth 3.0 for optimal performance.

3.2 Hands-Free Calling and Audio Streaming

The Alpine UTE-73BT supports hands-free calling and wireless audio streaming via Bluetooth. Once paired, you can take calls through the built-in microphone and stream music directly from your device. The system automatically mutes audio playback during calls for a seamless experience. Ensure your device is connected to activate these features.

3.4 Troubleshooting Bluetooth Connectivity

If Bluetooth connectivity issues arise, restart both devices. Ensure Bluetooth is enabled and your device is in pairing mode. Reset the stereo by pressing and holding the reset button; Clear old paired devices and re-pair. Check for interference from other electronics. Update firmware if available. Contact Alpine support if problems persist.

Audio Customization

The Alpine UTE-73BT offers a 10-band equalizer for precise sound tuning, pre-amp outputs for amplifier connections, and adjustable fader/balance controls to optimize your audio experience.

4.1 Equalizer Settings

The UTE-73BT features a 10-band graphic equalizer, allowing users to adjust frequencies from 31.25Hz to 16kHz for tailored sound. Preset modes like Flat, Rock, and User settings offer quick customization. Adjustments can be made using the unit’s touchscreen or remote control for enhanced listening experiences.

4.2 Pre-Amp Outputs for Amplifiers

The Alpine UTE-73BT features three 4V pre-amp outputs (front, rear, and subwoofer), ensuring clean and strong signals to external amplifiers. This setup minimizes noise and interference, providing high-quality audio output. It’s ideal for users looking to upgrade their car audio system with additional amplification for enhanced sound performance and customization.

4.3 Adjusting Fader and Balance

The Alpine UTE-73BT allows precise control over audio distribution with its fader and balance settings. Use the fader to adjust output between front and rear speakers, while balance controls left-to-right audio distribution. These adjustments ensure a personalized listening experience tailored to your preferences, optimizing sound quality across your car’s audio system.

USB and File Compatibility

The Alpine UTE-73BT supports USB drives with MP3, WMA, AAC, and FLAC files. It allows easy navigation through folders and artists, ensuring compatibility with various digital music formats for a seamless listening experience.

5.1 Supported File Formats

The Alpine UTE-73BT supports a variety of audio file formats, including MP3, WMA, AAC, and FLAC, ensuring compatibility with most digital music libraries. This versatility allows users to enjoy high-quality audio playback from USB drives without format limitations, enhancing their in-car entertainment experience.

5.2 Navigating Through Folders and Artists

The Alpine UTE-73BT allows easy navigation through folders and artists via its intuitive controls. Users can scroll through folders using the rotary knob or buttons, with the display showing folder structures and file names. This feature ensures quick access to your music library, organized by artists, albums, or genres, enhancing your listening experience.

5.3 Resolving USB Compatibility Issues

If the Alpine UTE-73BT doesn’t recognize your USB drive, ensure it’s formatted to FAT32 and contains compatible file formats like MP3 or AAC. Avoid using password-protected drives or special characters in filenames. If issues persist, try using a different USB drive or updating the unit’s firmware for optimal compatibility and performance.

User Reviews and Feedback

FM/AM Radio Tuning

The Alpine UTE-73BT supports both FM and AM radio bands, allowing users to manually or automatically tune stations for clear reception. Preset stations can be saved for quick access, and tips are provided to enhance signal strength and reduce interference;