Honeywell TH5220D1029 Thermostat: A Comprehensive Guide
Accessing the TH5220D1029 installation manual PDF is crucial for proper setup; Home Depot provides a downloadable version at their website for convenient reference.
The Honeywell TH5220D1029 is a non-programmable digital thermostat designed for reliable and straightforward temperature control within your home. It’s part of the FocusPRO series, catering to systems with up to two stages of heating and cooling. Understanding its functionalities begins with accessing vital documentation, specifically the TH5220D1029 installation manual PDF.
This manual, readily available online – for example, through Home Depot’s website – provides detailed guidance on installation, wiring, and operation. It’s essential reading before commencing any work with the thermostat. The guide covers models TH5110D (1 system), TH5220D (2 systems), and TH5320D (3 heating/2 cooling), ensuring compatibility information is clear.
The TH5220D1029 offers a user-friendly interface, but proper installation, as detailed in the PDF, is paramount for optimal performance and safety. Familiarizing yourself with the manual will empower you to effectively manage your home’s climate control system.

What’s Included in the Box
While a definitive list isn’t explicitly detailed in readily available snippets, referencing the TH5220D1029 installation manual PDF is crucial for confirming the complete contents. Generally, you can expect the thermostat itself – a non-programmable digital unit – and a mounting baseplate for wall installation.
Essential for a successful setup are the included screws and wall anchors, facilitating secure attachment. The package should contain wire labels, vital for correctly identifying existing wiring during the replacement process. However, the manual PDF is the ultimate authority on verifying all components are present.
It’s important to note that professional installation might require additional tools not supplied, such as a screwdriver and wire strippers. Always consult the PDF documentation to ensure you have everything needed before beginning, preventing delays and ensuring a smooth installation experience.
Safety Precautions
Prior to commencing any installation work with the Honeywell TH5220D1029, consulting the TH5220D1029 installation manual PDF is paramount for safety. Crucially, always disconnect power to your heating and cooling system at the breaker box before handling any wiring. This prevents electrical shock and potential damage to the thermostat or system.
Exercise caution when dealing with wiring; incorrect connections can lead to system malfunction or hazardous conditions. If you are uncomfortable working with electrical wiring, it’s strongly recommended to enlist the services of a qualified HVAC technician.
The manual PDF will detail specific warnings regarding proper grounding and adherence to local electrical codes. Never bypass safety features or attempt to modify the thermostat beyond the instructions provided. Following these precautions ensures a safe and successful installation process, protecting both yourself and your home.
Installation Process
The TH5220D1029 installation manual PDF guides users through wiring, mounting, and connection steps, ensuring a smooth and accurate installation of your new thermostat.
Wiring Diagram Overview
The TH5220D1029 installation manual PDF provides detailed wiring diagrams essential for a successful installation. These diagrams illustrate the correct connections for various system types, including conventional heating and cooling, heat pumps, and millivolt systems. Carefully studying the diagram corresponding to your specific system is paramount before commencing any wiring work.
Typically, terminals are labeled for common wire (C), heating (W), cooling (Y), fan (G), and potentially auxiliary heat (AUX) or emergency heat (E). The PDF clarifies which wires from your existing thermostat correspond to these terminals on the Honeywell TH5220D1029 base. Incorrect wiring can lead to system malfunction or damage, so double-checking each connection against the diagram is vital. The manual also often includes notes on compatible wire gauges and potential wiring configurations for different setups, ensuring a secure and functional connection.
Identifying Your System Type (Heating & Cooling)

The TH5220D1029 installation manual PDF emphasizes the importance of correctly identifying your heating and cooling system before installation. The thermostat supports various configurations, including conventional systems (furnace and air conditioner), heat pumps, and even millivolt systems. Misidentifying your system will lead to incorrect wiring and operational issues.
The manual guides you through a series of questions to determine your system type. Consider whether you have a gas furnace, oil furnace, electric furnace, or a heat pump. Note if you have central air conditioning, and if so, whether it’s a single-stage or multi-stage system. The PDF often includes visual aids and descriptions to help differentiate between these systems. Accurate identification ensures you select the appropriate wiring diagram and programming settings within the thermostat, guaranteeing optimal performance and efficiency. Referencing your existing system’s documentation can also be helpful.
Mounting the Thermostat Base
The TH5220D1029 installation manual PDF details a straightforward process for mounting the thermostat base. Begin by turning off power to your HVAC system at the breaker box – a crucial safety step. The manual recommends using the included mounting screws and wall anchors if necessary, ensuring a secure attachment to the wall.
Position the base plate where your old thermostat was located, or choose a new, representative location, avoiding direct sunlight or drafts. Use a level to ensure the base is perfectly horizontal. The PDF provides clear diagrams illustrating proper screw placement. Carefully feed the existing thermostat wires through the opening in the base plate. Once aligned and leveled, securely fasten the base to the wall. Double-check the stability of the mount before proceeding to the wiring stage, as a loose base can cause connection issues and inaccurate readings.
Connecting the Wires – Step-by-Step
The TH5220D1029 installation manual PDF emphasizes careful wire connection for optimal performance. Before starting, reconfirm power is OFF at the breaker. The manual provides a detailed wiring diagram, crucial for identifying each wire’s function (R, W, Y, G, C, etc.).
Using the provided terminal block screws, connect each wire to its corresponding terminal on the thermostat base. Ensure each wire is securely fastened – loose connections can cause malfunctions. The PDF highlights the importance of the ‘C’ wire (common wire) for consistent power. If your old thermostat lacked a ‘C’ wire, the manual suggests consulting a professional for assistance. Double-check all connections against the diagram before proceeding. Gently tug on each wire to confirm it’s firmly held in place. Incorrect wiring can damage your HVAC system, so accuracy is paramount.
Attaching the Thermostat to the Base
The TH5220D1029 installation manual PDF details a straightforward attachment process. After verifying all wiring connections, carefully align the thermostat body with the mounted baseplate. Ensure the thermostat sits flush against the base, avoiding any gaps or misalignment.
The manual illustrates a simple snapping or clipping mechanism to secure the thermostat. Gently press the thermostat onto the base until you hear or feel a click, confirming it’s properly locked in place. Avoid forcing it, as this could damage the internal components. Once attached, lightly test the thermostat’s stability to ensure it’s firmly secured. The PDF advises against excessive force during attachment. A secure fit is essential for reliable operation and prevents accidental disconnections. Refer to the manual’s diagrams for visual guidance on the correct attachment method.
Thermostat Programming & Operation
The TH5220D1029 installation manual PDF explains that this is a non-programmable digital thermostat, offering simple temperature adjustments and system mode selections.
Understanding the Display Icons
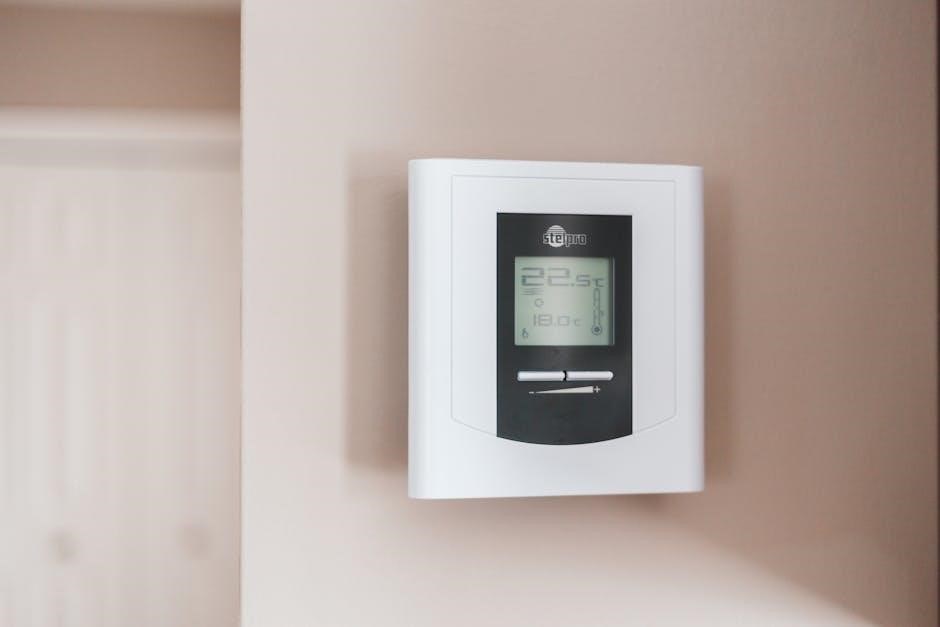
The TH5220D1029 installation manual PDF details the various icons displayed on the thermostat’s screen, providing crucial insight into its current operational status. Understanding these symbols is key to effectively managing your home’s heating and cooling system. The display clearly indicates the current system mode – Heat, Cool, or Off – allowing for quick verification of the selected setting.
Furthermore, icons signify whether the fan is operating in Auto mode, circulating air only when heating or cooling, or On mode, providing continuous airflow. The manual explains that a flame icon denotes active heating, while a snowflake icon indicates cooling is in progress. A battery icon alerts users to low battery levels, prompting replacement. Other icons may indicate specific system faults or operational conditions, as detailed within the comprehensive PDF guide. Familiarizing yourself with these icons ensures efficient and informed thermostat operation.
Setting the Temperature
The TH5220D1029 installation manual PDF provides clear instructions on adjusting the desired temperature. The thermostat utilizes up and down arrow buttons to increase or decrease the setpoint, displayed prominently on the screen. The manual emphasizes that the displayed temperature represents the target temperature, not necessarily the current room temperature.
Users can set separate temperatures for heating and cooling modes, tailoring the climate control to their preferences. The guide details how to ensure the selected temperature aligns with comfort levels and energy efficiency goals. It’s important to note that the thermostat responds to button presses with a visual confirmation on the display. The PDF also clarifies that the temperature scale (Fahrenheit or Celsius) is typically set during initial installation, but can sometimes be adjusted within the settings menu, as outlined in the manual. Precise temperature control is readily achievable with careful reference to the provided documentation.
System Mode Selection (Heat, Cool, Off)

The TH5220D1029 installation manual PDF details how to cycle through the available system modes: Heat, Cool, and Off. Typically, a dedicated “Mode” button allows users to select the desired operation. The manual stresses the importance of selecting the correct mode based on the season and desired climate control. In “Heat” mode, the thermostat activates the heating system when the room temperature falls below the setpoint. Conversely, “Cool” mode activates the cooling system when the temperature exceeds the setpoint.
The “Off” mode disables both heating and cooling, allowing for manual control or ventilation; The PDF clarifies that some models may feature an “Auto” mode, automatically switching between heating and cooling to maintain the set temperature. Understanding these modes, as explained in the manual, is crucial for efficient and comfortable operation. The guide also highlights potential limitations based on the system wiring and configuration.
Fan Control Settings (Auto, On)
The TH5220D1029 installation manual PDF thoroughly explains the fan control options: “Auto” and “On.” In “Auto” mode, the fan operates only during heating or cooling cycles, circulating air when the system is actively working to adjust the temperature. This is the most energy-efficient setting. Selecting “On” forces the fan to run continuously, regardless of whether heating or cooling is active, providing consistent air circulation and potentially improving air quality.
The manual details that continuous fan operation can slightly increase energy consumption. It also notes that some systems may benefit from constant air circulation, particularly those with uneven temperature distribution. The PDF emphasizes that the optimal setting depends on individual preferences and the specific characteristics of the home’s HVAC system. Proper understanding, as outlined in the manual, ensures comfortable and efficient climate control.

Troubleshooting Common Issues
The TH5220D1029 installation manual PDF offers guidance for resolving problems, including power failures, temperature inaccuracies, and unresponsive heating/cooling systems.
Thermostat Not Powering On
If your Honeywell TH5220D1029 thermostat fails to power on, consulting the TH5220D1029 installation manual PDF is the first step. Begin by verifying the power source – ensure the system’s breaker hasn’t tripped. The manual details checking the wiring connections at both the thermostat and the furnace/air handler, confirming secure and correct placement according to the wiring diagram.
A common issue involves a disconnected or faulty C-wire (common wire), essential for providing continuous power. The manual illustrates how to identify and test the C-wire connection. Additionally, inspect the batteries (if applicable) and replace them if necessary. The PDF guide also provides troubleshooting steps for scenarios where the transformer supplying power to the system may be defective, advising on when to contact a qualified HVAC technician for further assistance. Always prioritize safety and disconnect power before inspecting wiring.
Incorrect Temperature Readings
When the Honeywell TH5220D1029 displays inaccurate temperature readings, the TH5220D1029 installation manual PDF suggests several checks. First, ensure the thermostat isn’t directly exposed to sunlight, drafts, or heat-generating appliances, as these can skew readings. The manual details proper thermostat placement for optimal accuracy.
Next, explore the temperature calibration feature, outlined in the PDF, allowing for minor adjustments to align the displayed temperature with a trusted thermometer. If the issue persists, verify the thermostat’s internal sensor hasn’t been damaged. The manual provides guidance on identifying potential sensor failures. Furthermore, confirm that the thermostat is correctly configured for your system type (heat pump vs. conventional). Incorrect settings can lead to inaccurate temperature reporting. If calibration doesn’t resolve the problem, professional HVAC assistance may be required.
Heating or Cooling Not Responding
If your Honeywell TH5220D1029 isn’t initiating heating or cooling, consult the TH5220D1029 installation manual PDF for troubleshooting steps. Begin by verifying the system mode is correctly set to “Heat” or “Cool,” as detailed in the manual’s operation section. Next, check the thermostat’s wiring connections against the diagram within the PDF, ensuring all wires are securely fastened to their corresponding terminals.
The manual emphasizes checking your breaker panel to confirm the HVAC system’s circuit hasn’t tripped. Also, confirm the furnace or air conditioner is receiving power. If wiring appears correct and power is confirmed, the issue might lie with the system itself, not the thermostat. The PDF suggests contacting a qualified HVAC technician for further diagnosis and repair. Remember to review the manual’s safety precautions before attempting any electrical checks.
Display Errors and Codes
The TH5220D1029 installation manual PDF provides a comprehensive list of display errors and corresponding troubleshooting steps. These codes indicate specific issues within the system, ranging from wiring problems to sensor malfunctions. The manual details how to interpret each code, guiding users toward potential solutions. For instance, certain codes may signal a faulty temperature sensor, while others point to communication errors between the thermostat and the HVAC equipment.
Referencing the manual’s error code section is crucial before attempting any repairs. It advises against disassembling the thermostat itself, as this could void the warranty. If an error code persists despite following the manual’s instructions, it’s recommended to contact Honeywell support or a qualified HVAC technician. The PDF also emphasizes the importance of noting the exact error code when seeking assistance, facilitating a quicker and more accurate diagnosis.
Advanced Features & Settings
The TH5220D1029 installation manual PDF details advanced settings like filter change reminders and temperature calibration, offering customized control over your HVAC system.
Filter Change Reminder
The Honeywell TH5220D1029 thermostat offers a valuable filter change reminder feature, enhancing your HVAC system’s efficiency and air quality. Detailed instructions on enabling and customizing this reminder are readily available within the TH5220D1029 installation manual PDF. This feature doesn’t automatically track usage; instead, it allows you to program a reminder based on a time interval – typically 1, 3, 6, or 12 months – to prompt filter replacement.
Consulting the manual is essential to understand how to access the settings menu and navigate to the filter reminder option. Properly maintaining your air filter is crucial for optimal system performance, reducing energy consumption, and prolonging the lifespan of your heating and cooling equipment. The manual provides clear, step-by-step guidance to ensure you can effectively utilize this beneficial feature.
Temperature Calibration
The Honeywell TH5220D1029 thermostat allows for temperature calibration, a useful function if you suspect the displayed temperature doesn’t accurately reflect the actual room temperature. The TH5220D1029 installation manual PDF provides detailed instructions on how to access and utilize this calibration feature. It’s important to note that calibration should only be performed if you have a reliable, calibrated thermometer for comparison.
The manual guides you through navigating the thermostat’s settings menu to locate the temperature offset adjustment. You can then increase or decrease the displayed temperature in small increments (typically 1 or 2 degrees) until it matches your reference thermometer. Accurate calibration ensures your system operates efficiently and maintains comfortable temperatures. Avoid excessive calibration, as it can impact system performance; refer to the manual for recommended calibration ranges.
Resetting the Thermostat to Factory Defaults
Occasionally, you might need to reset your Honeywell TH5220D1029 thermostat to its original factory settings. This is particularly useful when troubleshooting persistent issues or preparing the thermostat for a new installation. The TH5220D1029 installation manual PDF outlines the specific procedure for performing a factory reset, which typically involves a combination of button presses and holding them for a designated duration.
Before initiating a reset, understand that this action will erase all personalized settings, including programmed schedules, temperature preferences, and any calibration adjustments. After the reset, you’ll need to reconfigure the thermostat from scratch. The manual emphasizes carefully following the steps to avoid unintended consequences. A factory reset can resolve software glitches and restore the thermostat to a known working state, ensuring optimal performance.
Resources & Documentation
The TH5220D1029 installation manual PDF, readily available online via Home Depot, provides comprehensive guidance for installation, operation, and troubleshooting your Honeywell thermostat.
Downloading the TH5220D1029 Installation Manual PDF
Accessing the official installation manual in PDF format is a vital first step before beginning any work with your Honeywell TH5220D1029 thermostat. Fortunately, Honeywell makes this resource easily available. A direct link to the PDF can be found on the Home Depot website, specifically within the product catalog section – look for the document identifier c50ba4f9-6ab4-4427-8bf6-6ca7b2fe1649.pdf.
This comprehensive document details everything from initial wiring diagrams and system type identification to step-by-step installation instructions and troubleshooting guides. It’s essential for both DIY enthusiasts and professional installers. The manual covers non-programmable digital thermostat operation, ensuring you understand all features. Downloading and reviewing this PDF will prevent errors and guarantee a successful installation, maximizing the performance and longevity of your Honeywell TH5220D1029.
Honeywell Support Contact Information
While the TH5220D1029 installation manual PDF provides extensive guidance, direct support from Honeywell is readily available should you encounter difficulties. Though specific contact details weren’t explicitly provided in the sourced information, Honeywell’s general support channels are accessible through their official website. These typically include a comprehensive online help center with FAQs, troubleshooting articles, and downloadable resources – including potentially updated manuals.
For more personalized assistance, Honeywell usually offers phone support and email contact options. Searching “Honeywell Home support” will lead you to the most current contact information. Remember to have your thermostat’s model number (TH5220D1029) readily available when contacting support. Utilizing these resources, alongside the readily available PDF manual, ensures a smooth installation and ongoing operation of your Honeywell thermostat, resolving any issues efficiently.
Finding Local Distributors
Although the TH5220D1029 installation manual PDF offers comprehensive self-help, sometimes a local expert is invaluable. Honeywell’s website features a “Locate a Distributor” tool, enabling you to find authorized dealers and retailers near your location. These distributors can provide the thermostat itself, alongside any necessary accessories like wiring or mounting hardware. They also offer professional installation services if you prefer not to tackle the project yourself.
Major home improvement retailers, such as Home Depot (where the manual PDF is hosted), frequently stock Honeywell thermostats, including the TH5220D1029. Local HVAC (Heating, Ventilation, and Air Conditioning) supply stores are another excellent resource. Visiting these stores allows you to discuss your specific heating and cooling system with knowledgeable staff, ensuring compatibility and a successful installation. Remember to bring a copy of the manual PDF for reference during your consultation.